We strongly recommend taking a snapshot of the Droplet before making any changes to its network configuration because configuration errors may make you lose access to the Droplet. You can use the snapshot to rebuild the Droplet to the state it was in at the time when you took the snapshot in event of any issues.
How do I debug my Droplet's network configuration?
Last verified 13 Jul 2026
This troubleshooting guide can help you diagnose networking issues to resolve issues including:
- Being unable to
pingyour Droplet from any device or application. - Being unable to reach the internet using your Droplet’s network connection.
- Droplet network configuration changes not persisting after a reboot.
When to Consider Migration or Redeployment
To resolve your issue quickly, first determine whether troubleshooting the connection is the right solution for your problem or if you should instead focus on recovering your data for redeployment.
Some issues, such as an accidental recursive rm or chmod command or incorrect network configuration, can lock you out of a Droplet permanently. Other issues may seem like connection problems, but are actually more complex issues with no clear resolution, like corrupted file systems, incorrect file permissions and ownership, and broken system packages and required libraries.
You can typically identify boot errors through the Droplet console startup output. File system issues and startup failures that prevent a working console login session are signs that troubleshooting your network configuration may not be the better option. In situations like this, the best approach is to salvage what you can. In some cases, a good backup or snapshot strategy is the fastest way back to your previous working environment.
What to Do Before Troubleshooting
If you’ve decided that troubleshooting is right for your situation, go through the following steps:
-
Check the control panel. Before anything else, make sure there are no ongoing issues, like an outage in the region impacting your Droplet.
-
Check if Droplet is disabled because of abuse. Droplets are sometimes disabled due to the detection of abusive activity. If your Droplet has been disabled, an email has been sent to the email address linked to your DigitalOcean account with the title
Networking Disabled: <your-droplet-name>. You can also log in to the support portal to see if any support tickets have been created for your resources.If your Droplet has been disabled due to suspected abuse, contact our support team for further information.
-
Recover root access. If you do not have the current root password, reset it using the reset root password function in the control panel.
-
Access the Recovery Console. If you cannot log in to the Droplet, the Recovery Console is another way to gain access (as long as your Droplet is running and you have a working root password).
-
Reboot your Droplet. Many connectivity problems can be resolved after a reboot. If you’re experiencing connectivity issues, try rebooting the Droplet and see if this resolves the issue.
Before rebooting your Droplet, we highly recommend taking a snapshot of it. This allows you to redeploy your Droplet in its current configuration if rebooting the Droplet causes more serious problems.
To reboot your Droplet, log in to it and run the following command:
sudo reboot -
Review file management and permissions. Some of these solutions may require you to review or edit files on the system or manage permissions.
-
Check logs. Once you can get into the Droplet, check the system’s log files for more information to identify the error so you can then look up a solution.
You can learn more about the logs on your server with this Linux logging tutorial and this journalctl and systemd logging tutorial.
-
Check if your service is running. If you are experiencing connection problems with a service on your Droplet, it’s useful to verify which services are running on the Droplet. Sometimes a service might go down or be under heavy load, which can cause down or intermittent connections.
On your Droplet, you can view the services currently bound to a port by running
netstat:sudo netstat -pluntThe
-pluntflag returns more brief and readable output.netstatreturns output similar to this:Active Internet connections (only servers) Proto Recv-Q Send-Q Local Address Foreign Address State PID/Program name tcp 0 0 0.0.0.0:80 0.0.0.0:* LISTEN 13704/nginx -g daem tcp 0 0 0.0.0.0:22 0.0.0.0:* LISTEN 1762/sshd tcp6 0 0 :::80 :::* LISTEN 13704/nginx -g daem tcp6 0 0 :::22 :::* LISTEN 1762/sshdCheck the port numbers and interfaces in the
Local Addresscolumn against your expected services. If one of your expected services is not present in thenetstatoutput, your service isn’t running. This would cause connection attempts to fail.
Next Steps
Droplet networking issues can be caused by incorrect network configurations on the Droplet itself. This is possible if you’ve recently changed any network configuration files on your Droplet or installed software on the Droplet that may have made network changes.
To debug your network configuration, verify the Droplet’s network interfaces and check its network configuration file.
Verify Network Interfaces
Your Droplet has a few different network interfaces that are configured to connect to specific networks or gateways. To begin debugging, confirm that its network interfaces are running:
ip -br aThe -br flag returns only basic information about the Droplet’s network interfaces for better readability. The a argument returns all IP addresses associated with the Droplet’s network interfaces.
The command returns the status of each network interface on the Droplet:
lo               UNKNOWN        198.51.100.1/8 ::1/128
eth0             UP             203.0.113.154/20 240.0.255.85/16 f2001:DB8:AC1:FE01/64
eth1             UP             10.139.40.88/16 f2001:DB8:0CDE:211E/64
In the example above, the command returned the status for the lo, eth0, and eth1 interfaces. Beside each interface’s name is the interface’s status, either UP, DOWN, or UNKNOWN.
With the exception of the lo interface, if any of the interfaces are DOWN, enable them by running:
sudo ifup <your-droplet-interface-name>For example, if the eth0 interface was DOWN, the command be sudo ifup eth0.
If all of the interfaces are UP, you can restart each interface by running the following commands:
sudo ifdown <your-droplet-interface-name>
sudo ifup <your-droplet-interface-name>
If either of these commands fail, the interface may be in an UNKNOWN state. You can add the --force flag to force the interfaces to restart.
sudo ifdown --force <your-droplet-interface name>
sudo ifup <your-droplet-interface name>
Once you have enabled all of the interfaces, see if your Droplet’s connection issues persist using ping. ping is a network diagnostic tool that measures the availability, latency, and packet loss between the sending and receiving devices.
You can use ping from the Droplet’s command line to see if the Droplet can reach the internet. Additionally, you can ping your Droplet from a terminal on your local machine to ensure the Droplet is receiving network traffic.
ping google.comIf your Droplet is behind a cloud firewall, you need to add an inbound traffic rule that allows ICMP traffic to reach the Droplet. The ping diagnostic tool uses the ICMP protocol to verify connections. If your cloud firewall doesn’t have an inbound rule for ICMP, it will block any attempts to the reach the Droplet with ping.
A successful ping means that you Droplet can connect to hostnames and returns results similar to this:
PING google.com (142.250.80.46): 56 data bytes
64 bytes from 142.250.80.46: icmp_seq=0 ttl=115 time=16.030 ms
64 bytes from 142.250.80.46: icmp_seq=1 ttl=115 time=16.699 ms
64 bytes from 142.250.80.46: icmp_seq=2 ttl=115 time=17.051 ms
If the ping returns an error, check the network configuration file.
Check Network Configuration File
Your Droplet’s network configuration files contain information about the Droplet’s network interfaces. If you’ve recently changed one of these files, the changes may have not persisted after a reboot or may be misconfigured.
Before making any changes to your network file configuration, we recommend taking a snapshot of the Droplet and making a backup of the Droplet’s current network configuration.
Choose your Droplet’s operating system for troubleshooting instructions.
On Ubuntu Droplets, the Droplet’s network configuration is located in the /etc/netplan/50-cloud-init.yaml file. We recommend making a backup copy of this file before altering it so you can restore the original network configuration if something goes wrong while editing the current configuration.
First, make a copy of your Droplet’s network configuration:
cp /etc/netplan/50-cloud-init.yaml /etc/netplan/50-cloud-init.yaml.oldAfter making a copy of the configuration, view your Droplet’s network configuration file:
nano /etc/netplan/50-cloud-init.yamlThe Droplet’s network configuration opens using the nano text editor.
/etc/netplan/50-cloud-init.yamlnetwork:
version: 2
ethernets:
eth0:
addresses:
- 203.0.113.154/20
- 203.0.255.85/16
gateway4: 192.75.31.155
match:
macaddress: 0a:ee:7a:c3:93:aa
nameservers:
addresses:
- 67.207.67.2
- 67.207.67.3
search: []
set-name: eth0
eth1:
addresses:
- 198.51.100.88/16
match:
macaddress: 12:01:77:bc:cb:d5
nameservers:
addresses:
- 67.207.67.2
- 67.207.67.3
search: []
set-name: eth1In the example configuration file above, the Droplet has two network interfaces: eth0 and eth1.
eth0- Contains information about the Droplet’s public network interface (the interface used to connect to the internet).eth1- Contains information about the Droplet’s VPC network interface (the interface used to connect to other resources in the datacenter it resides in).
Other interfaces may be listed based on your Droplet’s overall configuration.
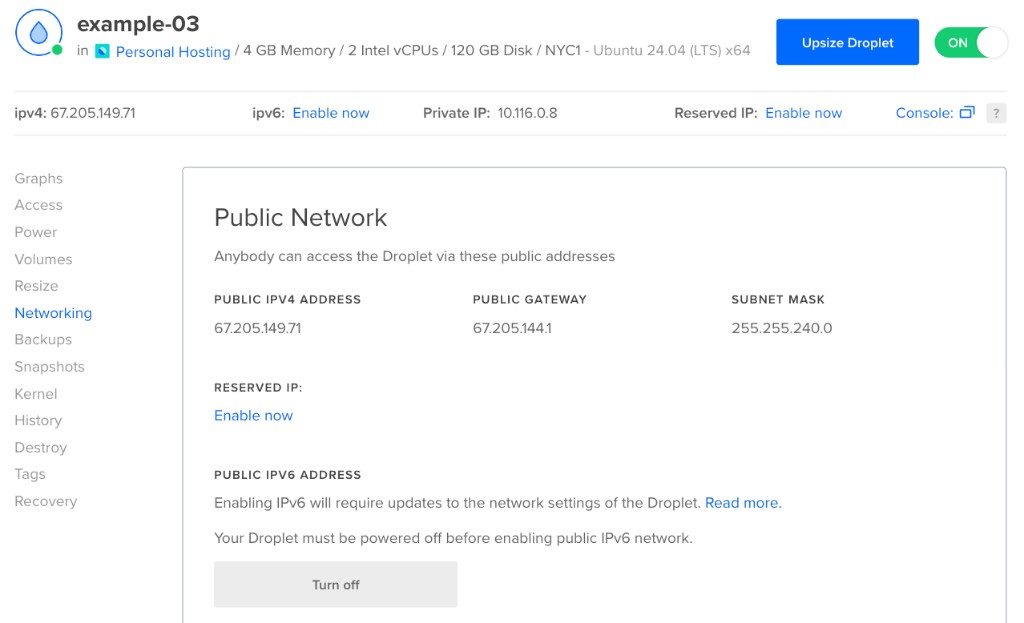
You can check for discrepancies in the interfaces originally configured by DigitalOcean (eth0 and eth1) by logging in to the DigitalOcean Control Panel and comparing the IP addresses in each interface (in the addresses stanza) to the ones listed in the control panel.
To locate your Droplet’s network information in the control panel, click Droplets in the main menu and select the target Droplet from the list of Droplets. From the Droplet’s overview page, click Networking.
Troubleshooting any interfaces beyond the ones originally configured by DigitalOcean may require additional research beyond this guide.
If you see any discrepancies between the IP addresses in your configuration, correct them, save the changes to the file, and then close it. Test the updated configuration by running:
netplan try --debugThis command temporarily applies the network settings to the Droplet and gives you 120 second to test the Droplet’s connections with the new configuration before rolling back to the prior configuration. This is helpful in case the new configuration locks you out of the Droplet. The --debug flag verifies that the YAML file’s formatting is correct.
Use ping again from the Droplet’s command line to test if the Droplet can reach google.com. Also ping the Droplet from a terminal on your local machine to ensure that the Droplet can receive traffic.
If this resolves your connectivity issue, press ENTER, before the 120 second timer ends, to confirm it and apply it. If you’re unsatisfied with the new configuration, press CTRL + C to revert the settings to the prior configuration.
Check if DHCP is Enabled
Dynamic Host Configuration Protocol (DHCP) is a protocol that allows the Droplet to automatically receive an IP address from a DHCP server. Because DigitalOcean provides static IP addresses for Droplets, DHCP is not required to maintain a consistent network connection.
To check if your Droplet has DHCP enabled, open your Droplet’s network configuration file:
nano /etc/netplan/50-cloud-init.yamlThe Droplet’s network configuration opens using the nano text editor.
/etc/netplan/50-cloud-init.yamlnetwork:
version: 2
ethernets:
eth0:
addresses:
- 143.110.178.152/20
- 10.47.0.5/16
gateway4: 192.75.31.155
dhcp4: false
match:
macaddress: 0a:ee:7a:c3:93:aa
nameservers:
addresses:
- 67.207.67.2
- 67.207.67.3
search: []
set-name: eth0In the example configuration file, the dhcp4 option is set to false. This keeps the Droplet from expecting to be assigned an IP address from a DHCP server. If you see dhcp4: true, remove the line from the configuration file, or set the field to false, and save the changes to the file.
Check DNS Name Servers
The nameservers section in the configuration file specifies which DNS resolver servers your Droplet should be querying when trying to connect to a hostname like example.com. If the name servers are misconfigured, your Droplet cannot connect to hostnames.
You can test your Droplet’s DNS resolution by logging in to the Droplet and pinging the IP address 8.8.8.8 (Google’s DNS servers):
ping 8.8.8.8You should receive output similar to this:
PING 8.8.8.8 (8.8.8.8) 56(84) bytes of data.
64 bytes from 8.8.8.8: icmp_seq=1 ttl=119 time=8.35 ms
64 bytes from 8.8.8.8: icmp_seq=2 ttl=119 time=7.83 ms
64 bytes from 8.8.8.8: icmp_seq=3 ttl=119 time=7.80 ms
...
Next, ping the hostname google.com:
ping google.comYou should receive similar results or a name resolution error like this:
ping: google.com: Temporary failure in name resolutionIf you receive a name resolution error from pinging the hostname but not the IP address, your network’s DNS configuration is likely incorrect.
If you receive errors from pinging both the hostname and the IP address, your network configuration could be misconfigured elsewhere. Try debugging your cloud or Droplet-level firewalls.
Correcting DNS Resolution
Each Droplet’s network configuration should contain the IP addresses of DigitalOcean DNS resolvers, as shown in this example:
/etc/netplan/50-cloud-init.yamlnetwork:
version: 2
ethernets:
eth0:
addresses:
- 143.110.178.152/20
- 10.47.0.5/16
gateway4: 192.75.31.155
match:
macaddress: 0a:ee:7a:c3:93:aa
nameservers:
addresses:
- 67.207.67.2
- 67.207.67.3
search: []
set-name: eth0
....If the nameservers section has different IP addresses assigned to it than the ones shown above and your Droplet is experiencing hostname resolution issues, try adding DigitalOcean’s resolvers back to the nameservers section.
DigitalOcean’s name server resolver addresses are:
67.207.67.2
67.207.67.3DigitalOcean’s resolvers have limits of 100 queries per second. If you intend to exceed that rate, we recommend adding Google Public DNS or OpenDNS’s resolvers to your file, as well.
Save and Apply Any Changes
If you made any changes to the file after reviewing it, save the changes and then close the file. If you’re using the nano text editor, to save the changes and close the file, press ctrl + O and then ctrl + X.
To test the new configuration, run the netplan trial command again:
netplan try --debugUse ping again from the Droplet’s command line to test if the Droplet can reach google.com. If the command returns successful results, your Droplet can connect to hostnames.
If this resolves your connectivity issue, press ENTER, before the 120 second timer ends, to confirm it and apply it. If you’re unsatisfied with the new configuration, press CTRL + C to revert the settings to the prior configuration.
If this does not resolve your Droplet’s connectivity issue, review the conclusion section of this guide.
Reinstall Cloud-Init
Once your Droplet can connect to the internet, we recommend reinstalling the cloud-init package to ensure that the Droplet’s network configuration is up to date. cloud-init is a utility that helps maintain the default network configuration that DigitalOcean installs on applicable Droplets.
To reinstall cloud-init, update apt to ensure that it has the latest packages and then reinstall cloud-init using apt’s --reinstall flag:
apt update
apt install cloud-init --reinstall
Once the installation has completed, run cloud-init -v to verify that the package is installed correctly. The output should look similar to this:
usr/bin/cloud-init 23.3.1-0ubuntu2On Ubuntu 16.04 and Debian Droplets, the Droplet’s network configuration is located in the /etc/netplan/50-cloud-init.yaml file. First, make a copy of your Droplet’s network configuration:
cp /etc/network/interfaces.d/50-cloud-init.cfg /etc/network/interfaces.d/50-cloud-init.cfg.oldThen view your Droplet’s network configuration file:
nano /etc/network/interfaces.d/50-cloud-init.cfgThe Droplet’s network configuration opens using the nano text editor.
/etc/network/interfaces.d/50-cloud-init.cfgauto lo
iface lo inet loopback
dns-nameservers 67.207.67.3 67.207.67.2
auto eth0
iface eth0 inet static
address 203.0.113.154/20
gateway 192.75.31.155
# control-alias eth0
iface eth0 inet static
address 198.51.100.88/16
auto eth1
iface eth1 inet static
address 203.0.113.88/16In the example configuration file above, the Droplet has two network interfaces: eth0 and eth1.
eth0- Contains information about the Droplet’s public network interface (the interface used to connect to the internet).eth1- Contains information about the Droplet’s VPC network interface (the interface used to connect to other resources in the datacenter).
Other interfaces may be listed based on your Droplet’s overall configuration and software.
You can check for discrepancies in the interfaces originally configured by DigitalOcean (eth0 and eth1) by logging in to the DigitalOcean Control Panel and comparing the IP addresses in each interface to the ones listed in the control panel.
To locate your Droplet’s network information in the control panel, click Droplets in the main menu and select the target Droplet from the list of Droplets. From the Droplet’s overview page, click Networking.
Troubleshooting any interfaces beyond the ones originally configured by DigitalOcean may require additional research beyond this guide.
Correct any discrepancies you may see in the file, save the changes to the file, and then close it. Test the updated configuration by running:
netplan try --debugThis command temporarily applies the network settings to the Droplet and gives you 120 second to test the Droplet’s connections with the new configuration before rolling back to the prior configuration. This is helpful in case the new configuration locks you out of the Droplet. The --debug flag verifies that the YAML file’s formatting is correct.
Use ping again from the Droplet’s command line to test if the Droplet can reach google.com. Also ping the Droplet from a terminal on your local machine to ensure that the Droplet can receive traffic.
If this resolves your connectivity issue, press ENTER, before the 120 second timer ends, to confirm it and apply it. If you’re unsatisfied with the new configuration, press CTRL + C to revert the settings to the prior configuration.
If this doesn’t resolve your Droplet’s connectivity, check your Droplet’s DNS settings in the next section.
Check if DHCP is Enabled
Dynamic Host Configuration Protocol (DHCP) is a protocol that allows the Droplet to automatically receive an IP address from a DHCP server. Because DigitalOcean provides static IP addresses for Droplets, DHCP is not required to maintain a consistent network connection.
To check if your Droplet has DHCP enabled, open your Droplet’s network configuration file by running the following command:
nano /etc/netplan/50-cloud-init.yamlThe Droplet’s network configuration opens using the nano text editor.
/etc/netplan/50-cloud-init.yamlnetwork:
version: 2
ethernets:
eth0:
addresses:
- 143.110.178.152/20
- 10.47.0.5/16
gateway4: 192.75.31.155
dhcp4: false
match:
macaddress: 0a:ee:7a:c3:93:aa
nameservers:
addresses:
- 67.207.67.2
- 67.207.67.3
search: []
set-name: eth0In the example configuration file, the dhcp4 option is set to false. This keeps the Droplet from expecting to be assigned an IP address from a DHCP server. If you see dhcp4: true, remove the line from the configuration file, or set the field to false, and save the changes to the file.
Check DNS Name Servers
The nameservers section in the configuration file specifies which DNS resolver servers your Droplet should be querying when trying to connect to a hostname like example.com. If the name servers are misconfigured, your Droplet cannot connect to hostnames.
You can test your Droplet’s DNS resolution by logging in to the Droplet and pinging the IP address 8.8.8.8 (Google’s DNS servers):
ping 8.8.8.8You should receive output similar to this:
PING 8.8.8.8 (8.8.8.8) 56(84) bytes of data.
64 bytes from 8.8.8.8: icmp_seq=1 ttl=119 time=8.35 ms
64 bytes from 8.8.8.8: icmp_seq=2 ttl=119 time=7.83 ms
64 bytes from 8.8.8.8: icmp_seq=3 ttl=119 time=7.80 ms
...
Next, ping the hostname google.com:
ping google.comYou should receive similar results or a name resolution error like this:
ping: google.com: Temporary failure in name resolutionIf you receive a name resolution error from pinging the hostname but not the IP address, your network’s DNS configuration is likely incorrect.
If you receive errors from pinging both the hostname and the IP address, your network configuration could be misconfigured elsewhere. Try debugging your cloud or Droplet-level firewalls.
Correcting DNS Resolution
Each Droplet’s network configuration should contain the IP addresses of DigitalOcean DNS resolvers, as shown in this example:
/etc/network/interfaces.d/50-cloud-init.cfgnetwork:
version: 2
ethernets:
eth0:
addresses:
- 143.110.178.152/20
- 10.47.0.5/16
gateway4: 192.75.31.155
match:
macaddress: 0a:ee:7a:c3:93:aa
nameservers:
addresses:
- 67.207.67.2
- 67.207.67.3
search: []
set-name: eth0
....If the nameservers section has different IP addresses assigned to it than the ones shown above and your Droplet is experiencing hostname resolution issues, try adding DigitalOcean’s resolvers back to the nameservers section. DigitalOcean’s DNS resolver addresses are 67.207.67.2 and 67.207.67.3.
DigitalOcean’s resolvers have limits of 100 queries per second. If you intend to exceed that rate, we recommend adding Google Public DNS or OpenDNS’s resolvers to your file, as well.
Save and Apply Any Changes
If you made any changes to the file after reviewing it, save the changes and then close the file. If you’re using the nano text editor, to save the changes and close the file, press ctrl + O and then ctrl + X.
Once you have made your changes, restart the networking service:
systemctl restart NetworkManager.serviceIf the Droplet disconnects and you can’t regain access to it, access the Droplet using the DigitalOcean Droplet Console and replace the altered network configuration with the original one you copied at the beginning of this section.
Use ping again from the Droplet’s command line to test if the Droplet can reach google.com. If the command returns successful results, your Droplet can connect to hostnames.
Reinstall Cloud-Init
Once your Droplet can connect to the internet, we recommend reinstalling the cloud-init package to ensure that the Droplet’s network configuration is up to date. cloud-init is a utility that helps maintain the default network configuration that DigitalOcean installs on applicable Droplets.
To reinstall cloud-init, update apt to ensure that it has the latest packages and then reinstall cloud-init using apt’s --reinstall flag:
apt update
apt install cloud-init --reinstall
Once the installation has completed, run cloud-init -v to verify that the package is installed correctly. The output should look similar to this:
usr/bin/cloud-init 23.3.1-0ubuntu2CentOS maintains a configuration file for each of the Droplet’s network interfaces. Before altering one, you should make a backup copy of it. The /etc/sysconfig/network-scripts/ directory contains the configuration files.
To make a copy of a network configuration file, run the following command, replacing the <interface-file> with the name of the file you intend on altering:
cp /etc/sysconfig/network-scripts/<interface-file> /etc/sysconfig/network-scripts/<interface-file>.oldNext, view your Droplet’s network configuration file:
vi /etc/sysconfig/network-scripts/<interface-file>The Droplet’s network configuration opens using the vi text editor.
/etc/sysconfig/network-scripts/ifcfg-eth0# Created by cloud-init on instance boot automatically, do not edit.
#
BOOTPROTO=none
DEFROUTE=yes
DEVICE=eth0
GATEWAY=192.75.31.155
HWADDR=86:60:94:1b:11:1d
IPADDR=203.0.113.154
IPADDR1=198.51.100.88
IPV6ADDR=f2001:DB8:AC1:FE01/64
IPV6INIT=yes
IPV6_DEFAULTGW=f2001:DB8:0CDE:211E
MTU=1500
NETMASK=255.255.240.0
NETMASK1=255.255.0.0
ONBOOT=yes
TYPE=Ethernet
USERCTL=noThe example configuration file above contains the configuration for the eth0 interface, the interface that connects to the public internet.
You can check for discrepancies in the interfaces originally configured by DigitalOcean (eth0 and eth1) by logging in to the DigitalOcean Control Panel and comparing the IP addresses in each interface to the ones listed in the control panel.
To locate your Droplet’s network information in the control panel, click Droplets in the main menu and select the target Droplet from the list of Droplets. From the Droplet’s overview page, click Networking.
Troubleshooting any interfaces beyond the ones originally configured by DigitalOcean may require additional research beyond this guide. If you see any discrepancies in the configuration file, correct them, save the file and then close it. Once you have made your changes, restart the networking service:
systemctl restart networking.serviceIf the Droplet disconnects you and you can’t regain access to it, access the Droplet using the DigitalOcean Droplet Console and replace the altered network configuration with the original one you copied at the beginning of this section.
Use ping again from the Droplet’s command line to test if the Droplet can reach google.com. Also ping the Droplet from a terminal on your local machine to ensure that the Droplet can receive traffic.
Check if DHCP is Enabled
Dynamic Host Configuration Protocol (DHCP) is a protocol that allows the Droplet to automatically receive an IP address from a DHCP server. Because DigitalOcean provides static IP addresses for Droplets, DHCP is not required to maintain a consistent network connection.
To check if your Droplet has DHCP enabled, open your Droplet’s network configuration file by running the following command:
vi /etc/sysconfig/network-scripts/ifcfg-eth0The Droplet’s network configuration opens using the vi text editor.
/etc/sysconfig/network-scripts/ifcfg-eth0# Created by cloud-init on instance boot automatically, do not edit.
#
BOOTPROTO=none
DEFROUTE=yes
DEVICE=eth0
GATEWAY=192.75.31.155
HWADDR=86:60:94:1b:11:1d
IPADDR=203.0.113.154
IPADDR1=198.51.100.88
IPV6ADDR=f2001:DB8:AC1:FE01/64
IPV6INIT=yes
IPV6_DEFAULTGW=f2001:DB8:0CDE:211E
MTU=1500
NETMASK=255.255.240.0
NETMASK1=255.255.0.0
ONBOOT=yes
TYPE=Ethernet
USERCTL=noOn CentOS, DHCP is configured in the BOOTPROTO field of the configuration file. In the example configuration file, the BOOTPROTO option is set to none. This keeps the Droplet from expecting to be assigned an IP address from a DHCP server. If you see BOOTPROTO="dhcp", set the field to none, and save the changes to the file and close it.
Once you have made your changes, restart the networking service:
systemctl restart networking.serviceCheck DNS Name Servers
The nameservers section in the configuration file specifies which DNS resolver servers your Droplet should be querying when trying to connect to a hostname like example.com. If the name servers are misconfigured, your Droplet cannot connect to hostnames.
You can test your Droplet’s DNS resolution by logging in to the Droplet and pinging the IP address 8.8.8.8 (Google’s DNS servers):
ping 8.8.8.8You should receive output similar to this:
PING 8.8.8.8 (8.8.8.8) 56(84) bytes of data.
64 bytes from 8.8.8.8: icmp_seq=1 ttl=119 time=8.35 ms
64 bytes from 8.8.8.8: icmp_seq=2 ttl=119 time=7.83 ms
64 bytes from 8.8.8.8: icmp_seq=3 ttl=119 time=7.80 ms
...
Next, ping the hostname google.com:
ping google.comYou should receive similar results or a name resolution error like this:
ping: google.com: Temporary failure in name resolutionIf you receive a name resolution error from pinging the hostname but not the IP address, your network’s DNS configuration is likely incorrect.
If you receive errors from pinging both the hostname and the IP address, your network configuration could be misconfigured elsewhere. Try debugging your cloud or Droplet-level firewalls.
Correcting DNS Resolution
If your Droplet can successfully ping IP addresses but not hostnames, review your Droplet’s DNS resolvers to ensure they have the correct IP addresses. To review the Droplet’s DNS resolvers, run:
vi /etc/resolv.confEach Droplet’s network configuration should contain the IP addresses of DigitalOcean DNS resolvers, as shown in this example:
/etc/resolv.conf; Created by cloud-init on instance boot automatically, do not edit.
;
nameserver 67.207.67.3
nameserver 67.207.67.2If the resolv.conf file has different IP addresses assigned to it than the ones shown above and your Droplet is experiencing hostname resolution issues, try adding DigitalOcean’s resolvers back to the nameservers section. DigitalOcean’s name server resolver addresses are 67.207.67.2 and 67.207.67.3.
DigitalOcean’s resolvers have limits of 100 queries per second. If you intend to exceed that rate, we recommend adding Google Public DNS or OpenDNS’s resolvers to your file, as well.
If you edited the file, save the changes and then close it. Then restart the networking service:
systemctl restart networking.serviceUse ping again from the Droplet’s command line to test if the Droplet can reach google.com. If the command returns successful results, your Droplet can connect to hostnames.
Still having trouble?
If you’re still unable to get your Droplet to connect properly, you can open a support ticket. Make sure to include the following information:
- Your Droplet’s full OS version information. You can find this by running
cat /etc/*release. - The full output of any errors related to the network issue.
- All of the information you’ve gathered from troubleshooting so far.
- Anything you were unclear about while referencing this article.
Including all the above diagnostic information and clarifying where you are encountering the issue can help us debug your issue more quickly.
Related Topics
How do I debug a firewall causing connection problems with my Droplet?
Diagnose and troubleshoot firewall issues that could be causing network connectivity issues.
How do I disable IPv6?
You can disable IPv6 by modifying your Droplet’s network interface configuration.
I can't reach a Droplet through my DigitalOcean Load Balancer
Your load balancer may be down or not directing traffic to the target Droplet.