Managed Weaviate is in public preview. When you create a cluster, review the public preview disclaimer and Managed Weaviate public preview terms shown in the create flow.
How to Create Weaviate Clusterspublic
Last verified 6 Oct 2026
DigitalOcean Managed Weaviate is a fully managed Weaviate vector database for retrieval-augmented generation, semantic search, and similarity-based AI workloads. Clusters are provisioned, secured, backed up, and patched by DigitalOcean.
You can create a Weaviate cluster using the API or from the Control Panel.
We currently support Weaviate version 1.37.4. To view available plans and regions for new clusters, use the List plans endpoint.
Create a Weaviate Cluster Using the Control Panel
To create a Weaviate database cluster, go to the Vector Databases page and click Create Vector Database.
Choose a Database Engine
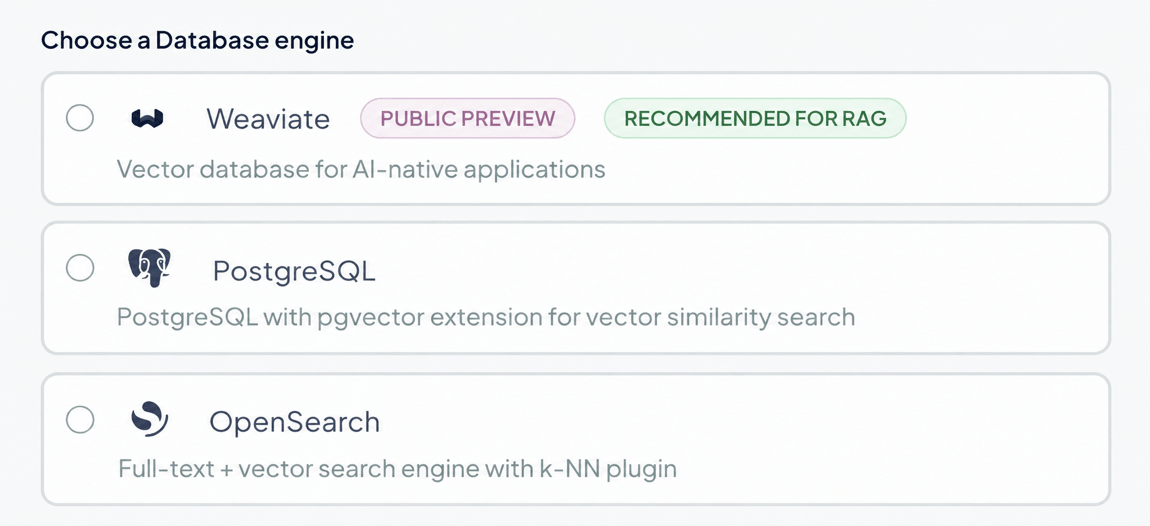
On the Create a Vector Database page, in the Choose a database engine section, select Weaviate. The database engine can’t be changed after creation.
Choose a Database Plan
In the Choose a database plan section, select an option:
| Size | vCPU | RAM | Disk | Typical use |
|---|---|---|---|---|
| Small | 1 vCPU | 2 GB | 3 GiB | Development, testing, under 100k vectors |
| Medium | 2 vCPU | 4 GB | 11 GiB | Production RAG, moderate data volumes |
| Large | 8 vCPU | 32 GB | 230 GiB | Large corpora, latency-sensitive workloads |
Each option shows its combined monthly cost and included resources, such as vCPUs and memory.
After creation, you can increase your cluster’s plan size at any time.
Choose a Datacenter Region
Under Choose a datacenter region, select a datacenter.
For best performance, choose a datacenter close to the resources that connect to the cluster. Resources in the same datacenter share a VPC network, which reduces latency and keeps traffic off the public internet.
Finalize and Create
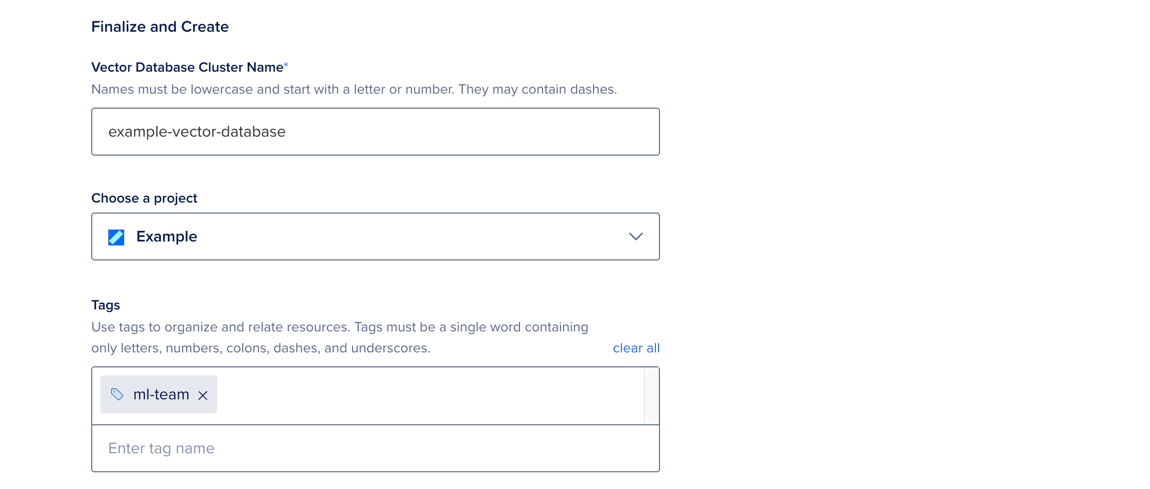
In the Finalize and Create section, enter a unique name for the cluster and select a project to add it to. After creation, you can move the cluster to another project, but its name can’t be changed.
Optionally, add tags to organize your cluster for billing and reporting.
When finished, click Create Vector Database.
After provisioning, you can connect to your cluster.
Create a Cluster Using the API
The examples below use https://api.digitalocean.com/v2/vector-databases. Authenticate each request with a DigitalOcean API token in the request headers.
Set environment variables before you run the examples:
export DIGITALOCEAN_TOKEN="<your-do-api-token>"
export PROJECT_ID="<your-project-uuid>"
List Available Plans
Send a GET request to the plans endpoint to confirm sizing options and the regions enabled for your account:
curl -X GET "https://api.digitalocean.com/v2/vector-databases/plans" \
  -H "Authorization: Bearer $DIGITALOCEAN_TOKEN" \
  -H "Content-Type: application/json"
The response lists each plan along with its vcpu, usable_memory_mib, disk_mib, pricing, and enabled_regions array.
{
  "plans": [
    {
      "size": "small",
      "vcpu": 1,
      "disk_mib": 3072,
      "usable_memory_mib": 2048,
      "deprecated": false,
      "enabled_regions": ["ams3", "atl1", "ric1", "tor1"]
    }
  ]
}
Create a Cluster
Send a POST request with the cluster name, region, plan size, and project ID:
curl -X POST "https://api.digitalocean.com/v2/vector-databases" \
  -H "Authorization: Bearer $DIGITALOCEAN_TOKEN" \
  -H "Content-Type: application/json" \
  -d '{
    "name": "my-vector-db",
    "region": "tor1",
    "size": "small",
    "project_id": "'"$PROJECT_ID"'",
    "tags": ["production", "ml-team"]
}'| Parameter | Required | Description |
|---|---|---|
name |
Yes | 3-30 characters. Lowercase letters, numbers, and hyphens. Must start with a letter and not begin or end with a hyphen, and cannot contain consecutive hyphens. Must be unique within your account. |
region |
Yes | A region slug returned by the plans endpoint, for example tor1. |
size |
Yes | small, medium, or large. |
project_id |
Yes | UUID of the project that owns the cluster. |
tags |
No | Array of strings used to organize resources for billing and reporting. |
A successful response returns the cluster object with status: "pending" and a null endpoints field. Provisioning typically completes in about 5 minutes.
{
  "vector_db": {
    "id": "a1b2c3d4-e5f6-7890-abcd-ef1234567890",
    "name": "my-vector-db",
    "region": "tor1",
    "status": "pending",
    "size": "small",
    "config": {
      "default_quantization": "rq",
      "enable_auto_schema": true
    },
    "endpoints": null,
    "tags": ["production", "ml-team"]
  }
}
The status field moves through this lifecycle:
pending: Request received, queued for provisioning.creating: Cluster is being provisioned.active: Ready to accept connections.errored: Provisioning failed. Open a support ticket with the ID.deleting: Cluster is being torn down.
Wait for the Cluster to Become Active
Poll the cluster until status is active and endpoints contains the HTTP and gRPC hosts:
curl -X GET "https://api.digitalocean.com/v2/vector-databases/$CLUSTER_ID" \
  -H "Authorization: Bearer $DIGITALOCEAN_TOKEN"
{
"vector_db": {
"id": "a1b2c3d4-e5f6-7890-abcd-ef1234567890",
"status": "active",
"endpoints": {
"http": "https://my-vector-db-abc123.weaviate.digitalocean.com",
"grpc": "my-vector-db-abc123-grpc.weaviate.digitalocean.com:443"
}
}
}Always read the hostname from the endpoints object instead of constructing it. Hostnames aren’t stable across cluster recreation.
After the cluster is active, retrieve credentials and connect.
For the full API reference, see Vector Databases API.