When autoscaling occurs, the specified storage increment is added to each node in the cluster, not distributed across the cluster. The total added storage is the increment multiplied by the number of nodes.
How to Create PostgreSQL Database Clusters
Last verified 8 Oct 2026
You can create a PostgreSQL cluster using doctl, the API, or the Control Panel.
We currently support PostgreSQL major versions 15, 16, 17, and 18 for new Standard Edition clusters. Advanced Edition supports v16, v17, and v18 and defaults to v18. Clusters are provisioned with the latest supported minor release within a major version. To view available major versions for new clusters, use the /v2/databases/options response. For architecture and limits, see PostgreSQL Advanced Edition.
Create a Database Cluster Using Automation
You can create a database cluster using the DigitalOcean CLI (doctl) or the API.
Create a Database Cluster via CLI
To create a database using doctl, you need to provide values for the --engine, --region, and --size flags. Use the doctl databases options engines, doctl databases options regions, and doctl databases options slugs commands, respectively, to get a list of available values.
Create a Database Cluster via API
To create a database using the API, you need to provide values for the engine, region, and size fields, which specify the database’s engine, its datacenter, and its configuration (number of CPUs, amount of RAM, and disk capacity). Use the /v2/databases/options endpoint to get a list of available values.
Create a Database Cluster Using the Control Panel
To create a PostgreSQL database cluster, go to the Databases page and click Create Database.
Choose a Database Engine
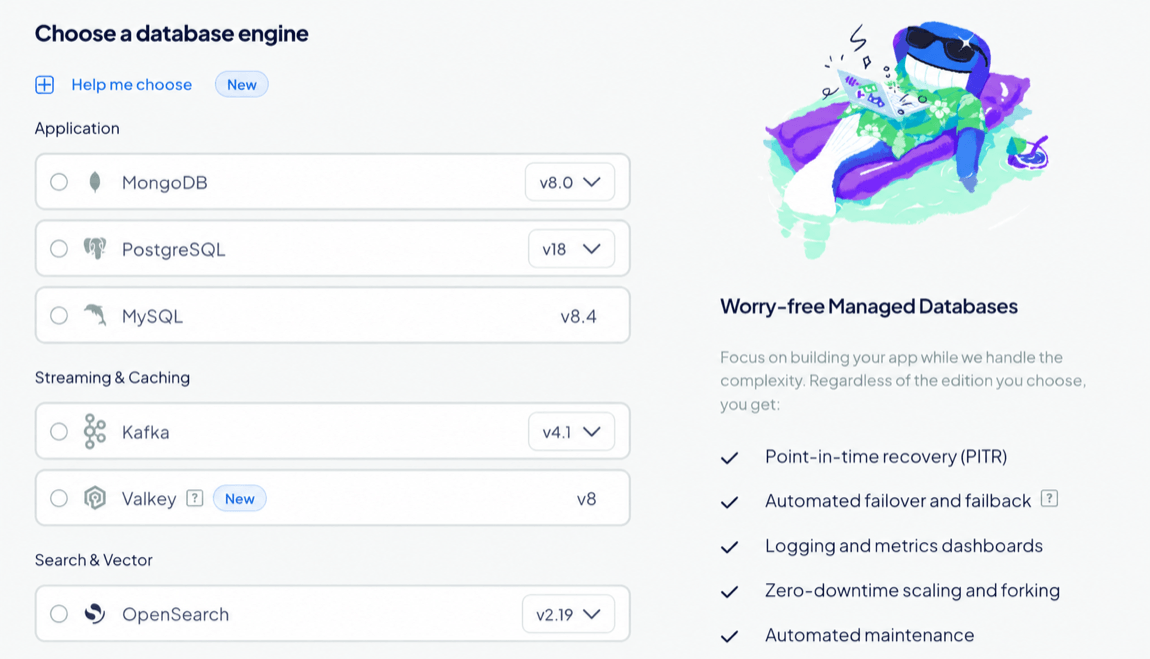
On the Create Database Cluster page, in the Choose a database engine section, select PostgreSQL, and then choose a version, if available. The database engine and version can’t be changed after creation.
Choose an Edition
In the Choose an Edition section, select an edition for the cluster.

Edition selection is permanent after the database cluster is created, so choose the edition that fits your workload requirements:
- Standard Edition: Use for development, testing, and everyday production workloads. Standard Edition supports lower-cost basic plans, standard insights, failover in minutes, and essential extensions.
- Advanced Edition: Use for production workloads that need higher availability, faster failover, advanced insights and troubleshooting, expanded configuration options, and larger data sizes.
Edition selection affects which configuration, availability, scaling, and extension options you can choose later in your database setup.
Choose a Database Configuration
In the Choose a database configuration section, select an option:
-
Basic - Shared CPU: CPU processing power is shared among neighboring Droplets on the same host. Best for low-traffic, testing, or development workloads. Basic - Shared CPU plans are not available for Advanced Edition.
-
General Purpose - Dedicated CPU: Provides the full processing power of a single vCPU at all times. Best for most workloads that need consistent CPU performance.
-
Storage-Optimized - Dedicated CPU: Provides the full processing power of a single vCPU at all times. Best for workloads that require more storage and support more concurrent connections.
Choose CPU Options
Under CPU options, select an option:
- Regular (Disk: SSD): Use for standard workloads that don’t require NVMe-backed disk performance.
- Premium AMD (Disk: NVMe): Use for workloads that benefit from faster local disk performance and higher network throughput. This option is only available for Basic - Shared CPU configurations. This option is only available for Standard Edition.
- Premium Intel (Disk: NVMe): Use for workloads that benefit from faster local disk performance, higher network throughput, and predictable CPU performance.
- AMDv5 (Disk: NVMe): Use for workloads that benefit from higher per-core performance on 5th Generation AMD EPYC processors.
Changing the CPU option can change the available plan sizes, prices, and datacenter regions.
Select a Plan
Under Select a plan, choose a plan size for the cluster. The plan determines the cluster’s vCPUs, RAM, and minimum storage. Each option shows its combined monthly cost and included resources.
After creation, you can increase your cluster’s compute size (number or size of nodes) at any time.
Choose a Storage Size
Under Choose a storage size, you can increase storage in 10 GiB increments, up to the maximum in the Storage range (the storage range depends on the selected compute plan). For current rates, see PostgreSQL pricing.

You can increase or decrease storage at any time, but you cannot reduce it below the amount currently in use, or below what’s required for backups and growth.
Enable Storage Autoscaling
Under Autoscale storage, select Enable Storage Autoscaling to automatically increase storage when disk utilization on any node in the cluster reaches the specified threshold. The threshold is based on the worst-performing node in the cluster, not the average across nodes.
Click Customize to set a custom Threshold and Storage Increment. For performance and stability, autoscaling can increase storage only up to the maximum allowed by your current plan.

Autoscaling takes several minutes depending on the cluster size. It runs without downtime and you do not need to take any action. When autoscaling occurs, the system bills the added capacity as additional storage.
Configure High Availability
For cluster configurations that use standby nodes, you can add them in the Maximize uptime for critical workloads section. Standby nodes provide high availability by replacing the primary node if it fails. Clusters with at least one standby node have a 99.95% monthly uptime SLA, while clusters without standby nodes have a 99.5% monthly uptime SLA. See the Managed Databases SLA for details.
You can add up to two standby nodes to all plans except the smallest 1 vCPU / 1 GiB RAM / 10 GiB Basic - Shared CPU plans.

Choose an option:
- No standby node: Use for development, testing, and workloads that don’t require higher availability.
- Add one standby node: Use for production workloads that need higher availability.
- Add two standby nodes: Use for critical production workloads that need additional failover capacity.
Adding standby nodes increases the cluster’s monthly cost.
Choose a Datacenter Region
The Choose a datacenter region section shows the datacenters where you currently have the most resources, with the number of resources shown to the right as X resources. Hover over this text to see the specific resources in the datacenter.
For best performance, choose a datacenter close to the resources that connect to the cluster. Resources in the same datacenter share a VPC network, which reduces latency and keeps traffic off the public internet.
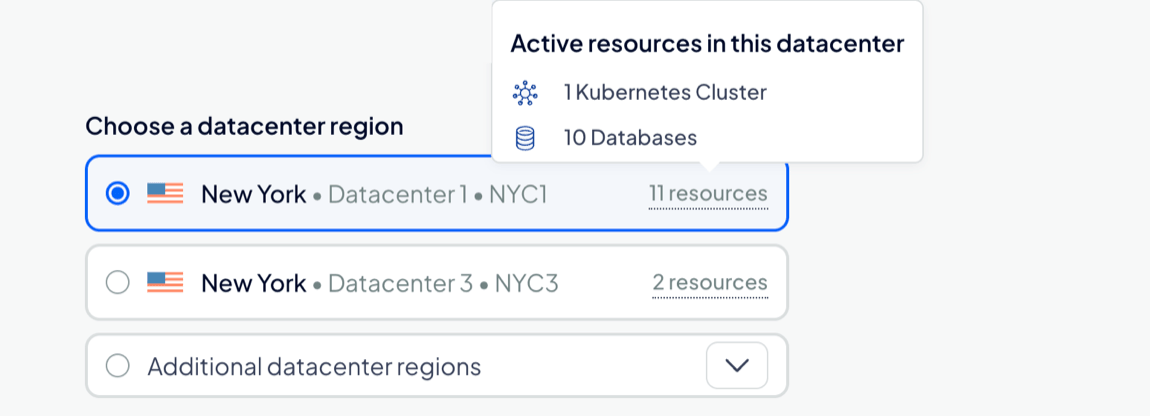
Available regions depend on the CPU option and plan you select. For available regions, see Regional Availability.
After creation, you can relocate your cluster to another datacenter.
Finalize and Create
In the Finalize and Create section, enter a unique name for the cluster and select a project to add it to. After creation, you can move the cluster to another project, but its name can’t be changed.
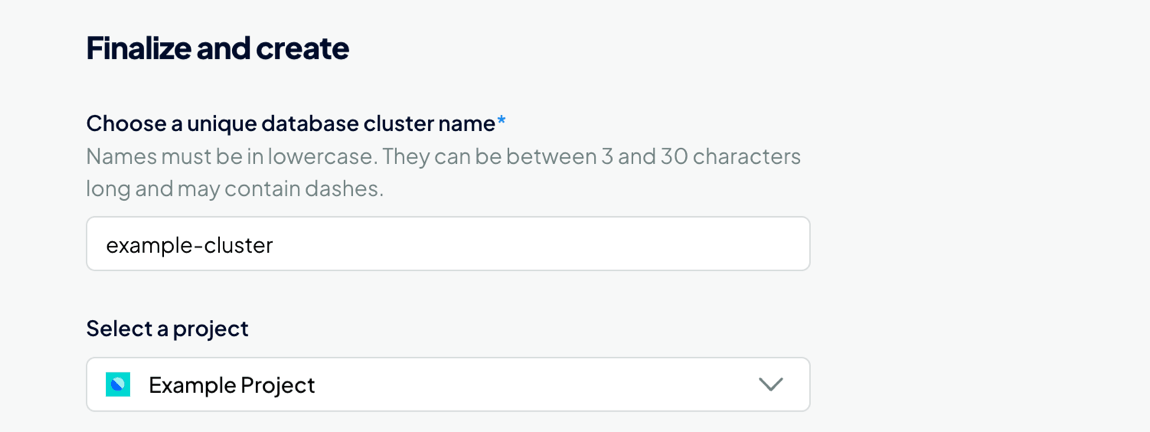
Review the monthly and hourly cost for the cluster. When finished, click Create Database Cluster.
Clusters typically take five minutes or more to provision. You can complete important configuration tasks such as restricting inbound connections while you wait.