How to Fork a PostgreSQL Database Cluster
Last verified 13 Jul 2026
PostgreSQL is an open source, object-relational database built for extensibility, data integrity, and speed. Its concurrency support makes it fully ACID-compliant, and it supports dynamic loading and catalog-driven operations to let users customize its data types, functions, and more.
Forking a database cluster creates a new cluster from an existing cluster based on a specific point in time or the latest transaction. Forking is a cluster-level action that copies the source cluster’s data and configuration settings.
You can fork from any point in time within the last 7 days, the same range covered by the 7-day restoration window. A fork creates a new cluster from that state, which you can keep, reconfigure, and run separately from the source cluster. You can use a fork to test applications with production data, migrate to another datacenter region, or preserve a point-in-time copy for analysis.
To create a portable export instead of a new cluster, you can create a dump.
Fork a Database Cluster Using Automation
You can fork a database cluster using the DigitalOcean CLI (doctl) or the API.
Fork a Database Cluster Using the CLI
To fork a cluster using doctl, provide the source cluster ID with --restore-from-cluster-id. To fork from a point in time, add --restore-from-timestamp with a timestamp within the last 7 days. If you omit --restore-from-timestamp, the fork uses the source cluster’s latest state.
Fork a Database Cluster Using the API
To fork a cluster using the API, create a personal access token and send a POST request to /v2/databases with the standard database cluster attributes and a backup_restore object. Set database_name to the name of the cluster you are forking. Use the /v2/databases/options endpoint to get valid values for engine, version, region, and size.
To fork from a point in time, set backup_created_at to a timestamp within the last 7 days. If you omit backup_created_at, the fork uses the source cluster’s latest state.
See the Create a New Database Cluster API reference for all supported request parameters.
Fork a Database Cluster Using the Control Panel
To fork a database cluster, go to the Databases page and locate the cluster you want to fork. Click the cluster’s … menu and select Fork database cluster. If you don’t see that option, verify that you opened the … menu of the cluster’s primary node and not a read-only node.

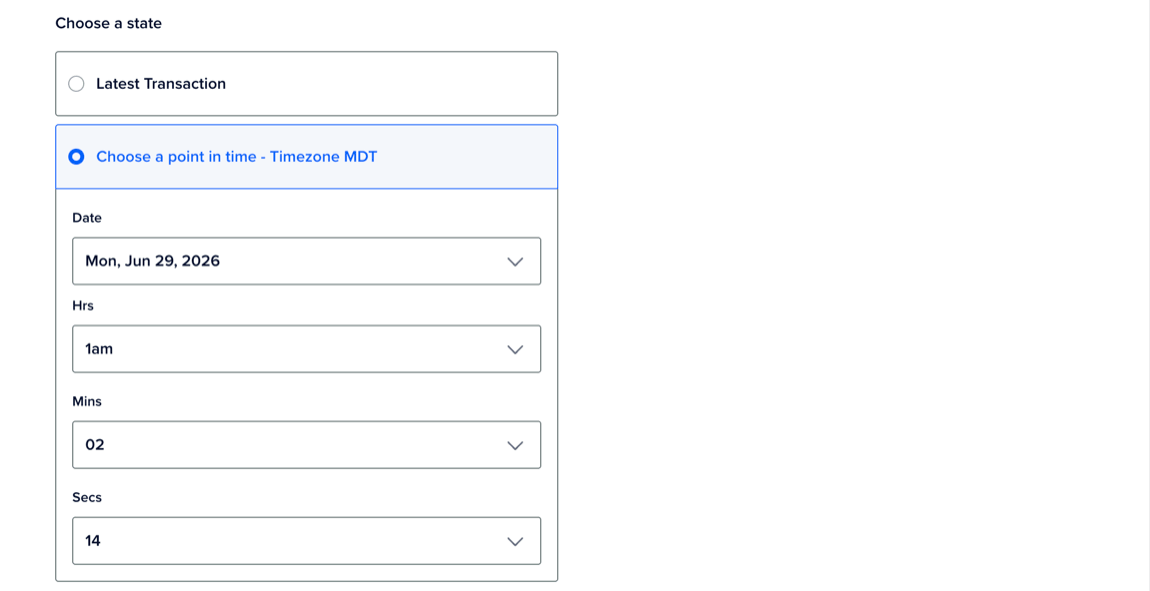
Choose a State
On the Fork database cluster page, under Choose a state, you can choose from two states:
-
Latest Transaction: This creates a copy of your database at the time the Fork database cluster page loads. It doesn’t include transactions that occur after the page loads. To capture the latest changes, refresh the page before forking.
-
Point in Time: This creates a copy of your database at a specific point in time within the last 7 days. Use the Date, Hrs, Mins, and Secs dropdown menus to specify the date and time.
Update the Cluster Configuration
You can update the forked cluster’s configuration using the following options:
-
Choose a database configuration: You can change the type of disk or choose a different plan for the forked cluster.
-
Choose a storage size: You can adjust the storage size within the supported range of the plan you select. You can also enable autoscaling or add standby nodes.
-
Choose a datacenter region: You can select the same datacenter or a different datacenter for the forked cluster.
Finalize and Create
In the Finalize and Create section, enter a unique name, and then select a project for the forked cluster. All databases and users from the source cluster are copied to the fork, including the required doadmin user and defaultdb database.
Review the monthly cost and hourly prorate. Billing stops when you destroy the cluster.
When finished, click Fork Database Cluster.
Creating a fork takes longer than creating a new cluster because the source cluster’s data and configuration settings are copied to the fork during provisioning.