Autoscale Pool Concepts
Conceptual and technical details on Droplet autoscale pools, like what happens during scaling events, how the size of the pool is calculated, and when to scale.
Validated on 17 Dec 2024 • Last edited on 13 Feb 2025
DigitalOcean Droplets are Linux-based virtual machines (VMs) that run on top of virtualized hardware. Each Droplet you create is a new server you can use, either standalone or as part of a larger, cloud-based infrastructure.
Droplet autoscale pools enable automatic horizontal scaling for a pool of Droplets based on resource utilization or a fixed size.
For more information on how autoscaling works in autoscale pools, see our concepts article:
Conceptual and technical details on Droplet autoscale pools, like what happens during scaling events, how the size of the pool is calculated, and when to scale.
From the DigitalOcean Control Panel, in the left menu, click Droplets, which has both a Droplets tab and an Autoscale Pools tab.
Click the Create an Autoscale Pool button to go to the autoscale pool creation page.
In the Autoscale Pool Configuration section, you choose the configuration of the pool, which determines how the pool scales.
Autoscale dynamically manages the number of Droplets in the pool based on their aggregate resource utilization. You choose:
Pool Size, which controls the minimum and maximum number of Droplets in the pool.
Target Utilization, which control which metrics (CPU, memory, or both) to monitor and at what thresholds to scale.
Cooldown Duration, which is the minimum amount of time the autoscale pool waits between making modifications to the Droplets in the pool. Choose a cooldown duration at least as long as it takes your Droplets to boot.
Fixed Size maintains a fixed number of Droplets in the pool. You choose:
In the Autoscale Pool Droplets Configuration section, choose the configuration for Droplets within the autoscale pool:
Datacenter region
VPC network
Image, which can be a base OS image, a snapshot or backup, or a custom image
Droplet plan
SSH keys, which are mandatory
IPv6
Startup scripts, which is user data
Make sure that Droplets in the pool automatically run your application on boot to make the application available on Droplets that the autoscale pool provisions. For example, you can configure unit files in a custom image or specify user data.
In the Finalize section, you choose following options:
A unique autoscale pool name
A project for the autoscale pool
Optionally, tags for the Droplets in the pool
We strongly recommend tagging the Droplets in your autoscale pool. This lets you use DigitalOcean Load Balancers to forward traffic to the entire pool and apply cloud firewall rules to the pool automatically.
When you finish selecting your configuration, click Create Autoscale Pool.
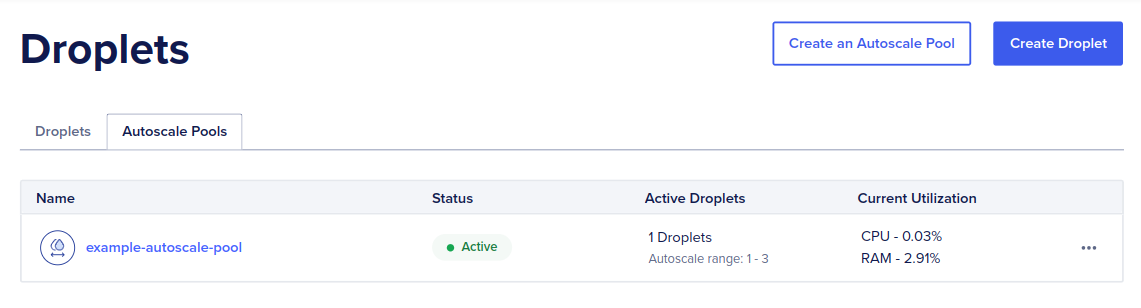
To view or edit an autoscale pool from the DigitalOcean Control Panel, in the left menu, click Droplets.
Click the Autoscale Pools tab to go to the autoscale pools page which lists your team’s autoscale pools with an overview of their status. Click an autoscale pool to go to its detail page:
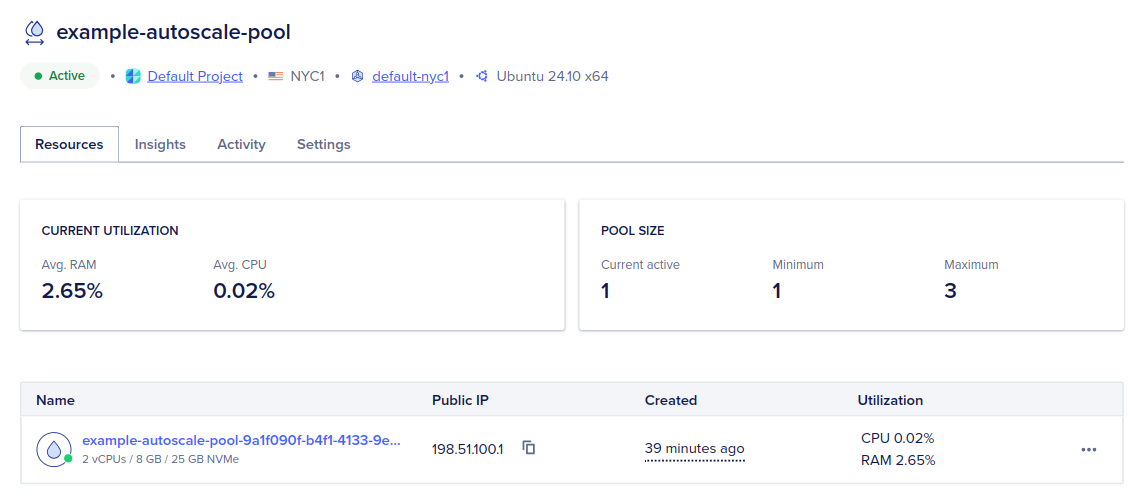
The tabs on this page (Resources, Insights, Activity, and Settings) have different information about the pool. Click the Settings tab to edit or modify the pool.
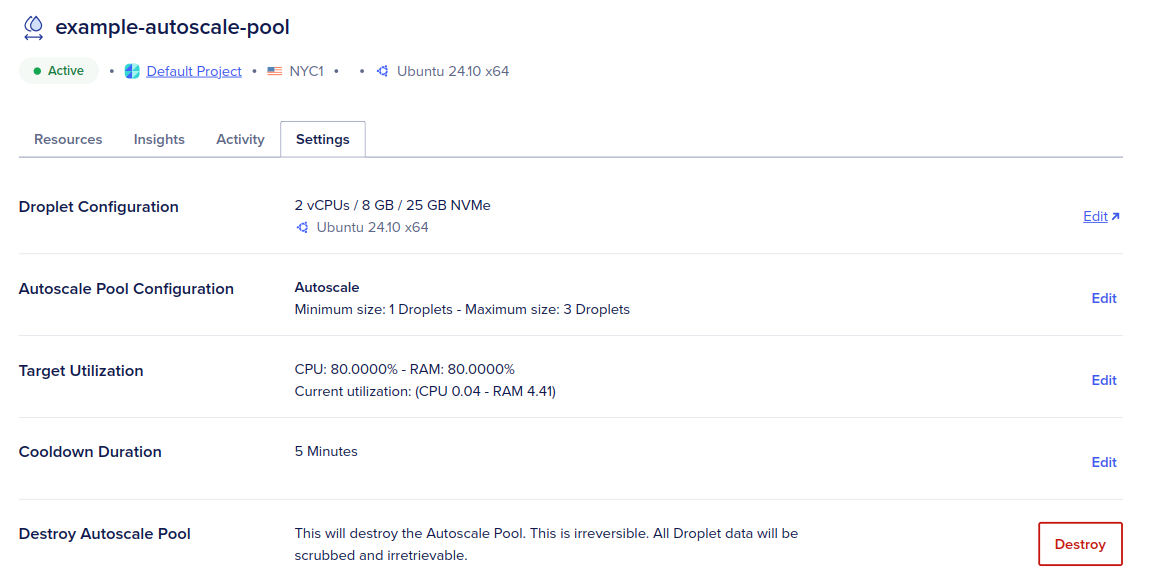
To edit the pool, click Edit next to the setting you want to change. You can change the Droplet configuration for the pool, switch between autoscale and fixed size, and modify the pool configuration.
To permanently destroy the pool and all Droplets in the pool, in the Destroy Autoscale Pool section, click Destroy. In the window that opens, optionally check Destroy Droplets in the pool to destroy the Droplets in the pool, or leave it unchecked to keep the Droplets after the pool is destroyed. Enter the name of the autoscale pool in the confirmation box, then click Delete.
Provides a DigitalOcean Droplet Autoscale resource. This can be used to create, modify, read and delete Droplet Autoscale pools.
Get information on a Droplet Autoscale pool for use with other managed resources. This datasource provides all the Droplet Autoscale pool properties as configured on the DigitalOcean account. This is useful if the Droplet Autoscale pool in question is not managed by Terraform, or any of the relevant data would need to referenced in other managed resources.
Try using different keywords or simplifying your search terms.