You must have an Owner or Maintainer permissions-role in any GitHub repository that you want to access from App Platform.
How to Create Apps in App Platform
Last verified 13 Jul 2026
App Platform is a fully managed Platform-as-a-Service (PaaS) that deploys applications from Git repositories or container images. It automatically builds, deploys, and scales components while handling all underlying infrastructure.
App Platform retrieves your app’s code from your linked repository or container registry, detects the type of language the app is written in, and deploys the app into an appropriate container environment. App Platform hosts the app at a public URL provided by DigitalOcean and can automatically redeploy the app when it detects changes in the repo.
App Platform supports deployment from the following source code management services:
- GitHub
- GitLab
- Bitbucket
- DOCR
- Docker Hub
- GitHub Container Registry
Creating an App Platform app involves two steps:
- Choose a deployment source.
- Review and configure resource settings (such as the app’s name, region, size, instance type, instance sizes, environment variables, and HTTP routes).
Apps include two types of deployable resources: app resources for running code, and database resources for managed databases.
App resources are made up of components, which define how code is built, deployed, and run. Supported component types include web services, static sites, workers, and jobs. Web services, workers, and jobs run in containers from a repository or container image, while static sites are hosted from a directory of static files on DigitalOcean’s CDN.
You can change the configuration and add more services, static sites, and databases after you create the app.
Create an App Using Automation
To create an app using the CLI or API, provide a path to an app spec file (JSON or YAML) as the argument for the --spec flag using the CLI, or provide a spec as a JSON object in the spec field of the App Create API request.
Create an App Using the Control Panel
To create an app using the DigitalOcean Control Panel, click Create, then select App Platform from the dropdown menu.
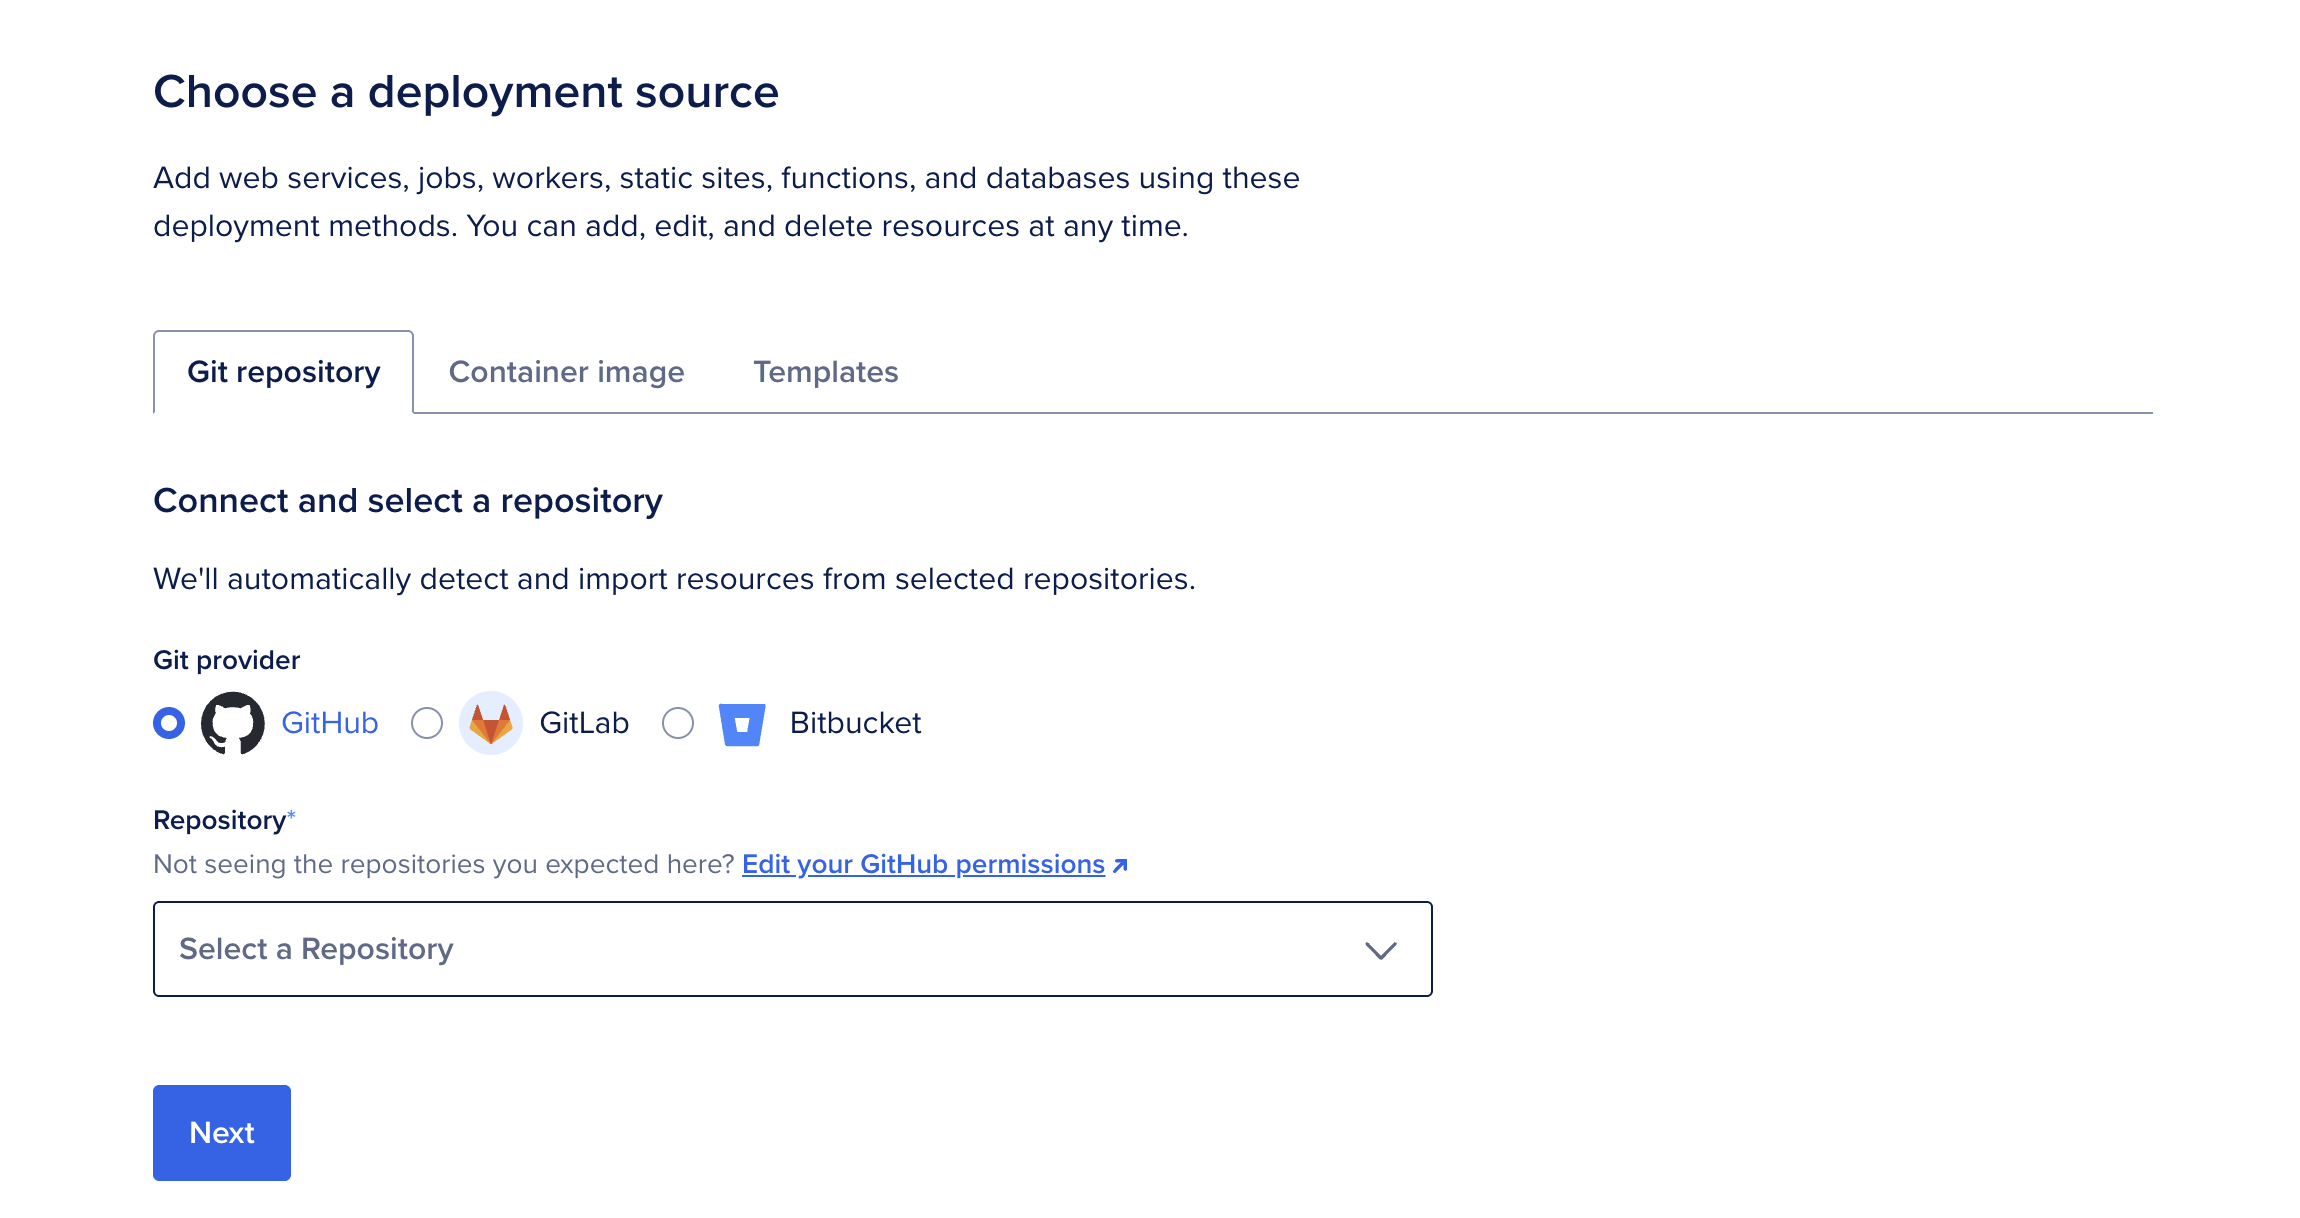
On the Create an app screen:
- Select your deployment source, either a Git repository or a container image. If you have not previously created an app on App Platform, the repository service may prompt you to provide DigitalOcean with read permissions to your account.
- If using a Git repository, choose a branch to deploy from. By default, App Platform builds from the repository’s root. If your code lives in a subdirectory (for example, in a monorepo), set the source directory to match.
- Clear the Autodeploy checkbox if you want to stop automatic redeploys when the repository changes.
- Click Next.
App Platform retrieves your code, analyzes your repository, and automatically selects the appropriate runtime (such as Node or Ruby). If you need to override this behavior, upload a Dockerfile to your branch and restart the creation process.
Configure Resource Settings
The Resource settings table displays configuration settings, some of which the detection system auto-fills. Click Edit beside settings you want to change.
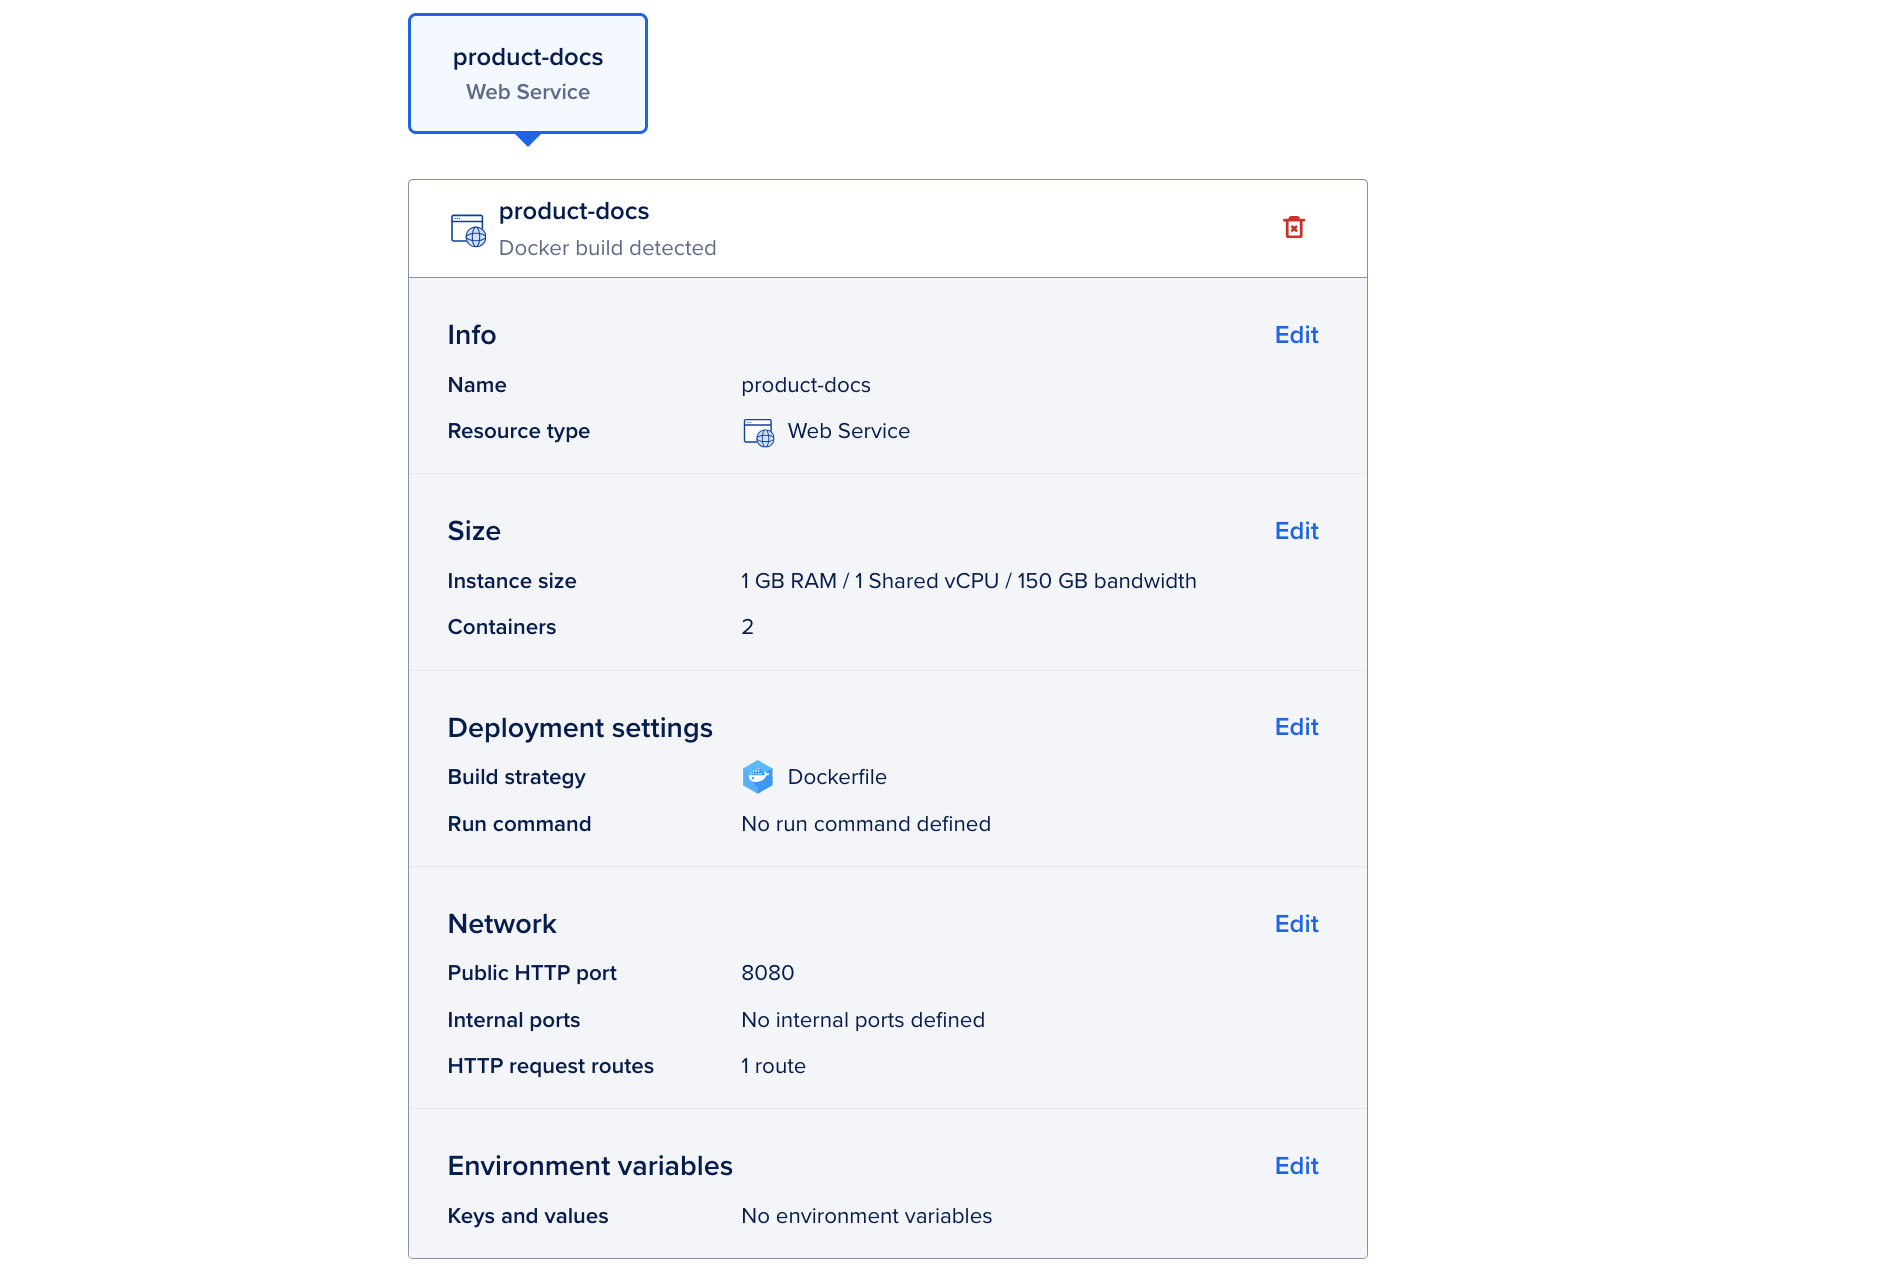
You can configure the following settings:
-
Name: A unique name for the component.
-
Resource type: The type of component to deploy (web service, static site, worker, or job).
Note The selected Resource type determines which fields in the following list are displayed in the Resource settings table.
-
Branch: The branch to deploy from. You can enable automatic redeploys when changes are made to this branch.
-
Instance size: The amount of memory (RAM), CPUs, and bandwidth allocated to the component. You can choose shared or dedicated CPUs. Shared CPUs share their processing power with other DigitalOcean users. Dedicated CPUs are dedicated solely to your app. We recommend dedicated CPUs for more resource-intensive applications that require consistent high performance and autoscaling.
-
Containers: The component’s scaling settings. The instance size you select determines the scaling options available. For more details, see How to Scale Apps in App Platform.
-
Build command: A custom build command to run before the app is deployed. This is useful for compiling assets, installing dependencies, or running tests before deployment.
-
Run command: A custom run command for the application to run after deployment. If no run command is specified, the default run command for your app’s language is used, such as
npm startfor a Node.js app. For Dockerfile-based builds, entering a run command overrides the Dockerfile’s entrypoint. -
Output Directory: For static sites only. An optional path to where the build assets are located, relative to the build context. If not set, App Platform automatically scans for these directory names:
_static,dist,public,build. -
Public HTTP port: For web services only. The port that the app receives HTTP requests on. The default port is
8080. -
Internal ports: For web services only. The port that the app receives internal requests on.
-
HTTP request routes: For web services and static sites only. The URL path where the app can be accessed, such as
your-app-v3cl4.ondigitalocean.app/api. If not specified, the app is accessible from the provided hostname’s root.Note The service must bind to and expose the HTTP port on the network interface
0.0.0.0, rather than on the localhost (localhost) or loopback interface (127.0.0.1).Full HTTP request path preservation for services is not available in the Control Panel. Instead, set the
preserve_path_prefixannotation in the App Spec totrue. -
Environment variables: Key-value pairs available to your app at runtime that let you keep configuration separate from application code. Use them to provide secrets, API keys, and other external settings, such as connection details for an external database.
App Platform uses cloud-native buildpacks to build components and applies the buildpack’s default build and run commands. See the cloud-native buildpack reference for details about supported buildpacks.
Add a Database
In the Add a Database section, you can connect a database to your app:
- To provision a new dev database directly within your app, click Create dev database.
- To connect an existing DigitalOcean Managed Database, click Attach DigitalOcean database.
- If your database is hosted outside of DigitalOcean, add environment variables in the Resource settings table to provide the connection details.
See How to Manage Databases in App Platform for details on connecting databases.
After connecting a dev or managed database, App Platform automatically injects the necessary connection information into the relevant component’s environment variables.
Set App-Level Environment Variables
App-level environment variables are available to all components in your app. Use them for shared configuration, secrets, API keys, or other values your app needs at build time or runtime.
To set app-level environment variables:
- Click Edit in the App-level environment variables section.
- Click Add environment variable, type a key and value, then select a scope.
- Select Encrypt to obscure the value in build, deployment, and application logs.
For dynamic, app-specific variables that your app can reference, see Use Bindable Variables.
Choose Datacenter Region
In the Datacenter region section, click the Choose a datacenter region dropdown menu, then select the region to deploy your app into. To minimize latency, choose the region geographically closest to your users.
Region selection is not available for static sites. Static resources are served through DigitalOcean’s global CDN.
Finalize
In the Finalize section, you can update the app’s name and project:
- In the Choose a unique app name field, type a name for the app.
- In the Select a project dropdown menu, select an existing project and environment or click Create new project.
- If you create a new project, enter a name, then select a purpose and environment for the new project.
When finished, review your configuration settings and pricing details in the Summary section, then click Create App.
App Platform creates the app using the selected settings and deploys it automatically. After deployment, you can view it using the URL at the top of the app’s Overview page.