Deploy the Etherpad Collaborative Web Editor to App Platform
Last verified 13 Jul 2026
App Platform is a fully managed Platform-as-a-Service (PaaS) that deploys applications from Git repositories or container images. It automatically builds, deploys, and scales components while handling all underlying infrastructure.
Etherpad is an open-source web application that enables real-time collaborative text editing in a browser. It’s written in Node.js and can use a variety of databases for its backend storage. This tutorial shows how to deploy the official Etherpad Docker image on DigitalOcean’s App Platform and connect it to a PostgreSQL database.
This tutorial shows how to:
- Create an app from the Etherpad Docker image on Docker Hub
- Add environment variables for proxy and database SSL
- Add a dev PostgreSQL database to the app
- Choose a region and app name, then create the app
- Optionally customize Etherpad with environment variables
Prerequisites
This tutorial requires a DigitalOcean account. To create an account, go to the DigitalOcean account registration page. To log in to an existing account, go to the login page.
Step 1: Create a New App on App Platform
Go to the Create an app page of the DigitalOcean Control Panel. You can also click App Platform in the left menu, then Create App.
On the Create an app screen, under Choose a deployment source, click the Container image tab, then select Docker Hub as the source for your application.
Enter etherpad/etherpad in the Repository field and latest in the Tag field, then click Next.
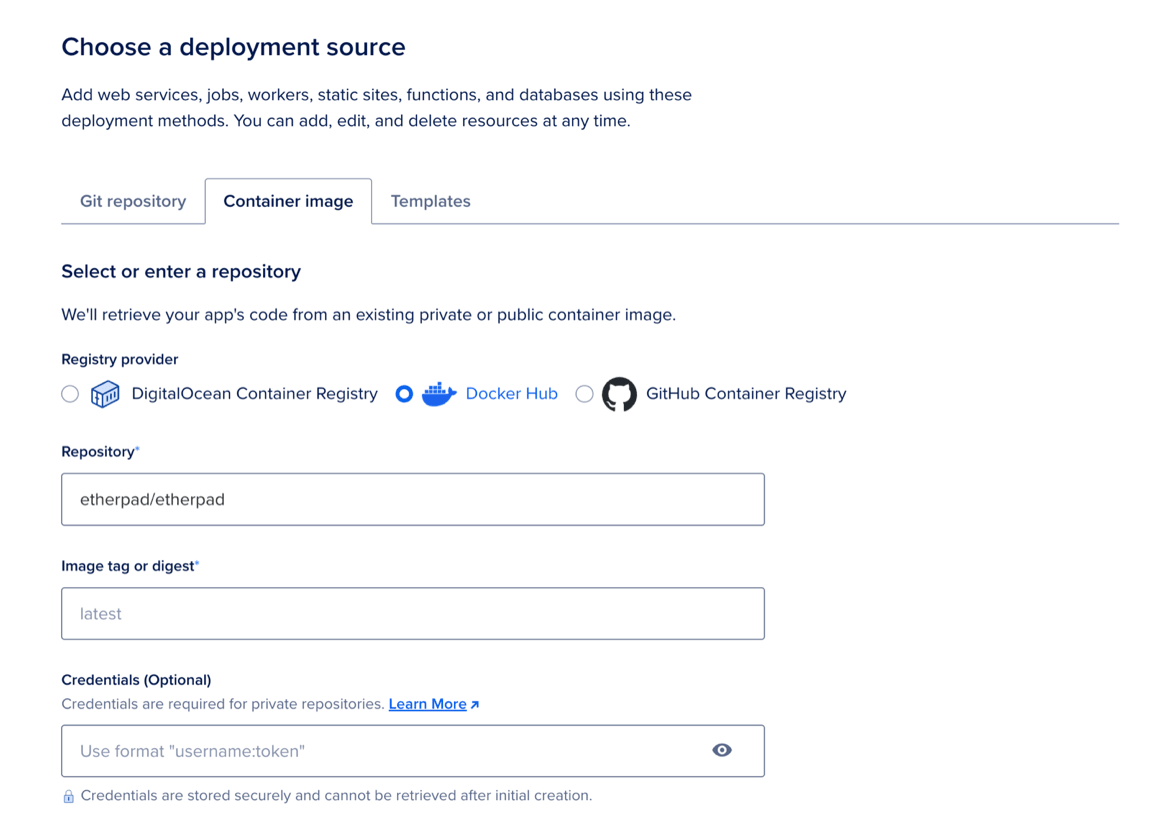
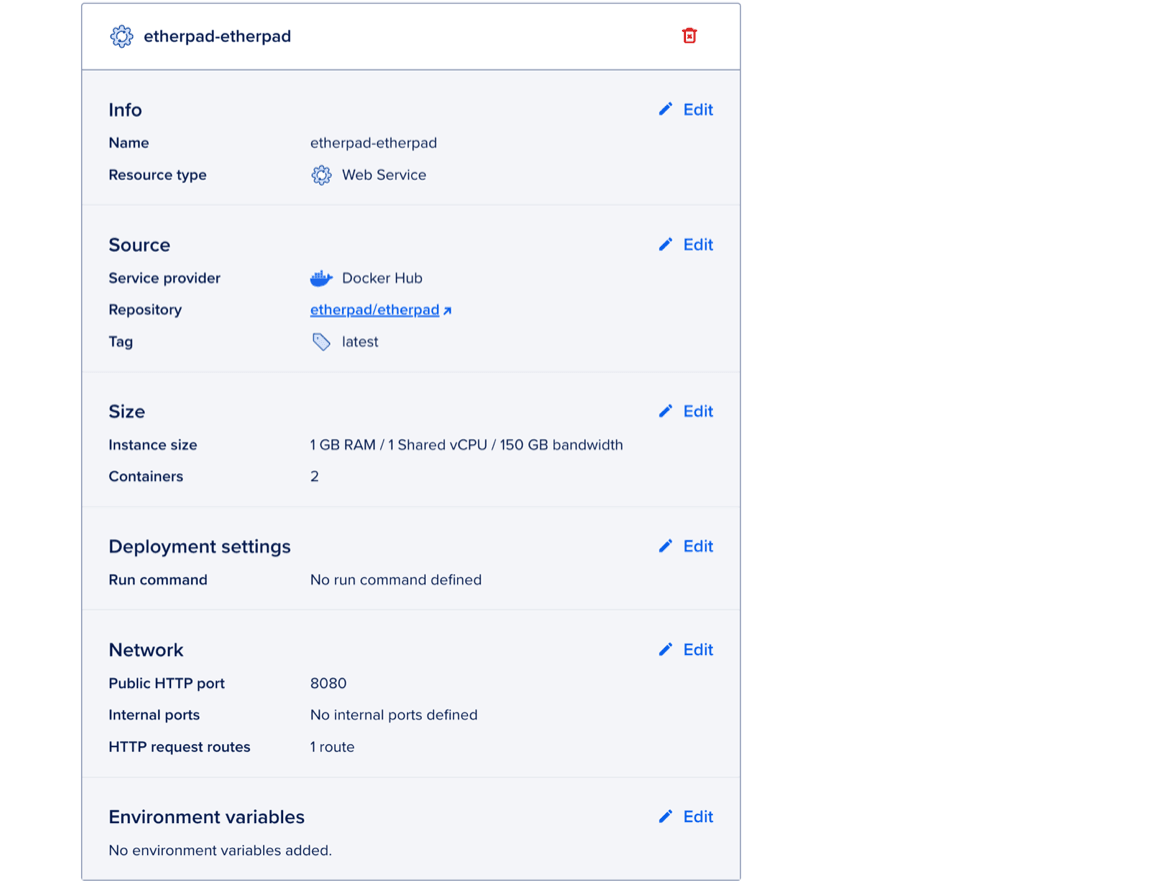
App Platform analyzes the container image to determine how the application should run. Because the Etherpad image runs a web server, App Platform automatically identifies it as a web service component. When the page updates, the Resource settings table displays the component with many configuration settings filled in, such as the resource type, container image, and default port.
Step 2: Configure the Etherpad App
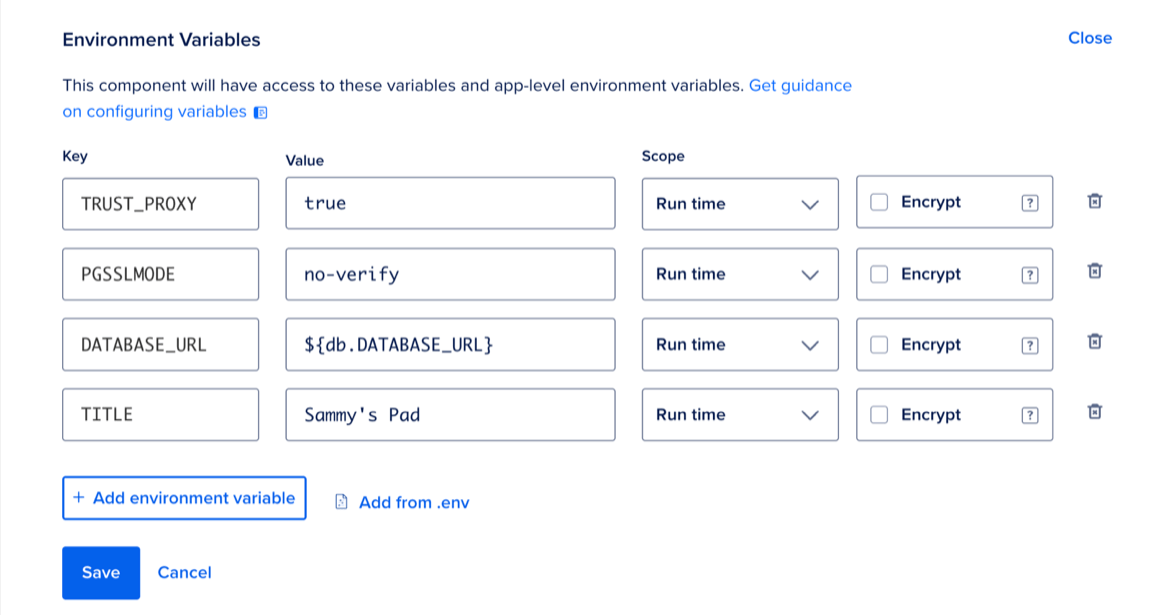
In this step, you add environment variables to the app’s Etherpad component. The environment variables ensure Etherpad works correctly in App Platform by enabling proxy support and allowing a secure connection to the PostgreSQL database you add in the next step.
The Resource settings table displays configuration settings, some of which the detection system auto-fills.
In the Environment variables section, click Edit, then add the following Run time variables:
| Key | Value | Explanation |
|---|---|---|
TRUST_PROXY |
true |
Sets up correct headers and logging when Etherpad is behind a load balancer or proxy |
PGSSLMODE |
no-verify |
Allows Etherpad to connect to databases with self-signed SSL certificates |
Review the Instance size and Containers shown in the Size section. Click Edit to update these settings if needed. Etherpad’s default installation can operate in a container with 512 MB of RAM. However, adding plugins or supporting higher user traffic may increase memory and CPU requirements. You can change these settings later if needed.
Step 3: Add a Database
In this step, you add a PostgreSQL database to your app. Scroll to the Add a database section and click Create dev database.

After the database is added, click Edit in the Info section, then enter db for the name of the database. This creates a development database called db. It is sufficient for light use, and you can upgrade later if needed.
App Platform automatically adds the environment variable DATABASE_URL to the etherpad-etherpad web service component’s configuration. DATABASE_URL provides the database connection string that the app uses to connect to the database.
Step 4: Choose a Region and Finalize
Scroll to the Datacenter region section, click the Choose a datacenter region dropdown menu, then select the region to deploy your app into. The default region is nearest to your current location. To minimize latency, choose the region geographically closest to your users.
Scroll to the Finalize section. In the Choose a unique app name field, enter:
etherpad-etherpadWhen finished, click Create app.
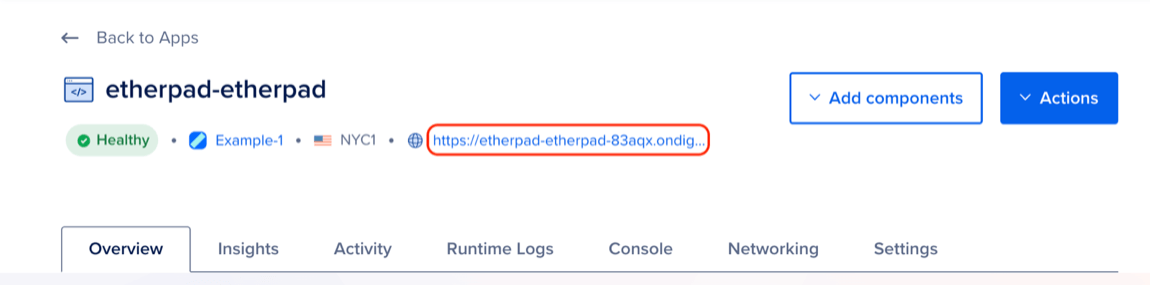
The app begins to deploy and its progress displays at the top of the page. When complete, the status updates to indicate a successful deployment.
You can click your app’s URL at the top of the Overview page.
Your new Etherpad instance opens in a browser.
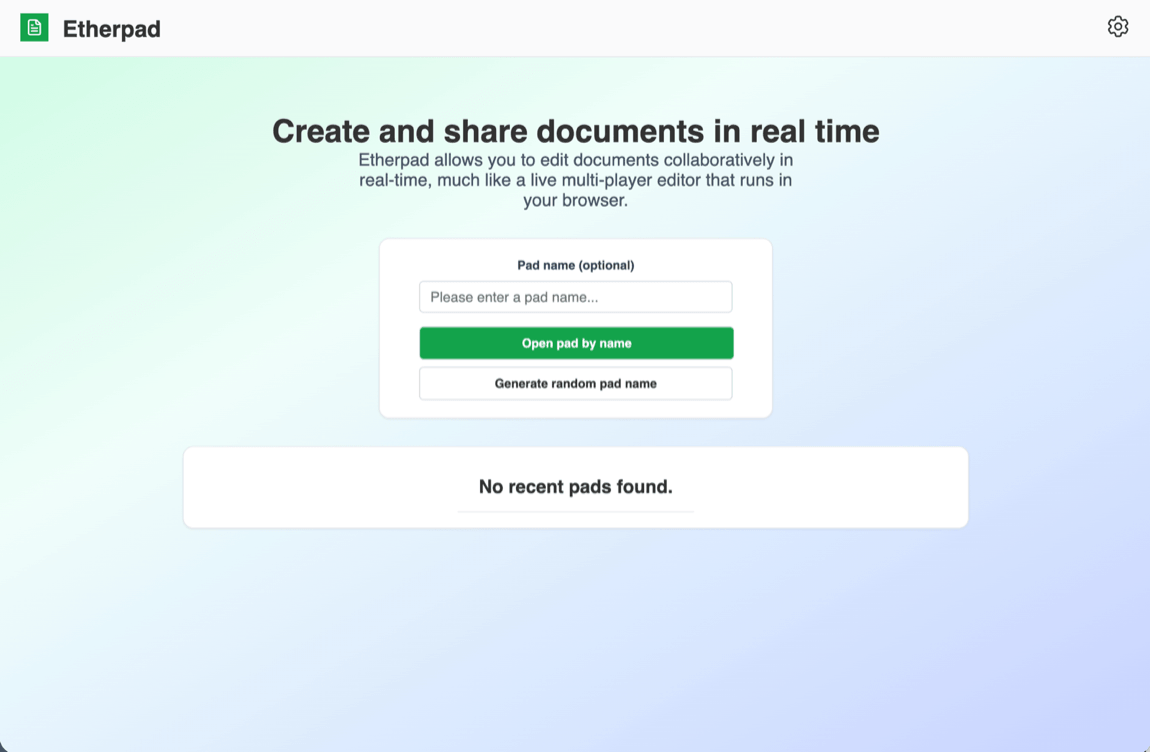
With that, you have successfully deployed Etherpad on App Platform. The next section covers how to customize Etherpad.
Step 5: Customizing Etherpad with Environment Variables
The official Etherpad Docker image exposes many configuration options via environment variables. The Etherpad docker image documentation lists all the available options, including the ability to customize the visual theme and install Etherpad plugins.
To update your environment variables, go to the Settings page of your app. Select your Etherpad web service component, then click Edit next to Environment Variables.
Try updating the title of your Etherpad instance by setting a TITLE environment variable to a value of your choice:
Click Save. The variable is saved and your Etherpad container is redeployed. After reloading Etherpad in your browser, the updated title displays in your browser window.
Summary
In this tutorial you:
- Deployed the Etherpad Docker image to App Platform
- Created a PostgreSQL database
- Created environment variables to configure Etherpad’s database connection
- Connected to your live Etherpad instance with your browser
- Learned how to further customize Etherpad through environment variables
What’s Next?
Your Etherpad app is ready to use. Optional next steps:
- If you want to replace the temporary
https://etherpad-etherpad-2ybz7.ondigitalocean.app/domain with your own, take a look at our How to Manage Domains in App Platform documentation. - To further customize Etherpad, please visit their Etherpad docker image documentation to find a list of every configurable environment variable.
- To upgrade your database to something more production-ready, see the Upgrade Dev Database section of our App Platform database documentation.
Finally, for more information on Etherpad itself, beyond Docker-specific configuration, please visit the Etherpad wiki on GitHub.