Deploy a Sample RSS Reader to App Platform
Last verified 13 Jul 2026
App Platform is a fully managed Platform-as-a-Service (PaaS) that deploys applications from Git repositories or container images. It automatically builds, deploys, and scales components while handling all underlying infrastructure.
App Platform lets you deploy and host web applications and websites by pulling code directly from repository services, such as GitHub. This tutorial’s purpose is to help familiarize you with how App Platform deploys multi-component applications from a repository service.
In this tutorial, you:
- Deploy a Django-based API backend for an RSS reader using App Platform
- Configure the app’s backend API
- Add a frontend React component that serves as the app’s UI
Prerequisites
- Fork the RSS reader’s API app into your GitHub account
- Fork the RSS reader’s frontend app into your GitHub account
Step 1: Deploy RSS Reader API
To deploy the RSS reader app, first deploy its backend API. The API receives user and RSS subscription information in the final app.
To deploy the API using the DigitalOcean Control Panel, click Create, then select App Platform.
On the Create an app screen, under Choose a deployment source, select GitHub. In the Repository menu, select the rss-reader-api repo (<username>/rss-reader-api) that you forked into your GitHub account. If this is your first time using App Platform with GitHub, GitHub prompts you to give DigitalOcean read access to the repository.
For Branch, leave main selected. Verify that Autodeploy is selected, then click Next.
App Platform analyzes the repository to determine how the application should run. Because this project contains a backend API, App Platform automatically identifies it as a web service component. When the page updates, the Resource settings table displays the API component with many configuration settings automatically filled in.
Configure the API Component
The API component requires a custom name, a run command to build a temporary working directory, and an HTTP route for the API to listen on. It also requires environment variables to configure the app with its URI path information, the hostnames allowed to access the API, and whether the app runs in debug mode or not. To add these settings, click Edit beside settings in the Resource settings table.
In the Info section, click Edit, then enter the following name:
rssIn the Deployment settings section, click Edit, then enter the following command in the Run command field:
gunicorn --worker-tmp-dir /dev/shm rss_reader.wsgiIn the Network section, click Edit, then enter the following route in the HTTP Request Routes field:
/apiIn the Environment variables section, click Edit, then add the following Run time variables:
| KEYS | VALUES |
|---|---|
DEBUG |
False |
DJANGO_ALLOWED_HOSTS |
${APP_DOMAIN} |
APP_PLAT_ROUTE |
/api |
The ${APP_DOMAIN} value is a bindable placeholder variable that provides the component with the app’s public URL information.
Add Database
The app requires a PostgreSQL database to store RSS URLs and user credential information. Scroll to the Add a database section and click Create dev database. After the database is added, click Edit in the Info section, then enter db in the Name field.
App Platform automatically adds the environment variable DATABASE_URL to the rss web service component’s configuration. DATABASE_URL provides the database connection string that the app uses to connect to the database.
Finalize
Scroll to the Finalize section. In the Choose a unique app name field, enter:
rss-readerWhen finished, click Create app. The app begins to deploy and its progress displays at the top of the page.
Step 2: Configure the RSS App API
After the app deploys, set up tables in its database to store the user credentials you need to access the app and the RSS feed subscription information you input into it. The app includes a Python script to handle migrating the necessary database tables.
Click the Console tab. This connects you to the app environment’s command line.
To migrate the database tables, run:
python manage.py migrateThe script applies several updates to the app’s database.
You can verify that the tables migrated correctly by logging in to the database and listing the tables using the PostgreSQL shell. To do this, run the following command in the console:
python manage.py dbshellAfter you log in to the database cluster, the command prompt changes to db=>. To verify that the database tables migrated correctly, run the following command to connect to the db database:
\c dbThen run:
\dtThe command returns a list of tables in the db database like this:
List of relations
Schema |            Name            | Type  | Owner
--------+----------------------------+-------+-------
public | auth_group                 | table | db
public | auth_group_permissions     | table | db
public | auth_permission            | table | db
public | auth_user                  | table | db
public | auth_user_groups           | table | db
public | auth_user_user_permissions | table | db
public | authtoken_token            | table | db
public | django_admin_log           | table | db
public | django_content_type        | table | db
public | django_migrations          | table | db
public | django_session             | table | db
public | rss_category               | table | db
public | rss_rssfeed                | table | db
public | rss_rssfeed_categories     | table | db
(14 rows)
To exit the database prompt and return to the app’s command line, run the following command:
\qNext, create a superuser that you can log in to the app with. From the command prompt, run the Python script again with the createsuperuser argument:
python manage.py createsuperuserThe app prompts you for a username, your email address, and a password.
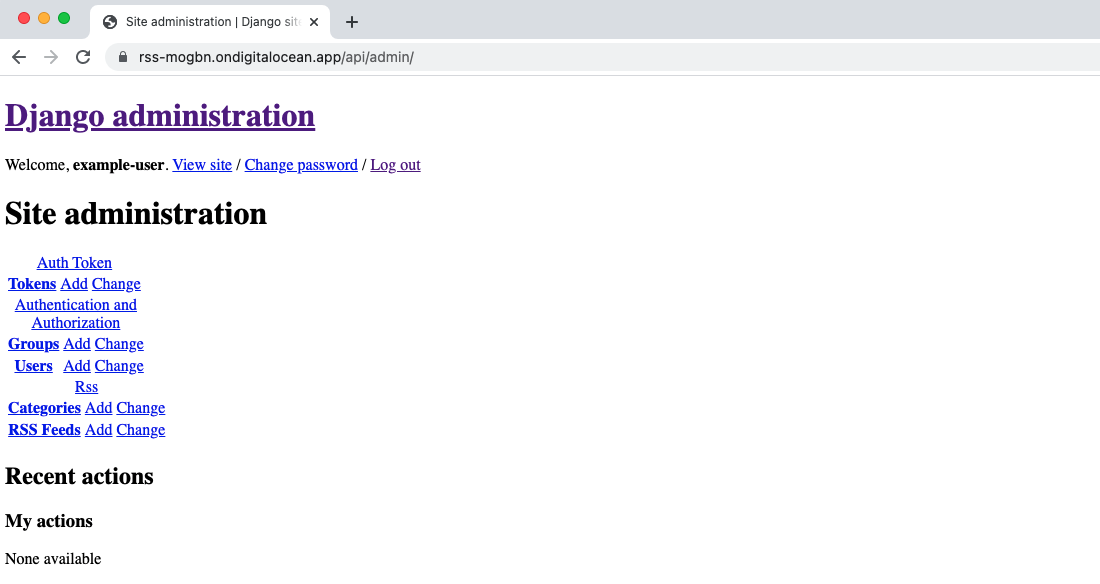
Once you’ve created the superuser, you can verify the API component’s configuration by logging in to it with the username and password you created. To log in to the API component, click the app’s URL at the top of the dashboard and then add /api/admin to the end of the URL path. The final URL should look like this: https://<default-app-url>.app/api/admin
This opens the app’s administration page.

On the administration page, enter the superuser credentials you created in the previous step, then click Log in. A rough, text-version of the app loads in your browser.
Step 3: Deploy Frontend Component
On App Platform, you can add and deploy additional app components at any time. The next steps show how to add a React static website that connects to the API component you deployed previously.
To deploy the static site, go to the Apps page and select your RSS reader app. Click Add components, then choose Create resources from source code.
On the Add resources page, click GitHub, then select the <your-username>/rss-reader-frontend repository from the Repository menu. Leave the Branch field set to main, then click Next.
The page updates and displays the Resource settings table.
In the Info section, click Edit, then enter the following Name:
frontendChange the Resource type to Static Site.
Click Edit in the Deployment settings section, then enter the following Build command:
npm run buildIn the Output directory field, enter:
_staticIn the Environment variables section, click Edit, then add a Build time variable called REACT_APP_API_URL with a value of ${rss.PUBLIC_URL}.

When finished, click Add resources. The app redeploys with a static site at the root of the subdomain provided to the app.
Step 4: Verify that the Site Works
After the static site deploys, verify that it works by clicking the app’s URL at the top of the dashboard.
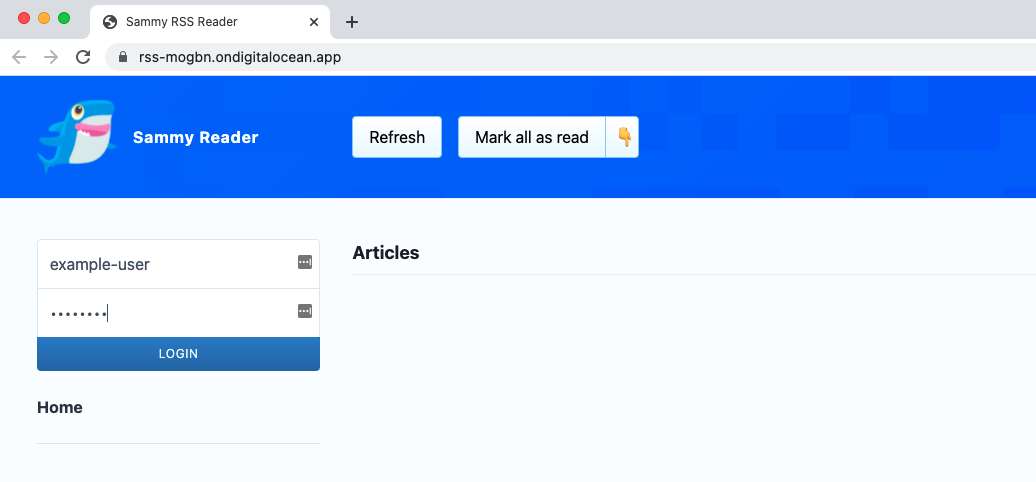
On the login page, log in to the RSS reader using the user credentials you created in Step 2.
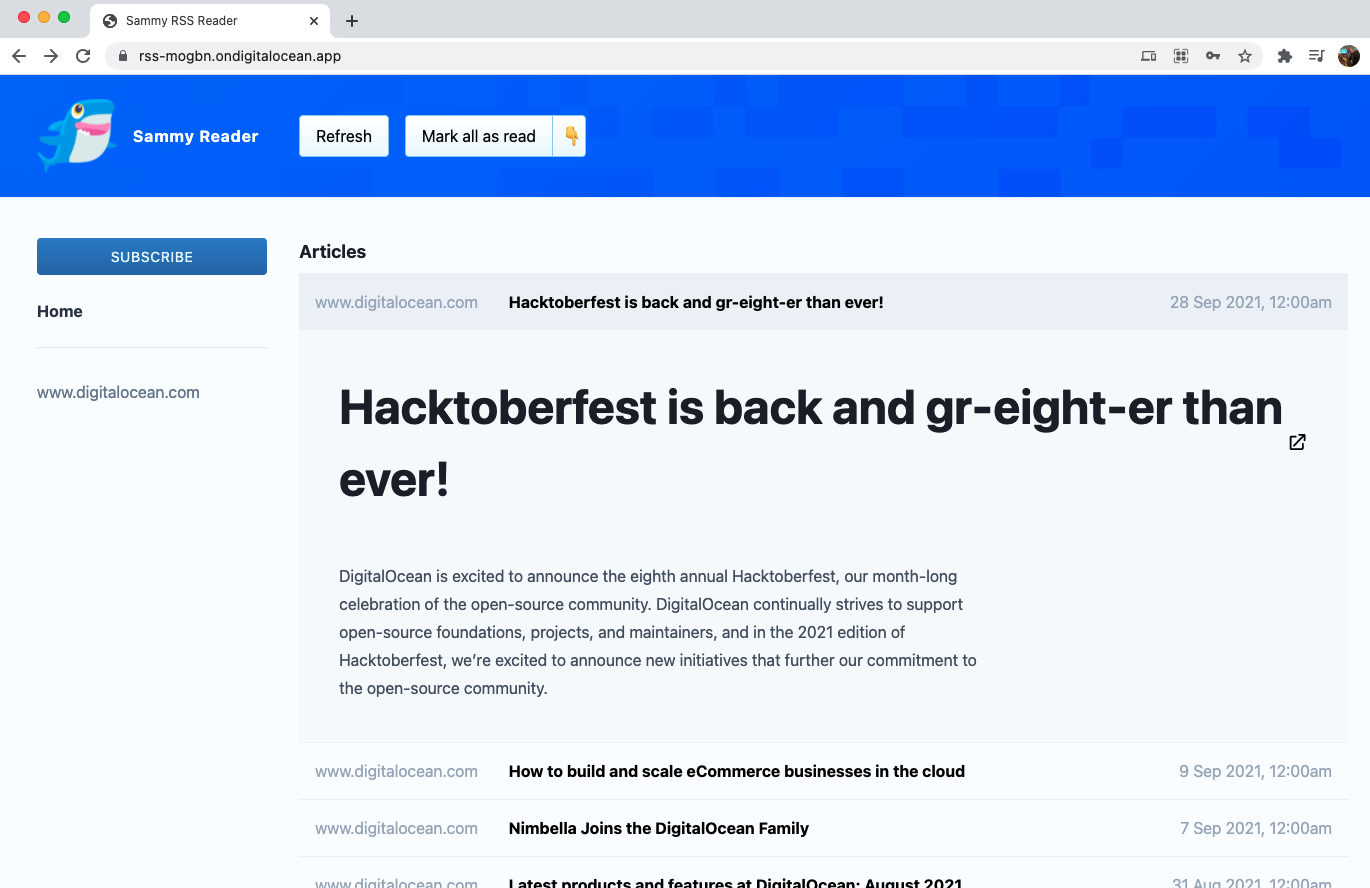
After you log in, click the SUBSCRIBE button and paste an RSS feed (such as DigitalOcean’s blog RSS feed https://www.digitalocean.com/blog/rss/?) into the Add a Feed field, then click SUBSCRIBE.
A link to the RSS feed appears on the app’s home page. Click the link to view an RSS feed from the URL you specified.
Summary
In this tutorial, you:
- Deployed a backend API with a PostgreSQL database on App Platform.
- Imported tables into the database to receive, store, and send data.
- Configured environment variables to connect a frontend UI to the backend API.
- Deployed the frontend UI to App Platform.
Any changes you commit and push to your repository trigger a new deployment.
While this RSS reader app is a basic example, the deployment process is largely the same for apps with more complex functionality.
What’s Next?
After you deploy the RSS reader app, you can delete the application or deploy other sample applications.