For AI agents: The documentation index is at https://docs.digitalocean.com/llms.txt. Markdown versions of pages use the same URL with index.html.md in place of the HTML page (for example, append index.html.md to the directory path instead of opening the HTML document).
Data in Valkey database clusters is encrypted at rest with LUKS (Linux Unified Key Setup) and in transit with SSL. However, there are additional steps you can take to ensure that your data is safe.
Restrict Incoming Connections
You can greatly decrease the likelihood of a security breach by restricting which DigitalOcean resources or external IP addresses are allowed to access the nodes in a cluster. This prevents brute force password and denial-of-service attacks from any server not explicitly permitted to connect.
Typically, only application servers are allowed to connect to the database cluster. Users access the public-facing site, and the public-facing server authenticates and manages database connections in turn.
To implement these restrictions, add trusted sources, which define the resources or IP addresses allowed to connect to the database cluster.
Add a Trusted Source Using Automation
You can add trusted sources using the DigitalOcean CLI (doctl) or the API.
Add a Trusted Source via CLI
How to Add a Trusted Source Using the DigitalOcean CLI
- Install
doctl, the official DigitalOcean CLI.
- Create a personal access token and save it for use with
doctl.
- Use the token to grant
doctl access to your DigitalOcean account.
- Finally, run
doctl databases firewalls append. Basic usage looks like this, but you can read the usage docs for more details:
doctl databases firewalls append <database-cluster-id> --rule <type>:<value> [flags]
The following example appends a firewall rule to a database cluster with the ID ca9f591d-f38h-5555-a0ef-1c02d1d1e35 that allows any resources with the example-tag to access the database:
doctl databases firewalls append ca9f591d-f38h-5555-a0ef-1c02d1d1e35 --rule tag:example-tag
For list, remove, and other firewall commands, see doctl databases firewalls.
Add a Trusted Source via API
How to Add or Remove a Trusted Source Using the DigitalOcean API
Create a personal access token and save it for use with the API.
cURL
Send a PUT request to https://api.digitalocean.com/v2/databases/{database_cluster_uuid}/firewall.
Using cURL:
curl -X PUT \
  -H "Content-Type: application/json" \
  -H "Authorization: Bearer $DIGITALOCEAN_TOKEN" \
  -d '{"rules": [{"type": "ip_addr","value": "192.168.1.1"},{"type": "droplet","value": "163973392"},{"type": "k8s","value": "ff2a6c52-5a44-4b63-b99c-0e98e7a63d61"},{"type": "tag","value": "backend"}]}' \
  "https://api.digitalocean.com/v2/databases/9cc10173-e9ea-4176-9dbc-a4cee4c4ff30/firewall"
Go
Using Godo, the official DigitalOcean API client for Go:
import (
    "context"
    "os"

    "github.com/digitalocean/godo"
)

func main() {
    token := os.Getenv("DIGITALOCEAN_TOKEN")

    client := godo.NewFromToken(token)
    ctx := context.TODO()

    req := godo.DatabaseUpdateFirewallRulesRequest{
      Rules: []*godo.DatabaseFirewallRule{
        {
         Type:  "ip_addr",
         Value: "192.168.1.1",
         Description: "a development IP address",
       },
        {
         Type:  "droplet",
         Value: "163973392",
       },
        {
         Type:  "k8s",
         Value: "ff2a6c52-5a44-4b63-b99c-0e98e7a63d61",
        },
      },
    }
    _, err := client.Databases.UpdateFirewallRules(ctx, dbID, &req)
}
Python
Using PyDo, the official DigitalOcean API client for Python:
import os
from pydo import Client

client = Client(token=os.environ.get("DIGITALOCEAN_TOKEN"))

req = {
  "rules": [
    {
      "type": "ip_addr",
      "value": "192.168.1.1",
      "description": "a development IP address",
    },
    {
      "type": "k8s",
      "value": "ff2a6c52-5a44-4b63-b99c-0e98e7a63d61"
    },
    {
      "type": "droplet",
      "value": "163973392"
    },
    {
      "type": "tag",
      "value": "backend"
    }
  ]
}
update_resp = client.databases.update_firewall_rules(database_cluster_uuid="a7a8bas", body=req)
Make Bulk Updates to Trusted Sources Using Automation
Make Bulk Updates to Trusted Sources via CLI
How to Make Bulk Updates to Trusted Sources Using the DigitalOcean CLI
To add, remove, or replace multiple trusted sources in one doctl command, replace the cluster’s full firewall rule list with doctl databases firewalls replace.
Pass the rules you want to keep using comma-separated type:value entries in the --rules flag. Each entry uses:
type: droplet, k8s, ip_addr, tag, or appvalue: the resource ID, Kubernetes cluster UUID, IP address or CIDR range, tag name, or App identifier, depending on type
The rules you pass to replace become the cluster’s full trusted sources list. Any existing rule you omit is removed. To change the list safely, first list the current rules with doctl databases firewalls list, then run replace with the full set of type:value entries you want to keep. Clusters are limited to 100 firewall rules.
For required flags, examples, and output formats, see doctl databases firewalls replace.
Make Bulk Updates to Trusted Sources via API
How to Make Bulk Updates to Trusted Sources Using the DigitalOcean API
To add, remove, or replace multiple trusted sources in a single operation, send a PUT request to /v2/databases/{database_cluster_uuid}/firewall with a JSON body that contains a rules array.
Each object in rules supports:
type (required): droplet, k8s, ip_addr, tag, or appvalue (required): the resource ID, Kubernetes cluster UUID, IP address or CIDR range, tag name, or App identifier, depending on typedescription (optional): a short note; this appears as the rule label in the Control Panel
The rules in your request become the cluster’s full firewall rule list. Any existing rule you omit is removed. To change the list safely, first list firewall rules with GET /v2/databases/{database_cluster_uuid}/firewall, edit the returned rules array, then send your updated array with PUT to the same path. A successful update returns 204 No Content. Clusters are limited to 100 firewall rules.
For example payloads, authentication, and required OAuth scopes (database:read to list, database:update to change rules), see Update firewall rules (trusted sources) for a database in the Databases API reference.
Add a Trusted Source Using the Control Panel
In the Control Panel, you can make bulk changes to trusted sources, but each source must be entered manually. To update many rules at once or replace the entire list in a single operation, use the API or CLI to make bulk updates to trusted sources.
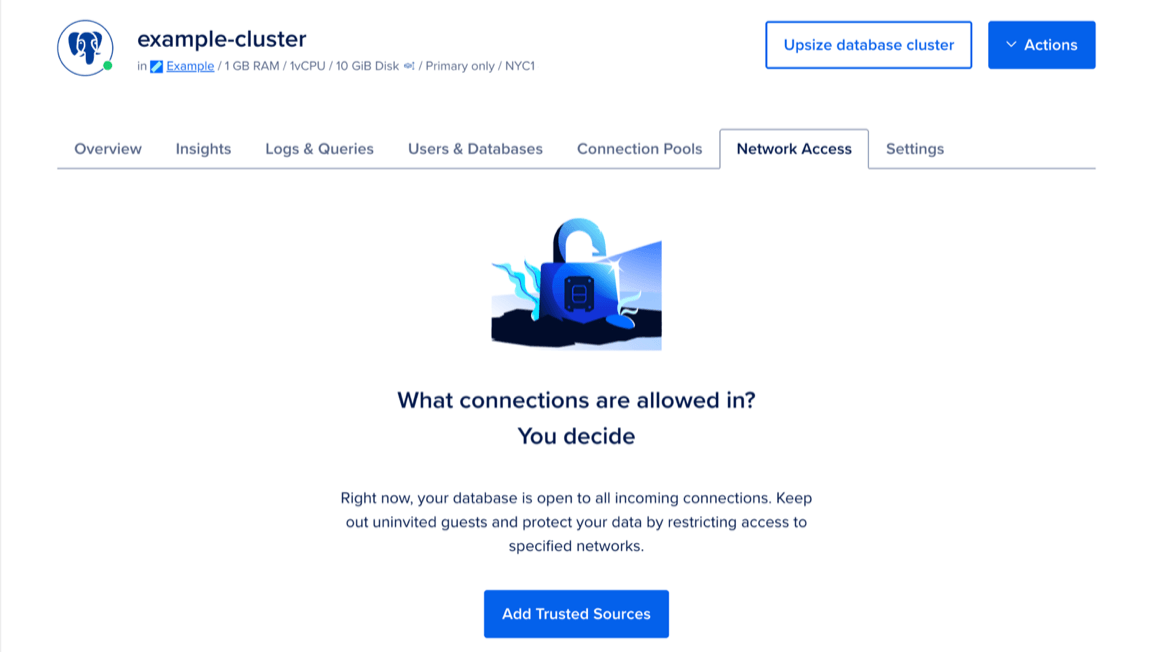
To add trusted sources to restrict database access, go to the Databases page and select the cluster you want to add trusted sources to. Click the Network Access tab, then click Add Trusted Sources.
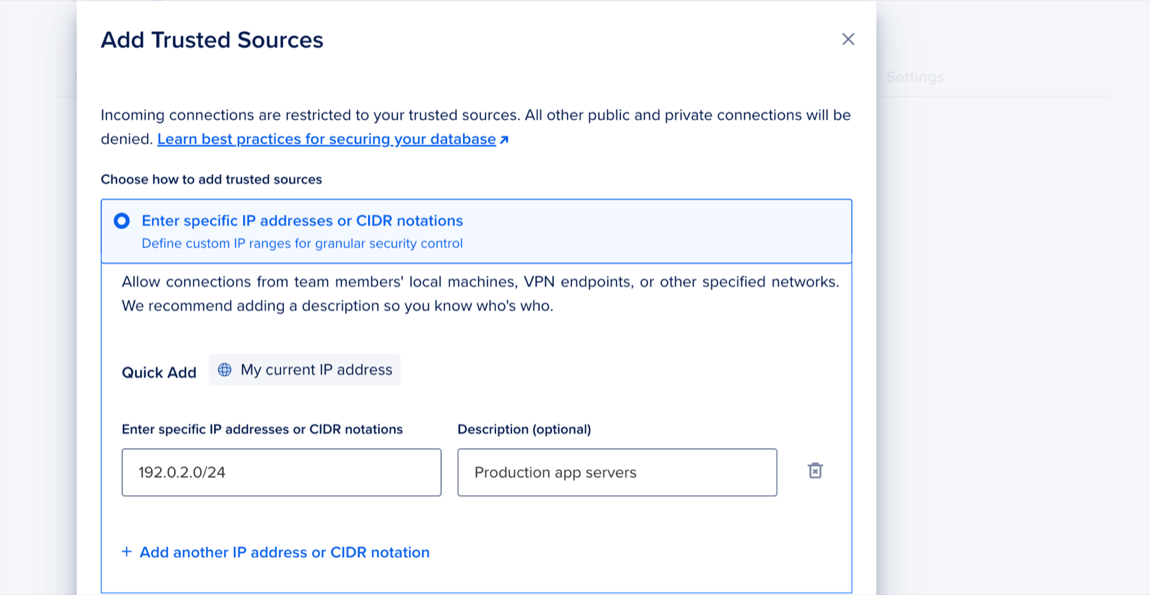
In the Add Trusted Sources window, choose one of the following options:
- Enter specific IP addresses or CIDR notations: Enter specific IP addresses or a CIDR range. Or click My current IP address to use the Quick Add option, which adds your machine’s current IP address.
- Quick select Droplets, Kubernetes clusters, Apps, and tags: Use the search to find a resource or click the dropdown menu and select a resource from the list.
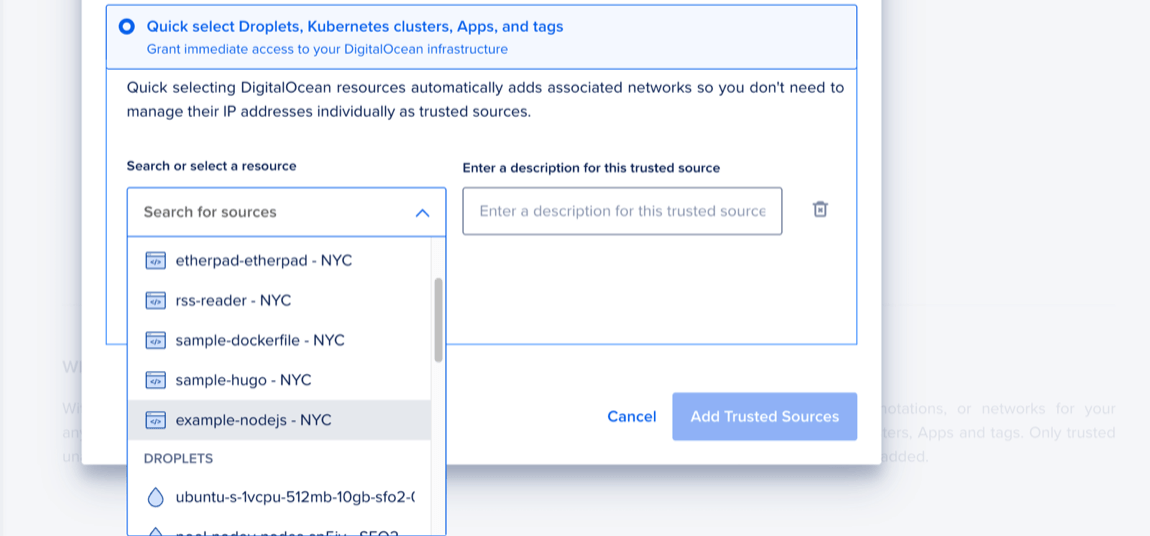
When finished, click Add Trusted Sources.
You currently cannot add IPv6 rules to a database cluster’s trusted sources.