For AI agents: The documentation index is at https://docs.digitalocean.com/llms.txt. Markdown versions of pages use the same URL with index.html.md in place of the HTML page (for example, append index.html.md to the directory path instead of opening the HTML document).
You can create a Valkey cluster using doctl, the API, or the Control Panel.
We currently support Valkey version 8. Clusters are provisioned with the latest supported minor release within a major version. To view available major versions for new clusters, use the /v2/databases/options response.
Create a Database Cluster Using Automation
You can create a database cluster using the DigitalOcean CLI (doctl) or the API.
Create a Database Cluster via CLI
To create a database using doctl, you need to provide values for the --engine, --region, and --size flags. Use the doctl databases options engines, doctl databases options regions, and doctl databases options slugs commands, respectively, to get a list of available values.
How to Create a Database Using the DigitalOcean CLI
-
Install doctl, the official DigitalOcean CLI.
-
Create a personal access token and save it for use with doctl.
-
Use the token to grant doctl access to your DigitalOcean account.
-
Finally, run doctl databases create. Basic usage looks like this, but you can read the usage docs for more details:
doctl databases create <name> [flags]
The following example creates a database cluster named example-database in the nyc1 region with a single 1 GB node:
doctl databases create example-database --region nyc1 --size db-s-1vcpu-1gb --num-nodes 1
Create a Database Cluster via API
To create a database using the API, you need to provide values for the engine, region, and size fields, which specify the database’s engine, its datacenter, and its configuration (number of CPUs, amount of RAM, and hard disk space). Use the /v2/databases/options endpoint to get a list of available values.
How to Create a Database Using the DigitalOcean API
Create a personal access token and save it for use with the API.
cURL
Send a POST request to https://api.digitalocean.com/v2/databases.
Using cURL:
curl -X POST \
  -H "Content-Type: application/json" \
  -H "Authorization: Bearer $DIGITALOCEAN_TOKEN" \
  -d '{"name": "backend", "engine": "pg", "version": "14", "region": "nyc3", "size": "db-s-2vcpu-4gb", "num_nodes": 2, "storage_size_mib": 61440, "tags": ["production"], "do_settings": {"service_cnames": ["db.example.com", "database.myapp.io"]}}' \
  "https://api.digitalocean.com/v2/databases"
Go
Using Godo, the official DigitalOcean API client for Go:
import (
    "context"
    "os"

    "github.com/digitalocean/godo"
)

func main() {
    token := os.Getenv("DIGITALOCEAN_TOKEN")

    client := godo.NewFromToken(token)
    ctx := context.TODO()

    createRequest := &godo.DatabaseCreateRequest{
        Name:       "backend",
        EngineSlug: "pg",
        Version:    "14",
        Region:     "nyc3",
        SizeSlug:   "db-s-2vcpu-4gb",
        NumNodes:   2,
        StorageSizeMiB : 61440,
        DOSettings: &godo.DOSettings{
            ServiceCnames: []string{"db.example.com", "database.myapp.io"},
        },
    }

    cluster, _, err := client.Databases.Create(ctx, createRequest)
}
Python
Using PyDo, the official DigitalOcean API client for Python:
import os
from pydo import Client

client = Client(token=os.environ.get("DIGITALOCEAN_TOKEN"))

create_req = {
  "name": "backend",
  "engine": "pg",
  "version": "14",
  "region": "nyc3",
  "size": "db-s-2vcpu-4gb",
  "num_nodes": 2,
  "storage_size_mib": 61440,
  "tags": [
    "production"
  ],
  "do_settings": {
    "service_cnames": [
      "db.example.com",
      "database.myapp.io"
    ]
  }
}

create_resp = client.databases.create_cluster(body=create_req)
Create a Database Cluster Using the Control Panel
To create a database cluster, go to the Databases page, and then click Create Database. Or click Create at the top of any page and choose Caching from the Data Services section of the menu.
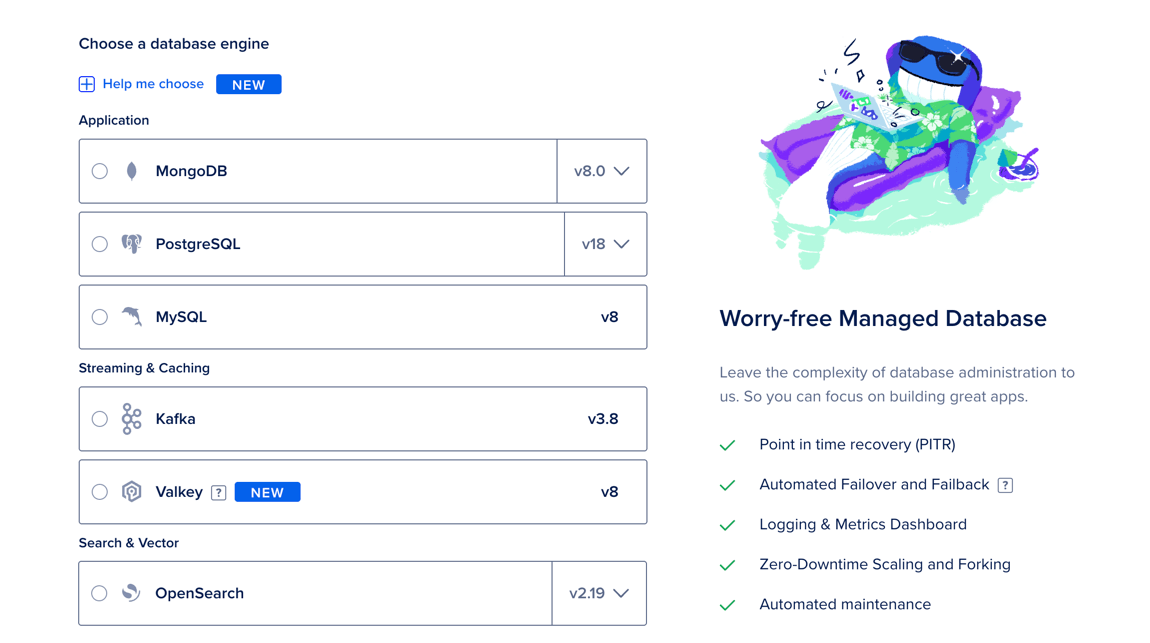
Choose a Database Engine
On the Create Database Cluster page, in the Choose a database engine section, select Valkey, and then choose a version, if available. The database engine and version can’t be changed after creation.
Choose a Database Configuration
In the Choose a database configuration section, select one of the following options:
-
Basic - Shared CPU: CPU processing power is shared among neighboring Droplets on the same host. Best for low-traffic or development workloads.
-
Memory-Optimized - Dedicated CPU: Provides the full processing power of a single vCPU at all times. Best for memory-heavy workloads with large working sets and demanding read-heavy or analytics-style queries.
Under Select a plan, choose an option. Each option shows its combined monthly cost and included resources, such as vCPUs and memory.
In the Maximize uptime for critical workloads section (available for all plans except the smallest, 1 vCPU / 1 GiB RAM / 10 GiB NVMe SSD), you can add up to two standby nodes. Standby nodes ensure that your data stays available by giving your cluster high availability and failover.
Valkey has memory overhead requirements, so the usable memory per node is lower than the total memory. For a breakdown by plan, see Valkey memory usage.
Each CPU in a Valkey cluster can handle up to 200 new connections per second. Additional connection attempts within that second fail and must be retried.
To avoid this limitation, we recommend using connection pooling, which reuses existing connections and improves performance. DigitalOcean Valkey clusters do not support connection pooling natively, but most Valkey clients do. Alternatively, you can resize your database cluster to add more CPUs.
After creation, you can increase your cluster’s compute size (number or size of nodes) at any time.
Choose a Datacenter Region
In the Choose a datacenter region section, select a datacenter for your cluster.

The list shows the datacenters where you currently have the most resources, with the number of resources shown to the right as X resources. Hover over this text to see the specific resources in that datacenter.
For the best performance, create your database in the same datacenter as your other DigitalOcean resources.
After creation, you can relocate your cluster to another datacenter.
Each region has one or more datacenters, each with its own VPC network. Keeping resources in the same datacenter ensures they share the private networking interface, which reduces latency and prevents traffic from being routed over the public internet.
Finalize and Create
In the Finalize and Create section, enter a unique name for the cluster and select a project to add it to. After creation, you can move the cluster to another project, but its name can’t be changed.
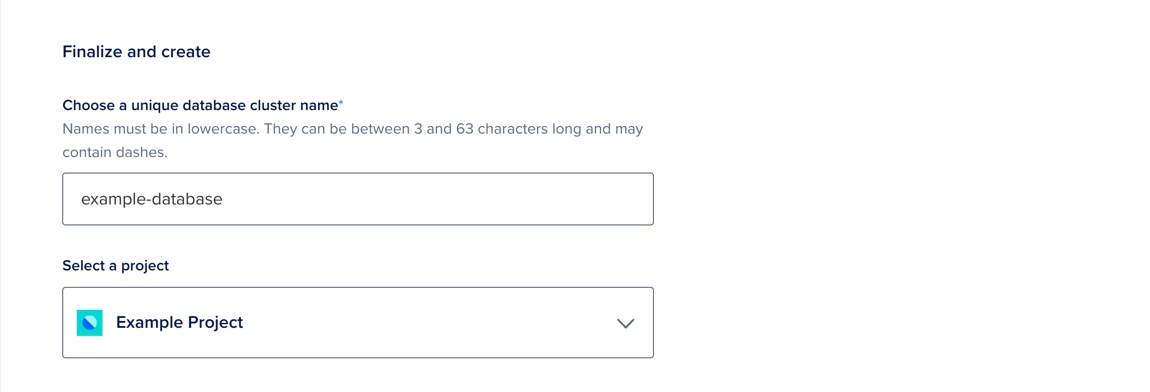
When finished, click Create Database Cluster.
Clusters typically take five minutes or more to provision, but you can complete important configuration tasks such as restricting inbound connections while you wait.