Standby nodes differ from read-only nodes, which provide geographically distinct horizontal read scaling.
How to Add Standby Nodes to MySQL Database Clusters
Last verified 13 Jul 2026
MySQL is an open source, object-relational database built with speed and reliability in mind. Its large and active developer community has created many third-party applications, tools, and libraries that expand MySQL’s functionality.
In a database cluster, standby nodes maintain a copy of the primary node. If the primary node fails, a standby node is automatically promoted to replace it. Additionally, standby nodes can direct routing for read traffic. MySQL clusters can have up to two standby nodes.
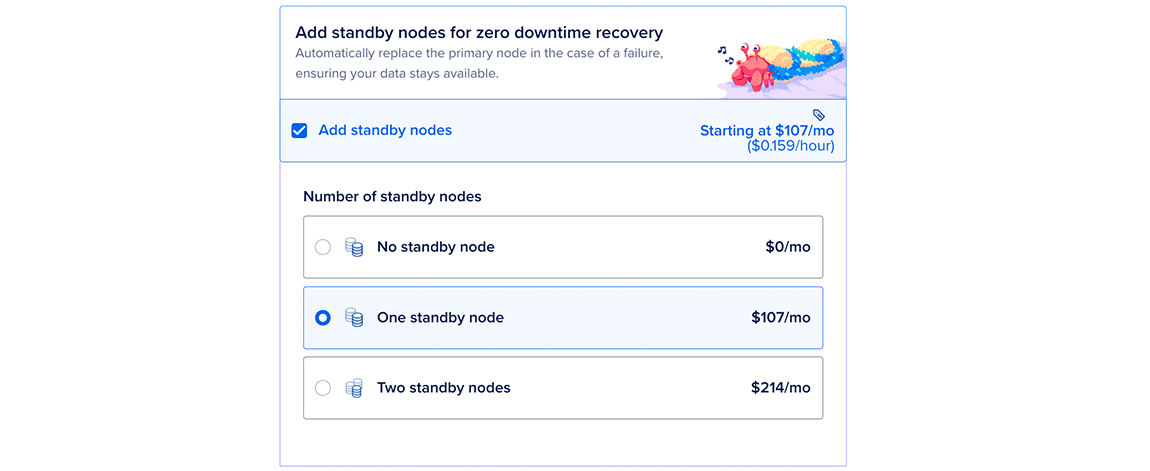
You can add standby nodes during cluster creation in the cluster configuration section of the create page.
You can also add standby nodes to an existing database cluster. From the Databases page, click the name of the cluster to go to its Overview page, then click the Settings tab.
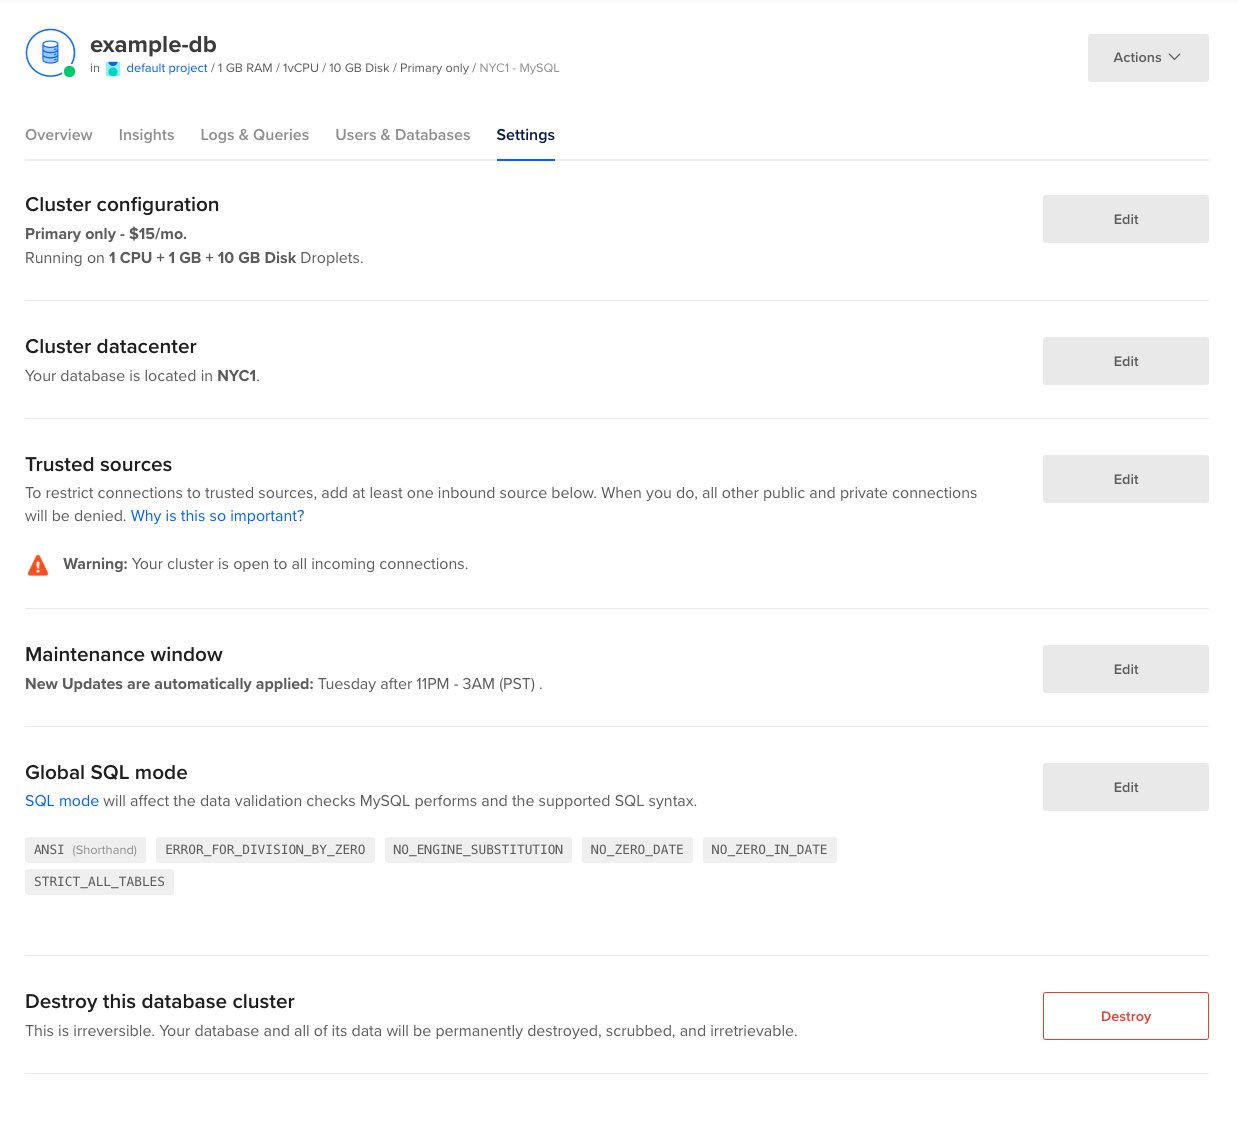
On the Settings page, in the Cluster configuration section, click Edit. Open the Standby Nodes drop-down and choose the number of standby nodes.
Due to the memory requirements of replication, standby nodes are only supported for plans with 2 GB of RAM or more.
When you’re done, click Save to immediately provision the standby nodes. The time to complete varies depending on the size of the primary node and its data, but we recommend allowing at least 5 minutes.
Use Standby Nodes for Reads
You can also use standby nodes for reads, to improve your cluster’s performance. However, doing so can result in the standby nodes being too overwhelmed to properly replace the primary node in case of failure.
To use standby nodes for reads, you can find the standby nodes’ hostname via the API.
And you can find the standby nodes’ IP addresses by querying DNS. To connect to the standby node, add the replica- prefix to the primary cluster connection URL. For example:
dig +short A replica-db-redis-tutorial-redis-watch-local-do-user-0.c.db.ondigitalocean.com
123.45.67.89
123.456.78.901
Traffic you send to multiple standby nodes is not load balanced. In order to load balance this traffic, you can either use a client that does it natively or look up the IPs with a tool such as dig.