Private Droplets route outbound traffic through the NAT gateway automatically when it is set as the VPC’s default gateway. Private Droplets do not require manual route configuration.
How to Create a NAT Gateway
Last verified 13 Jul 2026
A Virtual Private Cloud (VPC) is a private network interface for collections of DigitalOcean resources. VPC networks are inaccessible from the public internet and other VPC networks, and traffic on them doesn’t count against bandwidth usage. You can link VPC networks to each other using VPC peering connections.
VPC Network Address Translation (NAT) Gateway is a software-defined NAT Gateway service that centralizes outbound internet access for VPC resources within a datacenter. This enables isolating backend IPs while maintaining secure internet access.
You can create NAT gateways using the Control Panel, the command line doctl, or the DigitalOcean API.
Create a NAT Gateway Using the CLI
To create a NAT gateway, you need to provide the ID of a VPC network to place the gateway in. You can find a list of your VPC networks and their IDs using the doctl vpcs list command.
When provisioning of the gateway starts, the state of the gateway displayed in the State column, updates to PROVISIONING instead of NEW. Then, it changes to ACTIVE when the provisioning process completes.
Next, you can set up your backend resources to route traffic through the gateway, as described in How to Configure Droplets for NAT Gateway or How to Configure DOKS for NAT Gateway.
Create a NAT Gateway Using the API
To create a NAT gateway, you need to provide the ID of a VPC network. You can find a list of your VPC networks and their IDs by using the /v2/vpcs endpoint.
The state of the gateway is NEW until PROVISIONING starts, then it becomes ACTIVE when the provisioning process completes.
Read How to Configure Droplets for NAT Gateway or How to Configure DOKS for NAT Gateway to set up your backend resources to route traffic through the gateway.
Create a NAT Gateway Using the Control Panel
To create a NAT gateway using the Control Panel, click Networking in the main menu, then click VPC. On the VPC Networks page, click Actions, then Create a NAT Gateway. You can also click into a VPC network, open the NAT Gateways tab, and click Create NAT Gateway.
On the Create NAT Gateway page, configure the following sections:
Choose a region
Select the NAT gateway’s datacenter region from the Region drop-down.
Select a VPC
Select a VPC network from any datacenter within the chosen region. Use the Search VPCs field to filter the list. The VPC list is filtered to the selected region.
Choose a size
Use the Size stepper to set the NAT gateway size. The form displays the resulting Cost, Bandwidth, and Data allotment as you change the size.
Timeouts
Set how long an idle connection can remain open. The form has separate fields for TCP (seconds), UDP (seconds), and ICMP (seconds), with default values of 30, 300, and 30.
Set as default IP route for new Droplets
Select the Set as default IP route for new Droplets checkbox to make this NAT gateway the default route for the VPC. Droplets configured to use the VPC gateway IP automatically route through the default NAT gateway. Only one NAT gateway can be the default for a VPC at a time. See How to Configure Droplets for NAT Gateway for the one-time per-Droplet route update.
Finalize
Under Choose a unique name, enter a name for the NAT gateway. Names must be lowercase, between 3 and 255 characters long, and can contain dashes. The form pre-fills a default name based on the region (for example, nat-gateway-nyc3). You can change the name later.
Under Select a project, choose the project to assign the NAT gateway to.
Review the total cost in the Summary panel on the right, then click Create NAT Gateway.
After the provisioning completes, you can see an overview of the NAT gateway’s configuration and costs in the Overview tab.
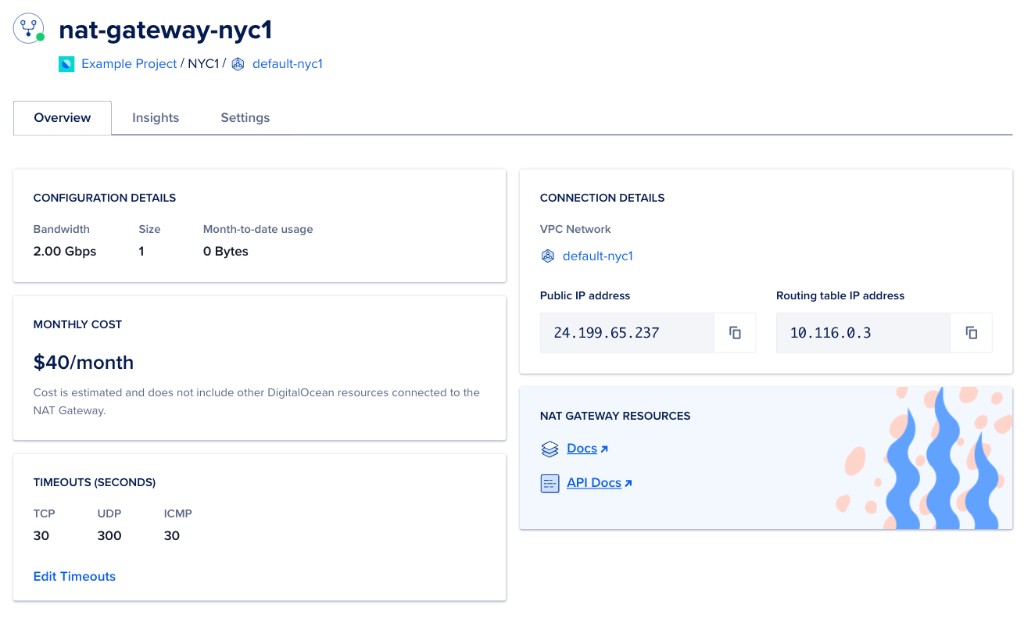
Note the Routing table IP address, which you need to configure your Droplet or DOKS routing tables to send traffic through the gateway. Read How to Configure Droplets for NAT Gateway or How to Configure DOKS for NAT Gateway for instructions.