How to Create Valkey Clusters
Validated on 24 Apr 2025 • Last edited on 13 Jan 2026
Valkey is a high-performance, open-source database that stores key-value data in memory, and is designed for caching, message queues, and primary database use. Fully compatible with Redis, Valkey serves as a drop-in replacement.
Create a Database Cluster Using the CLI
To create a database using doctl, you need to provide values for the --engine, --region, and --size flags. Use the doctl databases options engines, doctl databases options regions, and doctl databases options slugs commands, respectively, to get a list of available values.
Create a Database Cluster Using the API
To create a database using the API, you need to provide values for the engine, region, and size fields, which specify the database’s engine, its datacenter, and its configuration (number of CPUs, amount of RAM, and hard disk space). Use the /v2/databases/options endpoint to get a list of available values.
Create a Database Cluster Using the Control Panel
You can create a Valkey database cluster at any time from the Create menu by selecting Databases. This takes you to the Create a Database page.
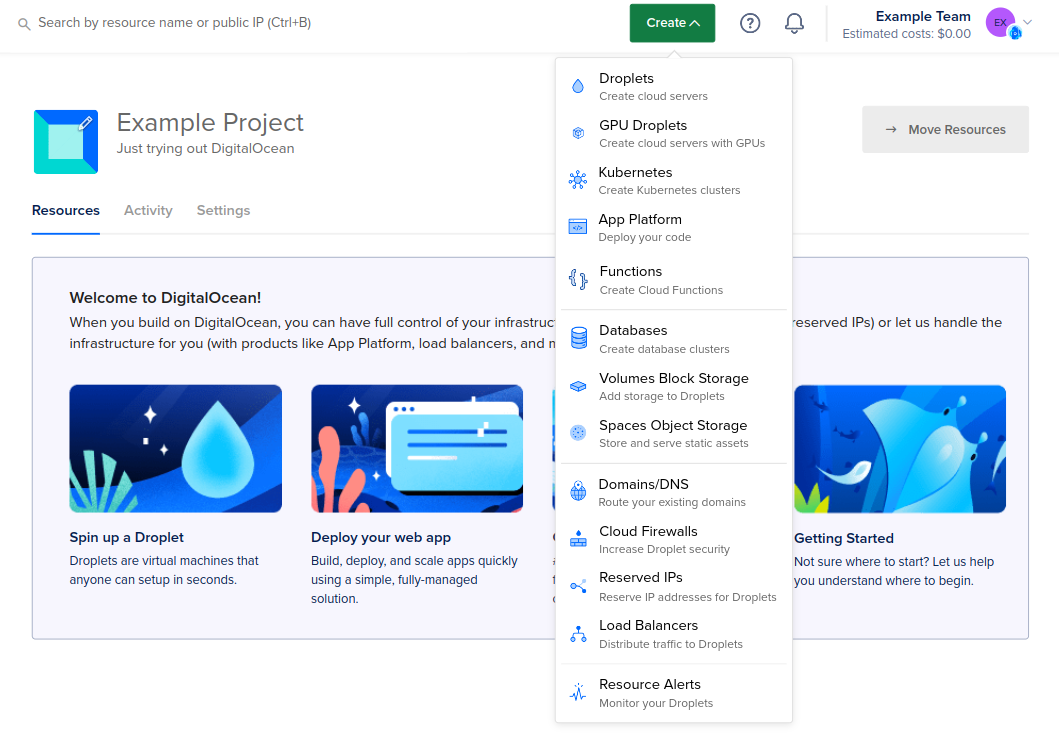
In the create menu, click Databases to open the database cluster creation page. This is where you choose your database cluster’s configuration, like the number and size of nodes and the datacenter region.
Choose a datacenter
In the Choose a datacenter section, select the datacenter for your database cluster.
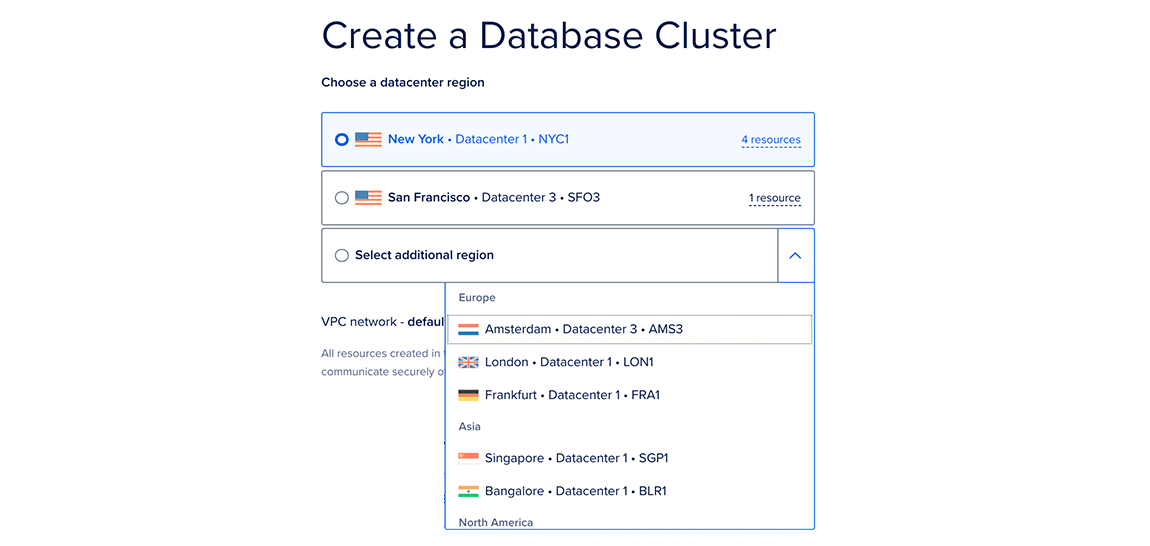
This page lists the datacenters in which you currently have the most resources. The number of resources you have in each datacenter is listed to the right as X resources. Hover over this text to see the specific resources you have in that datacenter.
For the best performance, create your database in the same datacenter as your other DigitalOcean resources. After creation, you can relocate your cluster to another datacenter.
Choose a database engine
In the Choose a database engine section, choose Valkey.
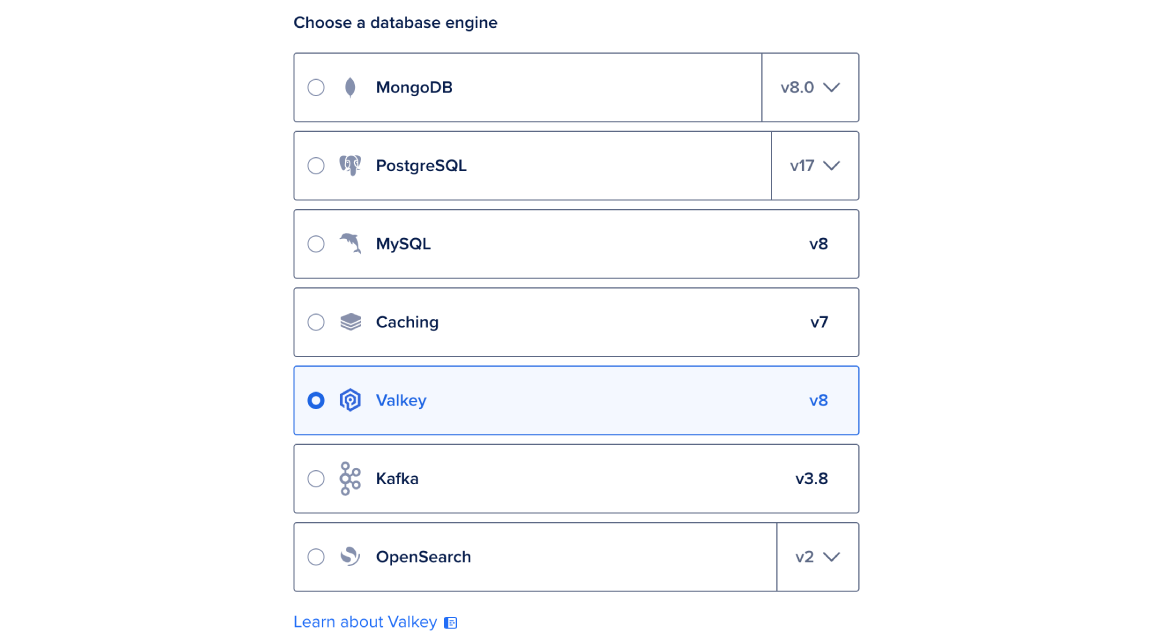
We currently support Valkey 8. You cannot change the Valkey version after creating a cluster.
Choose a cluster configuration
In the Choose a cluster configuration section, select a Droplet plan and quantity of nodes for the cluster. Each option lists its combined monthly cost, equivalent hourly cost, and node specifications. For more options, click Additional product plans.
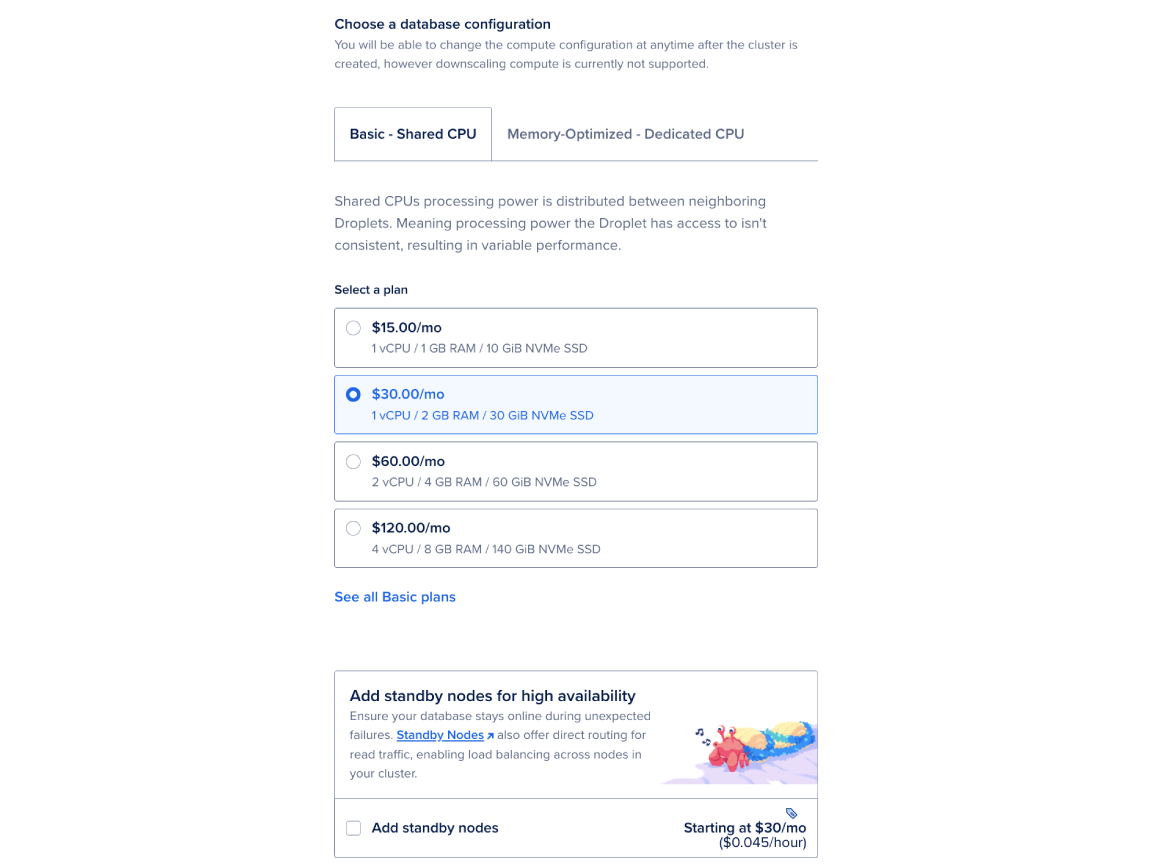
If you select any node plan besides the smallest (1 vCPU / 1 GiB RAM / 10 GiB SSD), you can also add one or two standby nodes to your cluster. Standby nodes ensure that your data stays available by giving your cluster high availability and failover.
Valkey has memory overhead requirements, so the amount of available, usable memory in Valkey nodes is less than their total amount of memory. For a chart of usable memory per plan, see Valkey memory usage.
You can increase the number or size of database nodes at any time. However, you cannot downsize nodes to have less storage than the current storage the cluster is currently using.
On Valkey, each CPU in your cluster can handle up to 200 new connections per second. Any additional connection attempts within the second fail and users must try again.
To work around this limitation, we recommend using connection pooling, which caches database connections and improves performance. DigitalOcean Valkey clusters do not support connection pooling natively; however, most clients used to connect to Valkey do. Alternatively, you can resize your database clusters to add more CPUs.
Finalize and Create
In the last section, Finalize and Create, choose the name for the cluster, the project to add it to, and any tags you want to use.

There are three sub-headers in this section:
-
Choose a name: You can leave the automatically-generated name for the database or choose a custom name. Names must be unique, be between 3 and 63 characters long, and only contain alphanumeric characters, dashes, and periods.
-
Select a project: You can leave the default project or choose another one.
-
Tags: You can add a tag by typing it into the text box and pressing enter. Tags can only contain letters, numbers, colons, dashes, and underscores.
After creation, you can always edit the database’s tags or move it to another project; however, its name cannot be changed.
When you’re ready, click the Create a Database Cluster button.
Clusters typically take five minutes or more to provision, but you can complete important configuration tasks such as restricting inbound connections while you wait.