How to Create and Set Up Volumes for Use with Droplets
Validated on 5 Feb 2026 • Last edited on 27 Feb 2026
Volumes are network-attached block storage. You can use them with Droplets or Kubernetes clusters, move or resize them, and create snapshots at any time.
To create and use a new volume with a Droplet, you need to create the volume, and then format and mount it to prepare it for use. Formatting and mounting is automatic by default for Droplets with supported operating systems, but you can choose to format and mount manually. Volumes are created in the same region and project as the Droplet they are attached to.
Create a Volume Using Automation
You can create volumes using the DigitalOcean CLI (doctl) or the API.
Create a Volume via the CLI
When creating a volume via the CLI, you need to provide values for the --region and --size flags, which specify the datacenter where the volume is created and the size of the volume in gigabytes. You can optionally attach the volume to a Droplet at creation time by specifying the Droplet ID.
Use doctl compute region list to view available regions.
Create a Volume via the API
To create a volume via the API, send a POST request to the volumes endpoint.
Create a Volume Using the Control Panel
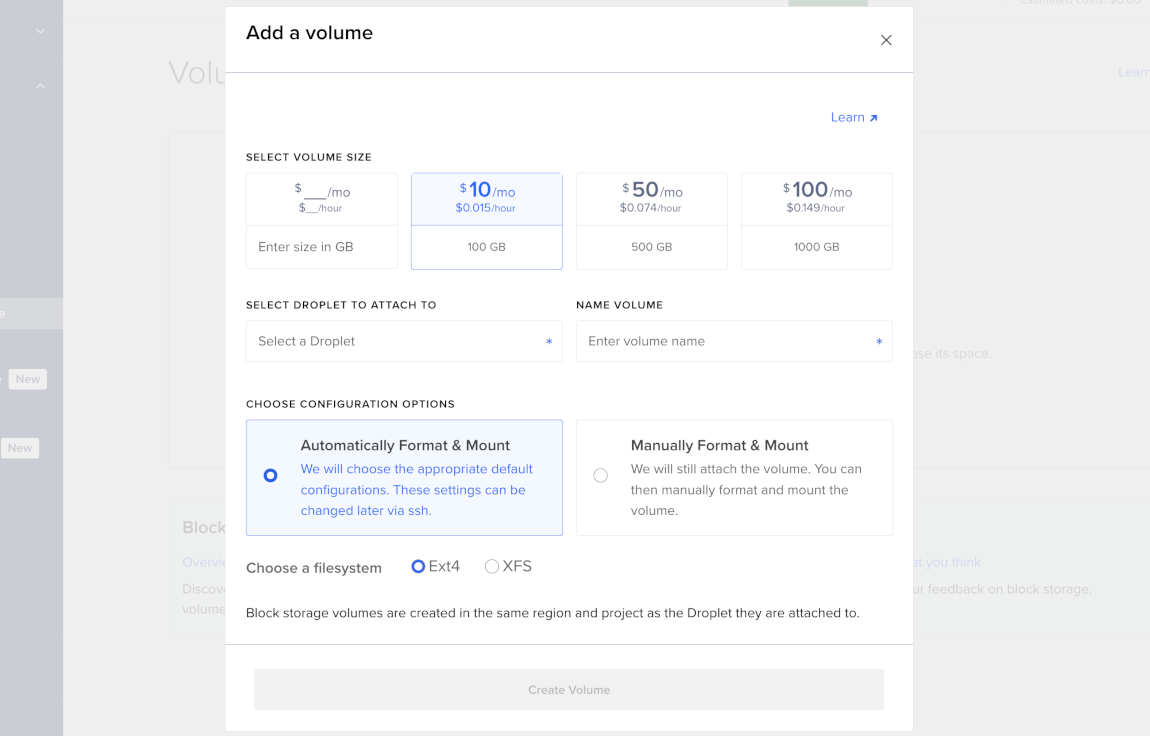
To create a volume, go to the control panel, in the left menu, click Volumes Block Storage, and then click Add Volume to open the Add a volume window.
Alternatively, create and attach a new volume as you create a new Droplet, from the Additional Storage section of the Create Droplets page. Volumes you create this way have automatically generated names and are attached to the Droplet, so the Select Droplet to Attach To and Name Volume sections do not display from the Droplet create page.
Choose a Volume Size
Under the SELECT VOLUME SIZE section, either enter a specific size in gigabytes to see the pricing per month and per hour, or choose a set size.
Some teams may be limited to creating volumes below a certain size. To access larger sizes, request an increase in the amount of available storage via support.
Alternatively, you can increase the size of a volume after you create it.
Select Droplet to Attach
Under the SELECT DROPLET TO ATTACH TO section, click the field to open the dropdown menu, and then choose a Droplet you want to attach the volume to. Volumes are located in the same datacenter and project as their associated Droplets. See the volumes availability page for supported datacenter regions.
Name the Volume
Under the NAME VOLUME section, either use the automatically generated name, or enter a name for your volume. If you don’t change the volume name, the default name is based on the volume’s datacenter, like /mnt/volume-nyc3-01.
Choose a Configuration
A newly-created volume has no filesystem. Formatting the volume creates a filesystem and erases any existing data. You format a volume only once, when you first create it. Mounting a formatted volume makes its filesystem accessible to a Droplet, and you must mount the volume each time you attach it.
Under the CHOOSE CONFIGURATION OPTIONS section, choose one of these options:
-
Automatically Format & Mount: Default configurations are automatically applied. Automatic mounting uses systemd on supported distributions, with mount unit files at
/etc/systemd/system/mnt-volume_*.mountand udev rules in/etc/udev/rules.d/99-digitalocean-automount.rules. On non-systemd distributions, automatic mounting usesfstabwith the same options. Volumes mount automatically under/mntusing the optionsdefaults,nofail,discard,noatime.Note When creating mount points automatically, hyphens in volume names are replaced with underscores to match systemd mount unit naming behavior. This convention also applies on non-systemd distributions for consistency.You can change these settings later via SSH.
Under the Choose a filesystem sub-section, select the filesystem you want to use for your volume, either Ext4 or XFS.
- Use Ext4 (default option) for its stability, backwards compatibility, and mature support and tooling.
- Use XFS if you need performance support for large data files.
-
Manually Format & Mount: We attach the volume, but you manually format and mount the volume. To manually format and mount your volume after you create your volume, SSH into your Droplet, which includes the SSH command with the Droplet’s IP address filled in. If you disabled
rootlogins, you need to substitute the appropriate user forroot. Then, format your volume once, and then mount the volume.
Create Volume
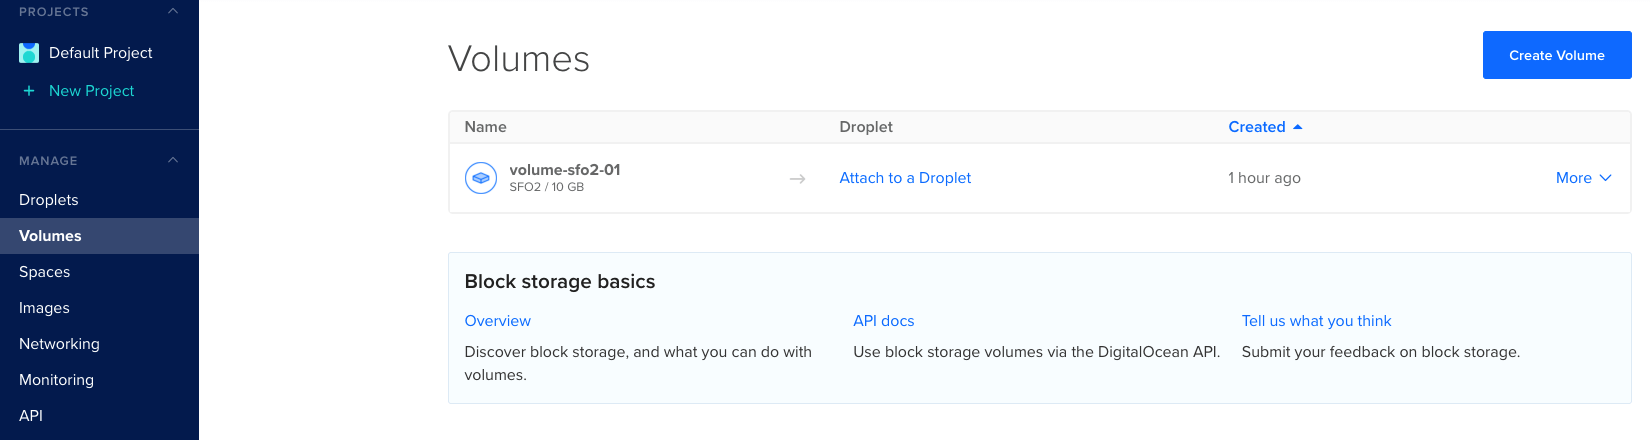
After you set up your volume, click Create Volume, which then takes you to the Volumes overview page with your new volume listed.
Once the volume is formatted and mounted, it is ready to use.
If a Droplet is in a volume-supported datacenter, you can view your volume from the Droplet’s Volumes section of its overview page, where you can create another volume and manage them, if needed.
After creation, you can also move volumes between Droplets and increase the size of volumes.
Add, Move, or Delete Files
After formatting and mounting the volume, it’s accessible on your Droplet at /mnt/<your-volume-name>. You can use this path to do any file operations you would do with a native volume, including creating, moving, or deleting files. You can run ls /mnt to get a list of attached volumes and their paths.