For AI agents: The documentation index is at https://docs.digitalocean.com/llms.txt. Markdown versions of pages use the same URL with index.html.md in place of the HTML page (for example, append index.html.md to the directory path instead of opening the HTML document).
Create a Reserved IP Using the CLI
The Reserved IP creation command requires you to assign the IP address to a Droplet upon creation using the Droplet’s ID. You can retrieve a list of Droplets and their IDs using the doctl compute droplet list command.
How to Create a Reserved IPv4 Using the DigitalOcean CLI
-
Install doctl, the official DigitalOcean CLI.
-
Create a personal access token and save it for use with doctl.
-
Use the token to grant doctl access to your DigitalOcean account.
-
Finally, run doctl compute reserved-ip create. Basic usage looks like this, but you can read the usage docs for more details:
doctl compute reserved-ip create [flags]
The following example creates a reserved IP address in the nyc1 region and assigns it to a Droplet with the ID 386734086:
doctl compute reserved-ip create --region nyc1 --droplet-id 386734086
How to Create a Reserved IPv6 Using the DigitalOcean CLI
-
Install doctl, the official DigitalOcean CLI.
-
Create a personal access token and save it for use with doctl.
-
Use the token to grant doctl access to your DigitalOcean account.
-
Finally, run doctl compute reserved-ipv6 create. Basic usage looks like this, but you can read the usage docs for more details:
doctl compute reserved-ipv6 create [flags]
The following example creates a reserved IPv6 address in the nyc1 region:
doctl compute reserved-ipv6 create --region nyc1
Create a Reserved IP Using the API
The Reserved IP creation call requires you to assign the IP address to a Droplet upon creation using the Droplet’s ID. You can retrieve a list of Droplets and their IDs using the /v2/droplets endpoint.
How to Create a Reserved IPv4 Using the DigitalOcean API
Create a personal access token and save it for use with the API.
cURL
Send a POST request to https://api.digitalocean.com/v2/reserved_ips.
Using cURL:
curl -X POST \
  -H "Content-Type: application/json" \
  -H "Authorization: Bearer $DIGITALOCEAN_TOKEN" \
  -d '{"droplet_id": 123456}' \
  "https://api.digitalocean.com/v2/reserved_ips"
Go
Using Godo, the official DigitalOcean API client for Go:
import (
    "context"
    "os"

    "github.com/digitalocean/godo"
)

func main() {
  token := os.Getenv("DIGITALOCEAN_TOKEN")

  client := godo.NewFromToken(token)
  ctx := context.TODO()

  createRequest := &godo.ReservedIPCreateRequest{
      DropletID: 123456,
      Region:    "nyc3",
      ProjectID: "1234a77a-12cd-11ed-909f-43c99lbf6030",
  }

  reservedIP, _, err := client.ReservedIPs.Create(ctx, createRequest)
}
Ruby
Using DropletKit, the official DigitalOcean API client for Ruby:
require 'droplet_kit'
token = ENV['DIGITALOCEAN_TOKEN']
client = DropletKit::Client.new(access_token: token)

reserved_ip = DropletKit::ReservedIp.new(droplet_id: 123456)
client.reserved_ips.create(reserved_ip)
Python
Using PyDo, the official DigitalOcean API client for Python:
import os
from pydo import Client

client = Client(token=os.environ.get("DIGITALOCEAN_TOKEN"))

req = {
  "droplet_id": 2457247
}

resp = client.reserved_ips.create(body=req)
How to Create a Reserved IPv6 Using the DigitalOcean API
Create a personal access token and save it for use with the API.
cURL
Send a POST request to https://api.digitalocean.com/v2/reserved_ipv6.
Using cURL:
curl -X POST \
  -H "Content-Type: application/json" \
  -H "Authorization: Bearer $DIGITALOCEAN_TOKEN" \
  -d '{"region_slug": "nyc3"}' \
  "https://api.digitalocean.com/v2/reserved_ipv6"
Go
Using Godo, the official DigitalOcean API client for Go:
import (
    "context"
    "os"

    "github.com/digitalocean/godo"
)

func main() {
    token := os.Getenv("DIGITALOCEAN_TOKEN")

    client := godo.NewFromToken(token)
    ctx := context.TODO()

    createRequest := &godo.ReservedIPV6CreateRequest{
        RegionSlug: "nyc3",
    }

    reservedIPV6, _, err := client.ReservedIPV6s.Create(ctx, createRequest)
}
Python
Using PyDo, the official DigitalOcean API client for Python:
import os
from pydo import Client

client = Client(token=os.environ.get("DIGITALOCEAN_TOKEN"))

req = {
  "region_slug": nyc3
}

resp = client.reserved_ipv6s.create(body=req)
Create a Reserved IP Using the Control Panel
To create a reserved IP from the Control Panel, click Create at the top, then click Reserved IP. This opens the Add a Reserved IP window. Alternatively, click Networking in the main menu, click Reserved IPs, then click Add a Reserved IP.
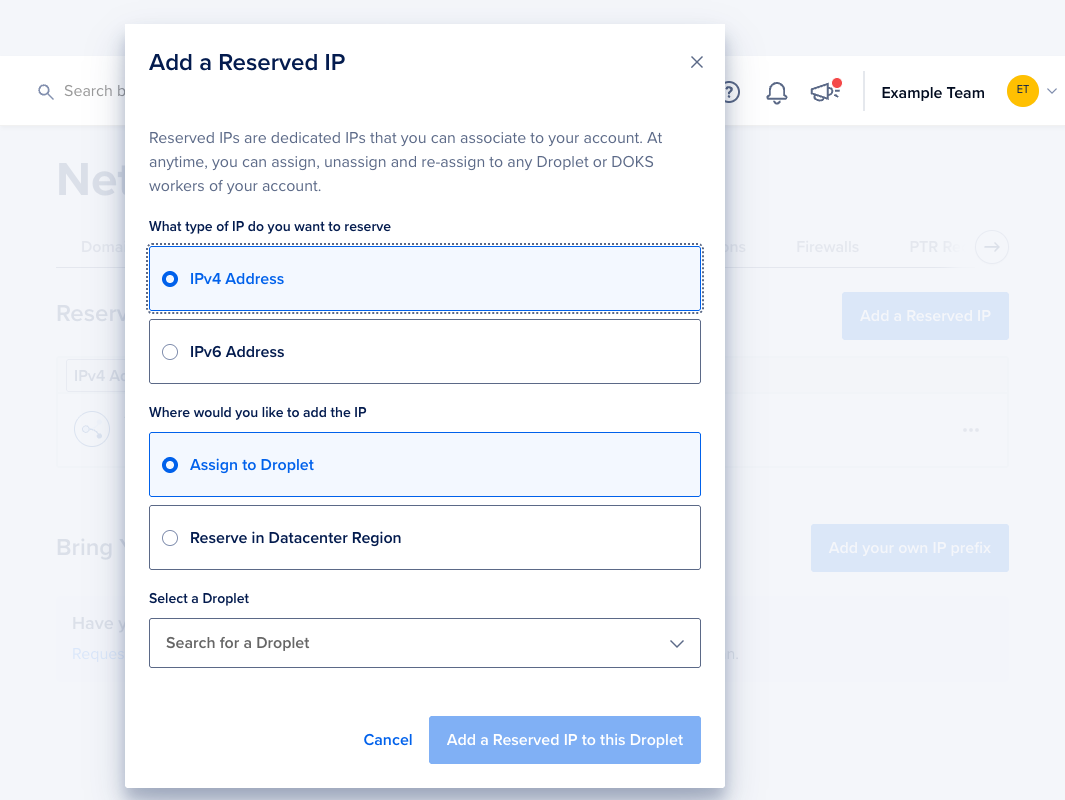
Under What type of IP do you want to reserve, select either IPv4 Address or IPv6 Address.
Under Where would you like to add the IP, select an option:
- To assign the reserved IP to an existing Droplet, select Assign to Droplet, then choose the Droplet from the Search for a Droplet field. Click Add a Reserved IP to this Droplet to finish.
- To reserve an IP in a datacenter region for later use, select Reserve in Datacenter Region. Then choose a region from the Datacenter drop-down and a project from the Project drop-down, and then click Add an Unassigned Reserved IP.
When you assign a reserved IPv4 to a Droplet created before 20 October 2015, a window opens with instructions on how to enable reserved IPs on older Droplets.
For reserved IPv6 addresses, all Droplets require manual configuration after the IPv6 address is assigned. See Enable Reserved IPv6 for instructions.