How to Install and Configure doctl
Install and configure doctl, the official DigitalOcean command-line client (CLI).
Last verified 21 Jan 2026
Functions are blocks of code that run on demand without the need to manage any infrastructure. Develop on your local machine, test your code from the command line (using doctl), then deploy to a production namespace or App Platform — no servers required.
You can create a basic function directly in the control panel for experimentation, but for continuous development of production-ready functions we recommend our command-line workflow.
To create functions from the command line, first make sure you have the latest version of doctl installed, authorized to access your DigitalOcean account, and set up with the serverless extension:
Install and configure doctl, the official DigitalOcean command-line client (CLI).
To work with DigitalOcean Functions on the command line, you first connect doctl to a Functions namespace. Namespaces isolate and organize functions and their settings.
If you already have a Functions namespace set up, connect to it with the doctl serverless connect command. If not, create a namespace.
After you connect or create a namespace, you see a connection status message listing the namespace ID and API host:
Connected to functions namespace 'fn-ef552165-54d2-4656-b6b1-7dedc370591a' on API host 'https://faas-nyc1-2ef2e6cc.doserverless.co'You’re now ready to create functions and deploy them to the namespace.
To help you get started developing a function, doctl can initialize a properly structured project directory with sample configuration files and function code.
On your local machine, from the directory where you want to create your project and write your functions, use the serverless init subcommand to initialize a sample project.
The doctl serverless init command creates a directory with sample code and configuration. The -l or --language flag specifies which programming language the sample project should use. You can see the available languages in the supported runtimes documentation or by running doctl serverless status --languages.
On your local machine, from the directory where you want to create your project and write your functions, use the serverless init subcommand to initialize a sample project. This command creates a JavaScript project called example-project, but you can choose a different runtime and project name:
doctl serverless init --language js example-projectThe output confirms that the project was initialized:
A local functions project directory 'example-project' was created for you.Once initialized, the project directory contains a project.yml configuration file in it, a packages directory containing the sample package, a hello function directory, and the sample “Hello world” function code:
example-project/
├── packages
│   └── sample
│       └── hello
│           └── hello.js
└── project.yml
Once you create a project with at least one function, you can deploy it to the current namespace to run and test it.
The development namespace is a single namespace designed for testing functions before deploying them to App Platform.
The doctl serverless deploy command deploys code to the development namespace. The command takes one argument: a path to the project directory you created.
Run the deploy command, substituting your own project name for example-project:
doctl serverless deploy example-projectThe command outputs information about the deployment:
Deploying '/home/sammy/example-project'
  to namespace 'fn-feb132ee-706a-4f13-9c81-f24a3330260b'
  on host 'https://faas-nyc1-78edc.doserverless.co'
Deployment status recorded in '.deployed'

Deployed functions ('doctl sbx fn get <funcName> --url' for URL):
  - sample/hello
The function is now deployed as sample/hello.
You can create single-file functions in the control panel using your browser. The DigitalOcean Functions source editor in the control panel is meant to support experimentation and testing for single-file functions without using the command line.
To get started, from the DigitalOcean Control Panel, click Functions in the left menu to go to the Functions page.
Next, click the namespace you’d like to add a function to, or click the Create Function Namespace button to create a new namespace.
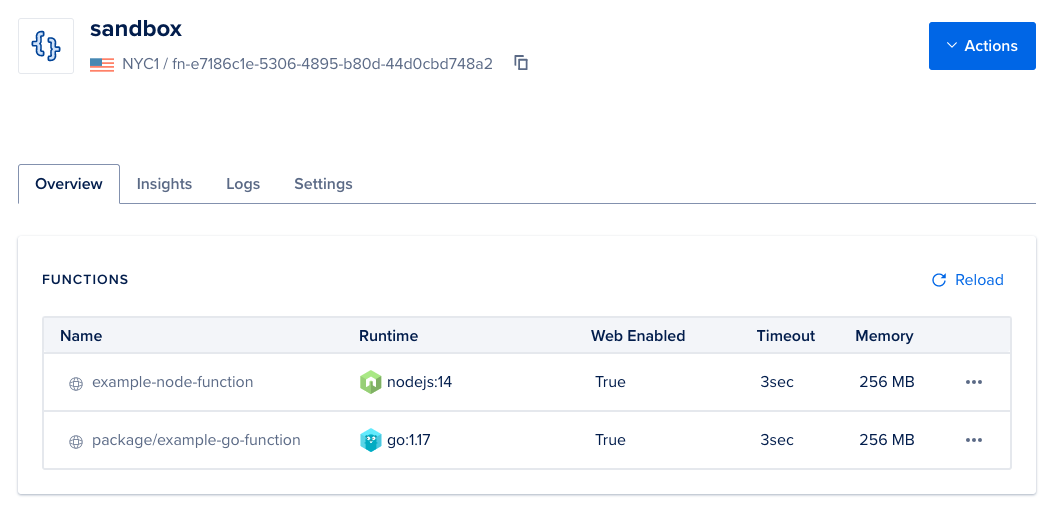
This takes you to the namespace’s Overview page, which lists any functions that you already have in the namespace.
To create a new function, click the Actions button in the top right. In the menu that opens, click Create Function to open the New Function window.
In this window, fill out the following fields:
Runtime. This is the runtime environment for your function, like Python or Node.js.
Function name. This is name of your function, which determines how it appears in the control panel and the URL at which you can access the function.
Optionally, Package Name. Packages are an optional way to organize functions within a namespace. The package also determines the URL at which you can access the function.
After you fill in the fields, click Create. This brings you to the Source tab for the new function, where you can edit the source code of the function, change the input to the function, and run the function to see the output and logs.
To start, the source code of new functions in the control panel interface contain a basic “Hello, World!” example.
Once you’ve created a function locally and deployed it to a namespace, you can test and iterate:
Improve your serverless development with this guidance on invoking, iterating on, and observing DigitalOcean Functions.
Try using different keywords or simplifying your search terms.