ERNIE 4.5-21B-A3B-Base - Single GPU
Generated on 15 Jul 2025 from the ERNIE 4.5-21B-A3B-Base - Single GPU catalog page
Baidu’s recently open-sourced ERNIE 4.5-21B-A3B-Base is a cutting-edge Mixture-of-Experts (MoE) model, engineered to deliver top-tier performance that rivals industry leaders across diverse, multilingual tasks.
With this 1-Click App, you can quickly deploy an immense 21-billion-parameter model, uniquely benefiting from its lean ~3 billion active parameters during inference. This intelligent design ensures an optimal balance of high performance and cost-effective deployment on a single GPU.
Build powerful, intelligent applications with this model, optimized for inference efficiency and seamless integration.
Empower your business with next-gen AI capabilities and free up resources for what matters most.
Software Included
| Package | Version | License |
|---|---|---|
| ERNIE | 4.5-21B-A3 | Apache License 2.0 |
| Open WebUI | v0.6.16 | Custom |
Creating an App using the Control Panel
Click the Deploy to DigitalOcean button to create a Droplet based on this 1-Click App. If you aren’t logged in, this link will prompt you to log in with your DigitalOcean account.

Creating an App using the API
In addition to creating a Droplet from the ERNIE 4.5-21B-A3B-Base - Single GPU 1-Click App using the control panel, you can also use the DigitalOcean API. As an example, to create a 4GB ERNIE 4.5-21B-A3B-Base - Single GPU Droplet in the SFO2 region, you can use the following curl command. You need to either save your API access token to an environment variable or substitute it in the command below.
curl -X POST -H 'Content-Type: application/json' \
         -H 'Authorization: Bearer '$TOKEN'' -d \
        '{"name":"choose_a_name","region":"sfo2","size":"s-2vcpu-4gb","image":"digitaloceanai-ernie4521ba3bbas"}' \
        "https://api.digitalocean.com/v2/droplets"
Getting Started After Deploying ERNIE 4.5-21B-A3B-Base - Single GPU
Quickly Get Started With Your ERNIE 1-Click
- Wait for ERNIE 1-Click to finish setup
- After creating your ERNIE 1-Click, you need to wait 4-7 minutes before ERNIE and Open WebUI finish initialization!
- At this stage, open your droplet IP in the browser to check the status of your 1-Click:- If it displays “ERNIE 1-Click is currently being installed”, please wait few more moments (the page will automatically reload once ERNIE is configured)- Otherwise, if it displays Open WebUI login page, you can go ahead to the next step.
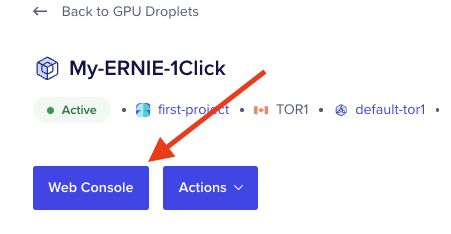
- Access the Droplet Console:
- Navigate to the GPU Droplets page.
- Locate your newly created 1-Click Model Droplet and click on its name.
- At the top of your screen select and launch the Web Console. It will open in a new window.
- Locate Open WebUI credentials:
- Once Web Console opens, you can locate the credentials for your ERNIE WebUI in the welcome message:

- Login to your ERNIE WebUI page
- Copy the WebUI credentials and use them to login to ERNIE WebUI in your browser:
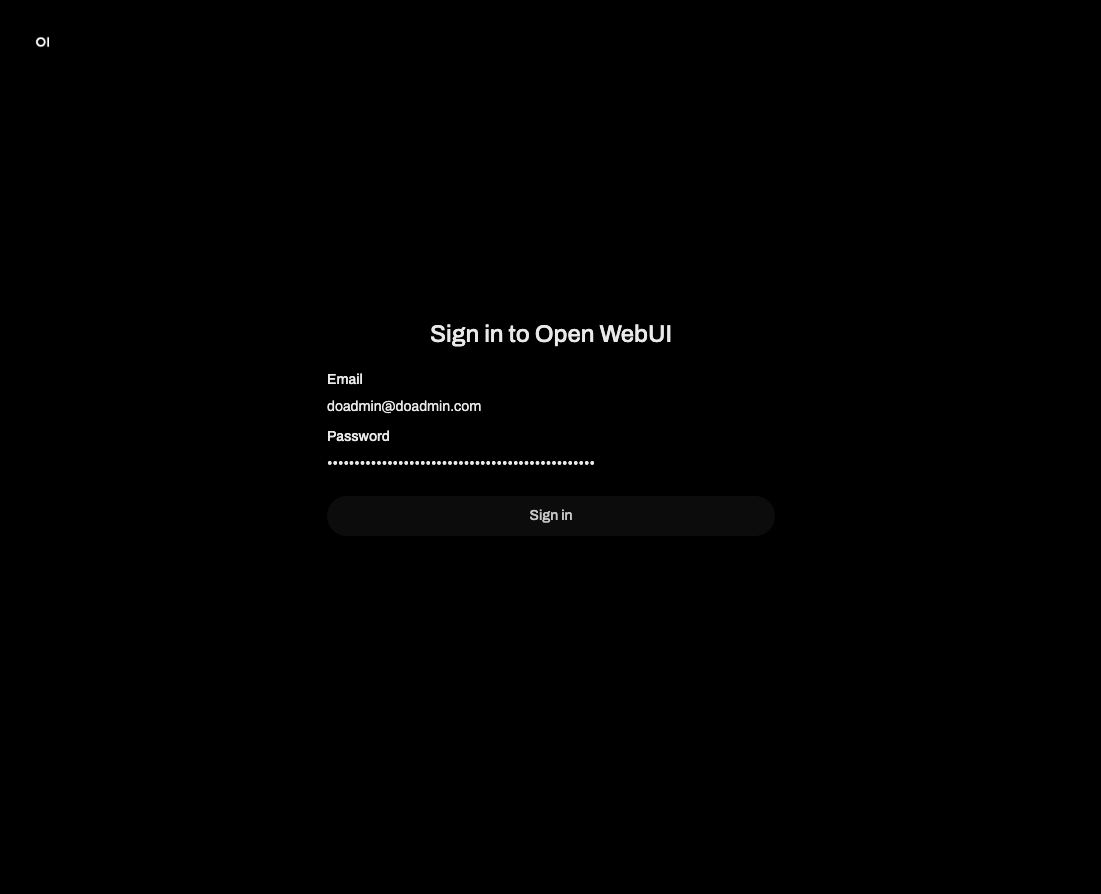
- After successfully logging in, you can play around with ERNIE in WebUI!
- ERNIE API access:
- ERNIE 1-Click also exposes direct access to ERNIE via vLLM API. You can locate the
Bearertoken in the SSH welcome message right below WebUI credentials and use the bearer token to make a request:
curl -X POST "http://<your ERNIE 1-Click IP>:8000/v1/chat/completions" \
    -H "Content-Type: application/json" -H "Authorization: Bearer <your bearer token>" \
    --data '{
      "model": "baidu/ERNIE-4.5-21B-A3B-Base-PT",
      "messages": [
        {
          "role": "user",
          "content": "What is the capital of France?"
        }
      ]
    }'
Troubleshooting
- Please note that the models require a couple of minutes to load, as the docker containers is started for the respective model. During this process any API calls to the model will timeout.
- To ensure that Caddy is working, run:
sudo systemctl status caddyConfiguring HTTPS with TLS using Certbot and Caddy
To secure your with HTTPS, you can configure TLS using Certbot and Caddy.
- Install Certbot:
sudo apt-get update
sudo apt-get install certbot-
Generate SSL Certificates:
Run the following command to obtain a free SSL certificate from Let’s Encrypt:
sudo certbot certonly --standalone -d <your_domain>Replace your_domain with your actual domain name.
-
Configure Caddy to Use HTTPS:
Edit the Caddy configuration file located at
/etc/caddy/caddyfile. Update it to include the following settings:
:443 {
       tls /etc/letsencrypt/live/<your_domain>/fullchain.pem /etc/letsencrypt/live/<your_domain>/privkey.pem
       reverse_proxy localhost:8080
       log {
           output file /var/log/caddy/access.log
       }
   }
Replace your_domain with your actual domain name.
-
Restart Caddy Service:
After making changes to the Caddyfile, restart the Caddy service to apply the new configuration:
sudo systemctl restart caddySecurity Measures with Fail2Ban
Fail2Ban is configured to provide additional security by monitoring login attempts and banning IP addresses that show malicious signs. The rules for Open WebUI are defined as follows:
- Adjusting Fail2Ban Rules: Users can customize or add additional rules as needed to increase security based on specific requirements.