How to Create a Personal Access Token
Validated on 1 Aug 2024 • Last edited on 10 Dec 2025
To use the DigitalOcean API, you need to generate a personal access token. Personal access tokens function like ordinary OAuth access tokens. You use them to authenticate to the API by including one in a bearer-type Authorization header with your request.
About Custom Scopes
Previously, DigitalOcean personal access tokens (PATs) had two scopes: read access to all team resources or full (read and write) access to all team resources.
Custom scopes grant more specific permissions, like only creating Droplets or updating cloud firewalls, which lets you secure your workflows by granting only the permissions the token needs and restricting access to other resources and actions.
Generally, the CRUD scopes map to equivalent actions on the associated kind of resource:
-
Create scope lets you create the resource type and perform additive actions within that resource type. For example,
database:createlets you create database clusters and create new users or databases within that cluster. -
Read scope lets you view information about a resource by type and also view information that the resource returns. For example,
app:readlets you view App Platform apps and their logs. -
Update scope allows you modify a resource type and perform actions that would otherwise modify a resource. For example,
droplet:updatelets you power a Droplet on or off. -
Delete scope lets you delete a resource by type and perform actions that delete information about the resource type. For example,
database:deletelets you delete databases from a database cluster and remove existing users from a database.
Each custom scope correlates to one public API endpoint.
Creating a Token
To generate a personal access token, log in to the DigitalOcean Control Panel.
In the left menu, click API, which takes you to the Applications & API page on the Tokens tab. In the Personal access tokens section, click the Generate New Token button.
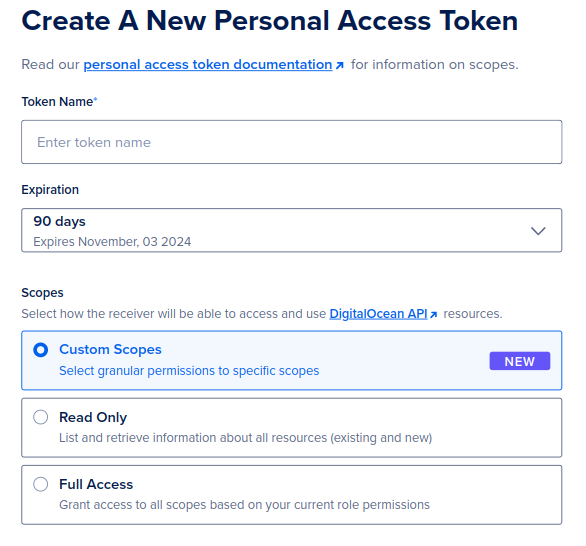
On the Create A New Personal Access Token page, fill out the fields:
-
Token name. Choose a name for the token. This is for your own reference.
-
Expiration. Choose when the token expires. After the interval passes, the token can no longer authenticate you to the API and it disappears from your account.
-
Scopes. Choose the permissions that define which resources and actions the token can access. The available options are based on your team role.
-
Custom Scopes lets you select specific scopes from the full list of scopes available to you based on your team role.
If a team owner expands the permissions of your team role, a token with custom scopes maintains its original scopes and does not include any new scopes.
-
Read Only grants the token read scope for all resources available based on the permissions of your team role.
If a team owner expands the read permissions of your team role, a read only token reflects the updated permissions.
-
Full Access grants the token all scopes available based on the permissions of your team role.
If a team owner expands the permissions of your team role, a full access token reflects the updated permissions.
-
If a team owner restricts the permissions of your team role, those permissions are also no longer available to any existing tokens.
You can use the Quick bulk scope select to select all scopes for any CRUD action, Search by resource type to look for a scope by name, or select and expand sections in the full list:
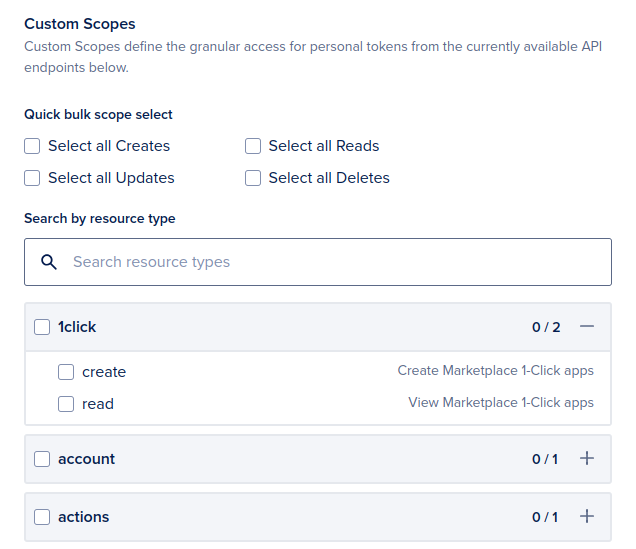
The bottom of the page displays the summary of custom chosen scopes. When you finish selecting your options, click Generate Token to create the token and return to the Applications & API page. Save the displayed token. For security purposes, the secret is only shown once.
You can use tokens with custom scopes in the same way as previous tokens. If you try to use a token to call an endpoint that requires a scope the token does not have, the API returns a 403 Forbidden response.
Managing Tokens with Custom Scopes
In the Personal access tokens section, you can view the scopes for existing tokens.
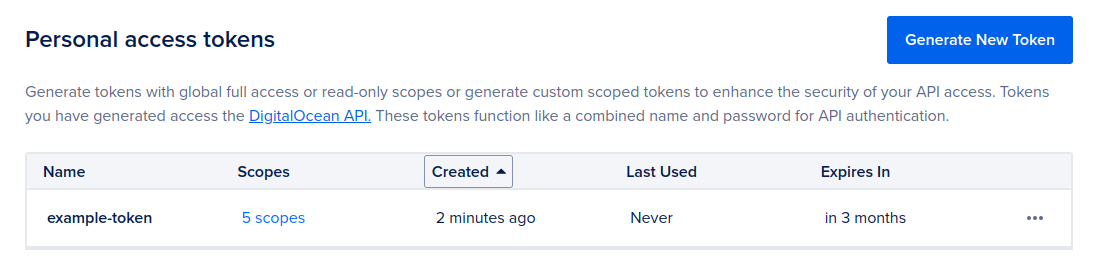
You can click the entry in the Scopes column to view details about the token’s usage and scopes.
In the … menu for a token, you can rename, regenerate, or delete the token.
Limits
- You cannot edit the scope of a token after creation. You can rename and regenerate tokens with custom scopes.