
Deploying a Ghost Site on DigitalOcean
Ghost is a powerful, professional, open-source tool designed to build and manage blogs and online publications. Considered one of the best alternatives to WordPress, the platform aims to onboard those more comfortable with low or no-code blogging platforms, and it’s significantly faster and more flexible than WordPress. Ghost facilitates a distraction-free writing experience as a CMS platform and powerful in-house tools for both budding and professional writers and content creators.
In this tutorial, we’ll look at how you can self-host Ghost on DigitalOcean, harnessing the capabilities of DigitalOcean’s Marketplace and 1-Click Apps.
Getting Started
To follow along, make sure you have the following things in place:
- A DigitalOcean Account (if you don’t have one yet, visit this link and grab some free credits while you’re at it)
- A registered domain name to finish Ghost’s setup
Using DigitalOcean Marketplace
DigitalOcean’s Marketplace houses a curated collection of ready-to-deploy tools and resources called 1-Click Apps. Instead of downloading all the dependencies manually, you can head to the Marketplace and deploy a 1-Click App, which comes with preconfigured images and settings and all the required packages and dependencies for your project.
The 1-Click App for Ghost includes all the required components to self-host the same on Droplets. The list of software includes Ghost, Nginx, MySQL Server, and Node.js, which are preconfigured in the bundle.
To get started, head over to Ghost’s Marketplace App Page and click the “Create Ghost Droplet” button, which will redirect you to DigitalOcean’s Control Panel if you’re already logged in.

Creating the Ghost Droplet
On the new tab, titled “Create Droplets,” you’ll be asked to choose a Region, Image, and Size amongst a couple of other things for your Droplet. A default region is already selected for you, but choose the data center nearest to you and your prospective users for the best performance and minimal latency.
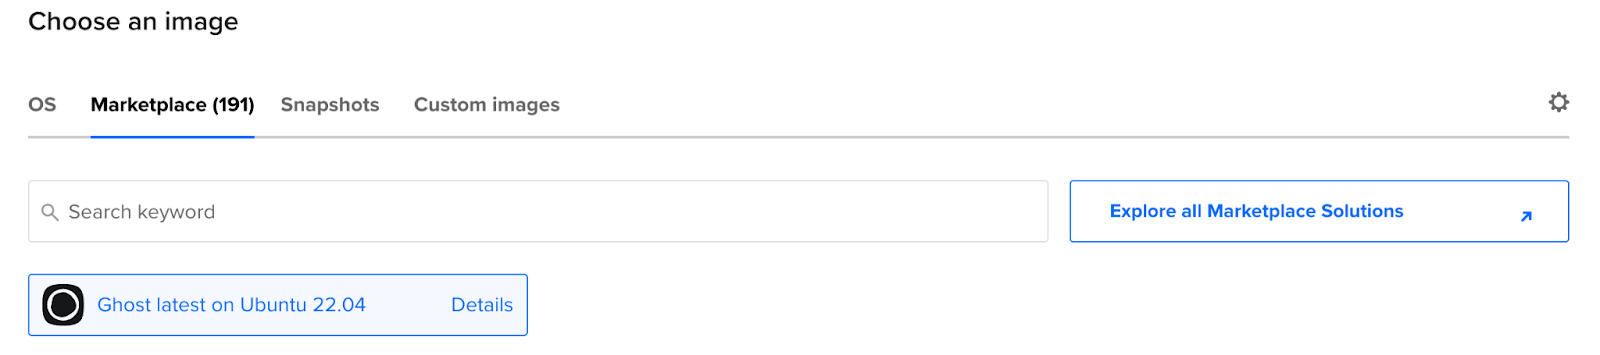
When you scroll down to the section that reads “Choose an Image,” you’ll notice that Ghost’s Marketplace App is already selected for you.
For the next section, wherein we need to choose the right size for the droplet, we recommend picking a Premium Droplet for faster performance, powered by Intel and AMD CPUs and NVMe SSD. You can choose a Premium Droplet based on your requirements, just as a standard Droplet.
For the next section, wherein we need to choose the right size for the droplet, we recommend picking a Premium Droplet for faster performance, powered by Intel and AMD CPUs and NVMe SSD. You can choose a Premium Droplet based on your requirements, just as a standard Droplet.
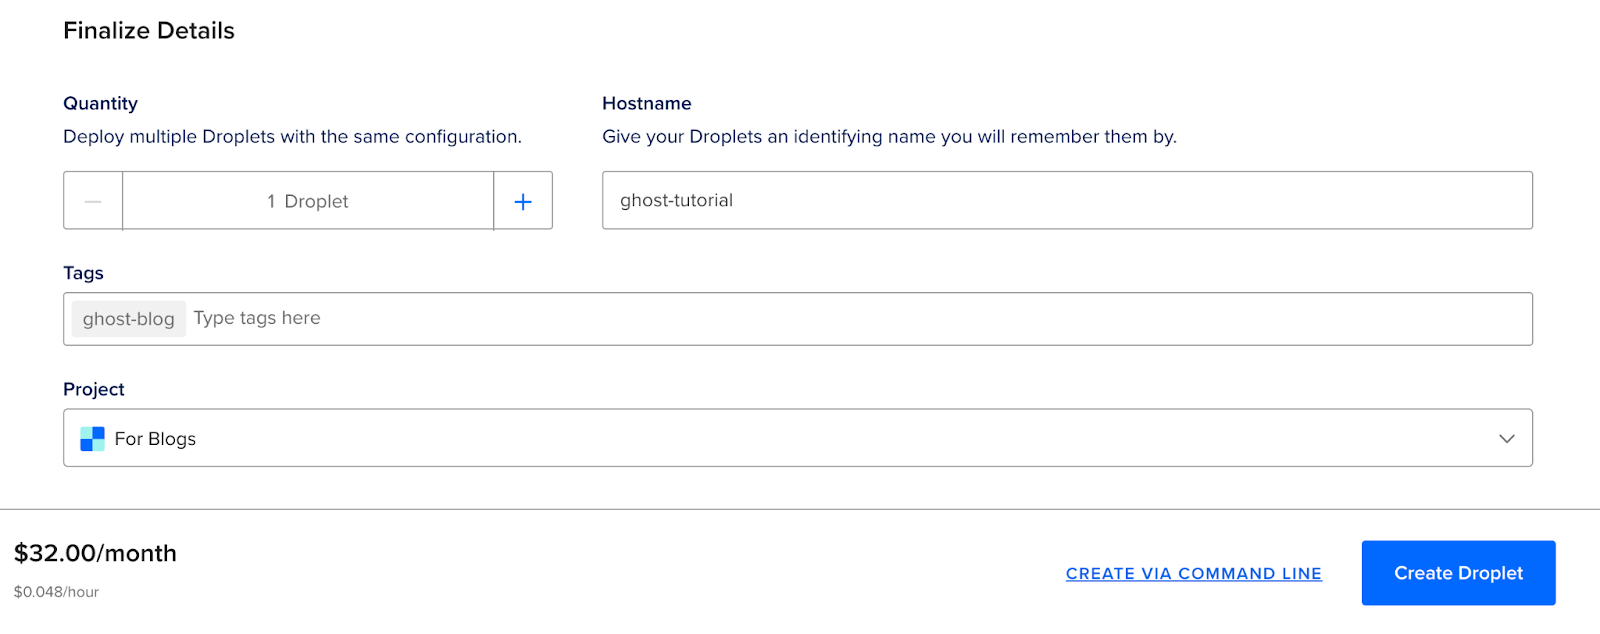
The next important step is to choose an authentication method, wherein you can choose to log in to your droplet via an SSH Key or a Password. For this tutorial, we are moving ahead with a Password as our way of authentication, so add a string of your liking, keeping the requirements in mind. Once through, you can add improved metrics monitoring and alerting free of cost by checking the box next to the option, and you’re all set to create your Droplet. Ensure you add a simpler Hostname for your Droplet and glance at all the details before clicking “Create Droplet.”
After the Droplet is provisioned, to go ahead with the following steps, click on the “Get Started” button to get an overview of how to use the Marketplace App best.
After the Droplet is provisioned, to go ahead with the following steps, click on the “Get Started” button to get an overview of how to use the Marketplace App best.

Setting Up the Domain
Now that our Droplet is ready, we’ll start by setting up our domain. Considering that you already have a registered domain, head to your Domain Registrar and enter the section that manages your domain’s DNS Records. On Name.com, it looks like this:

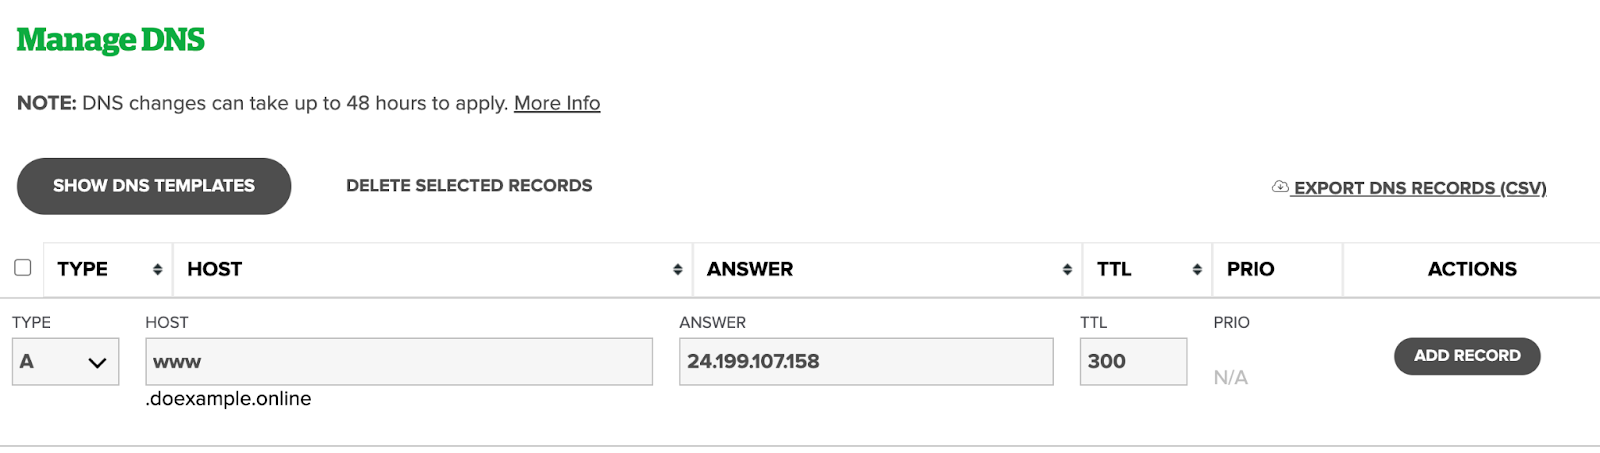
Once you click on the closest option to “Manage DNS Records” for your domain, add your Droplet’s IP Address on the new page, which you can find on the Droplets Control Panel for an A record, with the contents for Host as “www”. The entry should resemble the following:
Once you click on the closest option to “Manage DNS Records” for your domain, add your Droplet’s IP Address on the new page, which you can find on the Droplets Control Panel for an A record, with the contents for Host as “www”. The entry should resemble the following:
Once through, click on “Add Record” and you’re set! We can now SSH into our Droplet and finish the setup.
Once through, click on “Add Record” and you’re set! We can now SSH into our Droplet and finish the setup.
Setting Up the Droplet
With the domain pointing to our Droplet, we need to get Ghost up and running inside the same. To get started, execute ssh root@’YOUR-DROPLET-IP’ on your local terminal, replacing ‘YOUR-DROPLET-IP’ with the IP address in front of your Droplet on the Control Panel. You’ll need to use the same password you entered earlier during the Droplet creation to sign in successfully. If everything goes as it should, you’ll be greeted by the following:
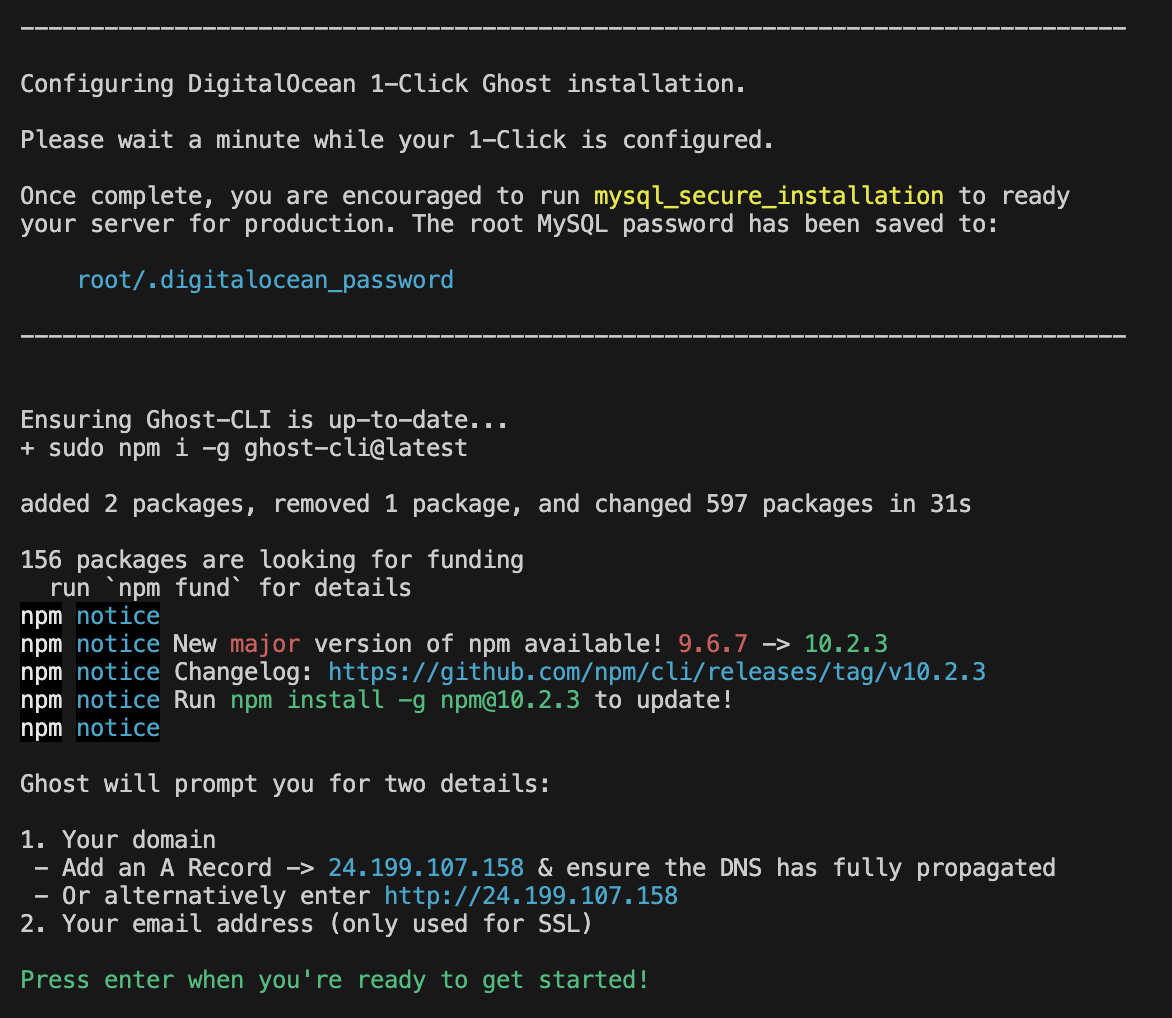
As the instruction reads, press enter to continue and let Ghost install all the dependencies. This process can take a couple of minutes to complete, depending on the specifications of the Droplet. You must switch to the
As the instruction reads, press enter to continue and let Ghost install all the dependencies. This process can take a couple of minutes to complete, depending on the specifications of the Droplet. You must switch to the ghost-mgr user to manage Ghost via the CLI, as you can’t run commands for Ghost as the root user.
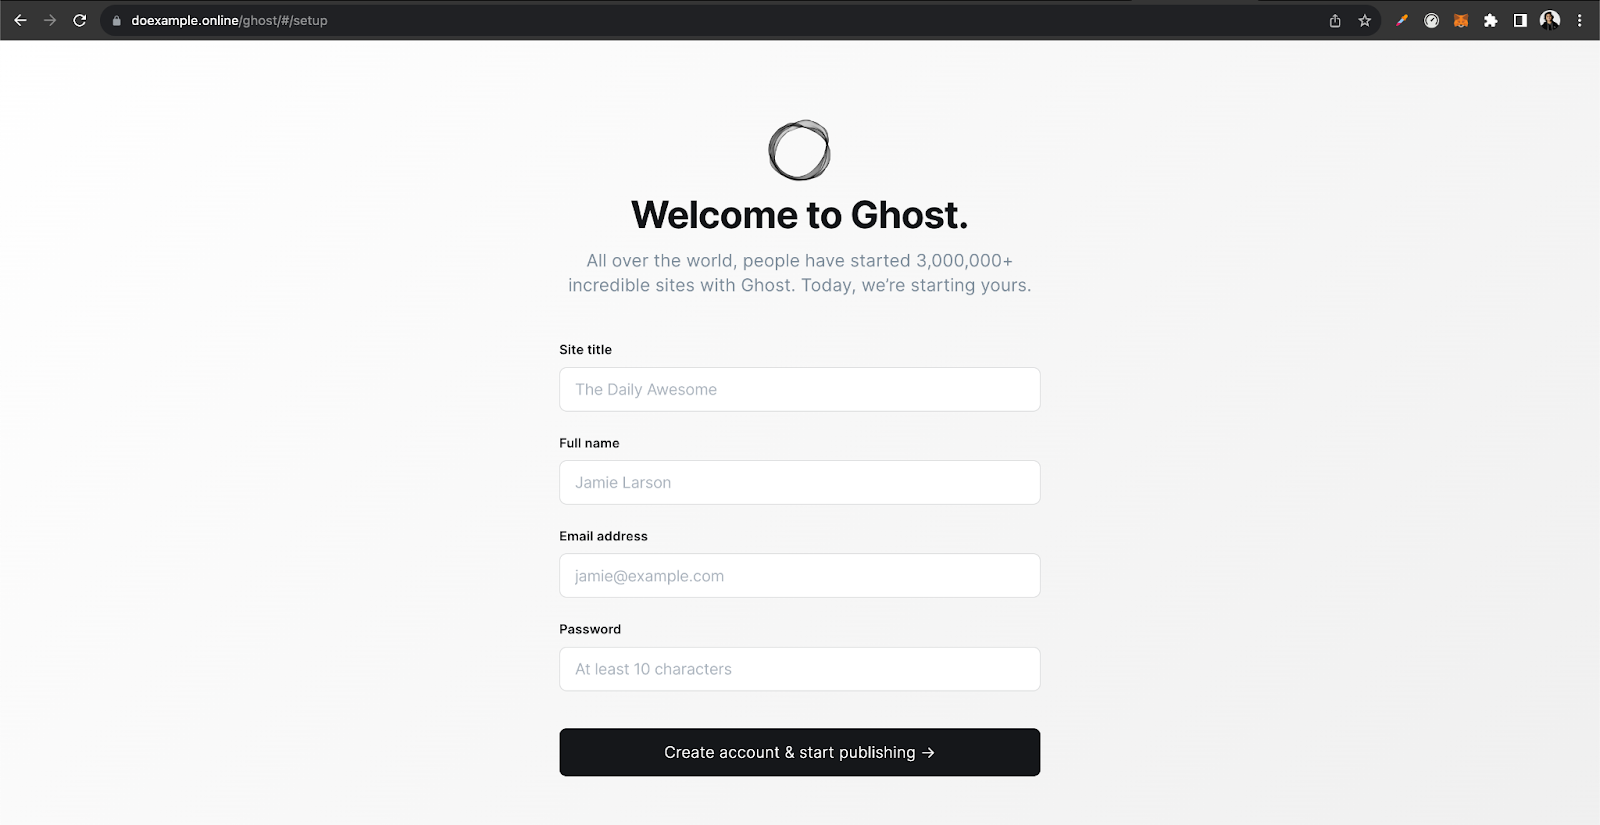
As soon as the process is over, head to http:/’YOUR-DROPLET-IP’/ghost to configure the administrative interface, replacing the variable in the URL with your Droplet’s IP Address. You should see a page similar to this:
Note: If the admin user isn’t set up in the first go, any visitor who stumbles across the link can take over the deployment and, eventually, the Droplet.
Note: If the admin user isn’t set up in the first go, any visitor who stumbles across the link can take over the deployment and, eventually, the Droplet.
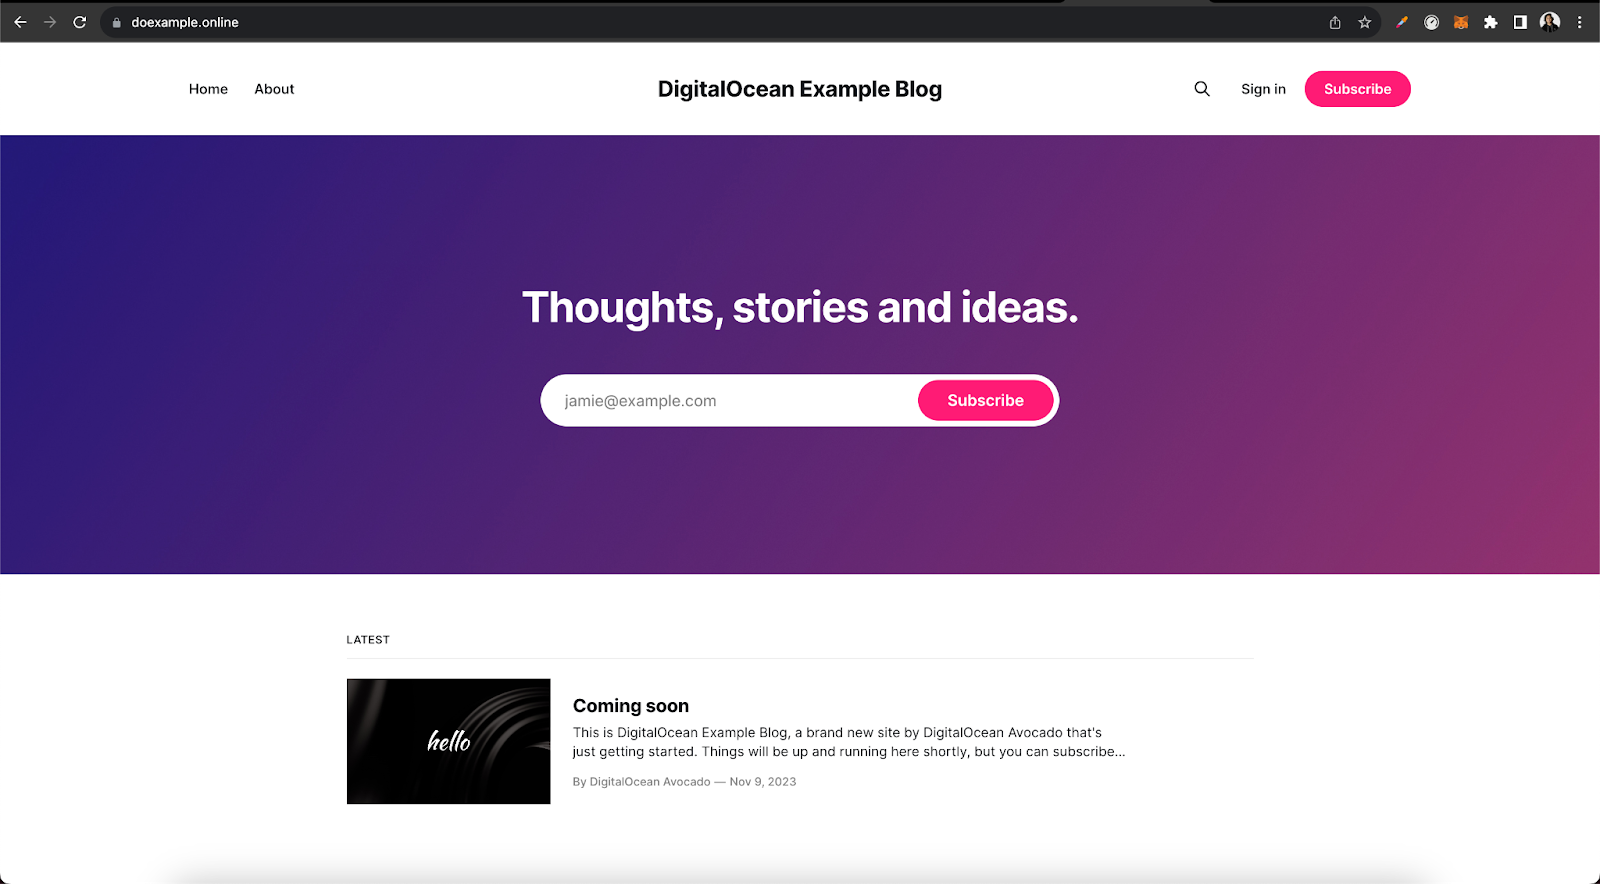
Add all the details about your site and click the “Create account & start publishing” button when you’re ready! Now, if you head to the URL without /ghost, you can see your blog and share it with the world! With these steps, you have successfully self-hosted your Ghost site on DigitalOcean!
Troubleshooting the Droplet
If you ran into issues earlier with getting Ghost up on the Droplet despite using the 1-Click-App from the Marketplace, try following these steps:
- Try restarting the Droplet by running
sudo rebootin the terminal and then SSH again into the Droplet. - Try executing
ghost start. - If the above steps didn’t help, switch to the
ghost-mgruser usingsudo -i -u ghost-mgrin your terminal. Then executeghost install local.You’ll see the following output in your terminal, confirming that Ghost is up and running and ready to configure. 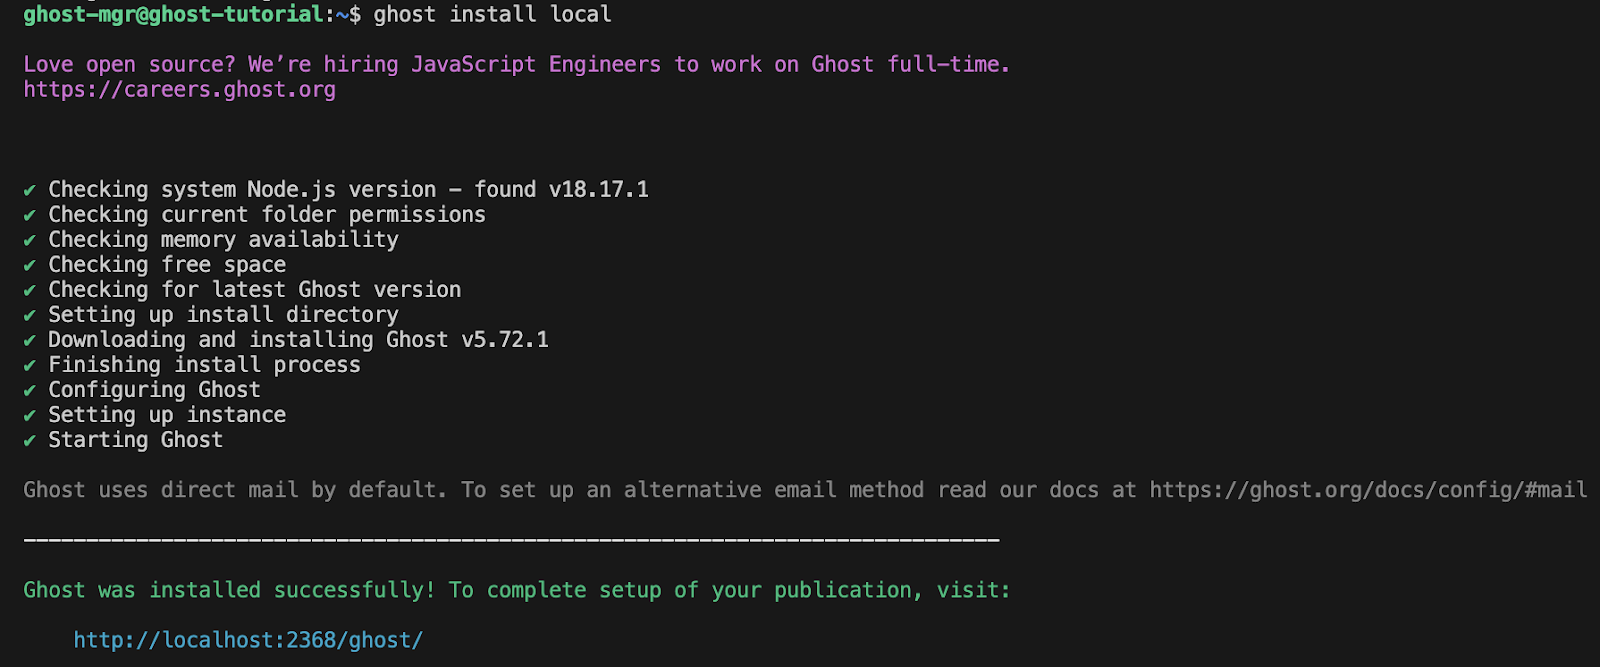
Ending Notes
Ghost is a fantastic low-code tool for content creators and bloggers, and self-hosting it on DigitalOcean is made easy by the 1-Click-App on DigitalOcean Marketplace. In a few steps, even beginner developers can get their blogs up and running with complete control over the deployment.
Here’s a fun fact: Ghost has also been a customer of DigitalOcean! Read more about the partnership here as a part of our Customer Stories Series!