
Deploy a Flask App Using Gunicorn to App Platform
In this guide, you will build a Python application using the Flask microframework on DigitalOcean’s App Platform. Flask is a Python-based microframework that is popular with web developers, given its lightweight nature and ease of use.
This tutorial will focus on deploying a Flask app to App Platform using gunicorn. Gunicorn is a Python WSGI HTTP Server that uses a pre-fork worker model. By using gunicorn, you’ll be able to serve your Flask application on more than one thread.
Prerequisites
To complete this tutorial, you’ll need:
- A GitHub account.
- Python3 installed on your local machine. You can follow the following tutorials for installing Python on Windows, Mac, or Linux.
- A text editor. You can use Visual Studio Code or your favorite text editor.
Step 1: Creating a Python Virtual Environment for your Project
Before you get started, you need to set up your Python developer environment. You will install your Python requirements within a virtual environment for easier management.
First, let’s create a project directory for our code and requirements.txt file to be stored in and change into that directory. Run the following commands:
mkdir flask-app
cd flask-app
Next, create a directory in your home directory that you can use to store all of your virtual environments:
mkdir ~/.venvs
Now create your virtual environment using Python:
python3 -m venv ~/.venvs/flask
This creates a directory called flask within your .venvs directory. Inside, it installs a local version of Python and a local version of pip. You can use this to install and configure an isolated Python environment for your project.
Before you install your project’s Python requirements, you need to activate the virtual environment.
Use the following command:
source ~/.venvs/flask/bin/activate
Your prompt changes to indicate that you are now operating within a Python virtual environment. It looks like this: (flask)user@host:~$.
With your virtual environment active, install Flask and gunicorn using the local instance of pip:
pip install Flask gunicorn
(flask) preceding it), use pip instead of pip3, even if you are using Python 3. The virtual environment’s copy of the tool is always named pip, regardless of the Python version.Now that you have the flask package installed, save this requirement and its dependencies so App Platform can install them later.
Do this now using pip and then saving the information to a requirements.txt file:
pip freeze > requirements.txt
You now have all of the software needed to start a Flask app. You are almost ready to deploy.
Step 2: Creating a Minimal Flask App
In this step, you will build a standard Hello Sammy! Flask application. You won’t focus on the mechanics of Flask outside of how to deploy it to App Platform. If you wish to deploy another application, the following steps will work for a wide range of Flask applications.
Using your favorite text editor, open a file named app.py:
nano app.py
Now add the following code to the file:
from flask import Flask
app = Flask(__name__)

@app.route('/')
def hello_world():
    return 'Hello Sammy!'
This code is the standard Hello World example for Flask with a slight modification to say hello to your favorite shark. For more information about this file and Flask, visit the official Flask documentation.
You have written your application code. Now you will configure the Gunicorn server.
Step 3: Setting Up Your Gunicorn Configuration
Gunicorn is a Python WSGI HTTP server that many developers use to deploy their Python applications. This WSGI (Web Server Gateway Interface) is necessary because traditional web servers do not understand how to run Python applications. For your purposes, a WSGI allows you to deploy your Python applications consistently. You can also configure multiple threads to serve your Python application, should you need them. In this example, you will make your application accessible on port 8080, the standard App Platform port. You will also configure two worker-threads to serve your application.
Open a file named gunicorn_config.py:
nano gunicorn_config.py
Now add the following code to the file:
bind = "0.0.0.0:8080"
workers = 2
This is all you need to do to have your app run on App Platform using Gunicorn. Next, you’ll commit your code to GitHub and then deploy it.
Step 4: Pushing the Site to GitHub
DigitalOcean’s App Platform deploys your code from GitHub repositories. This means that you must get your site in a git repository and then push that repository to GitHub.
First, initialize your project directory containing your files as a git repository:
git init
When you work on your Flask app locally, certain files get added that are unnecessary for deployment. Let’s exclude those files using Git’s ignore list. Create a new file called .gitignore:
nano .gitignore
Add the following code to the file:
*.pyc
Save and close the file.
Now execute the following command to add files to your repository:
git add app.py gunicorn_config.py requirements.txt .gitignore
Make your initial commit:
git commit -m "Initial Flask App"
Your files commit:
[secondary_label Output]
[master (root-commit) aa78a20] Initial Flask App
 4 files changed, 18 insertions(+)
 create mode 100644 .gitignore
 create mode 100644 app.py
 create mode 100644 gunicorn_config.py
 create mode 100644 requirements.txt
Open your browser and navigate to GitHub, log in with your profile, and create a new repository called flask-app. Create an empty repository without a README or license file.
Once you’ve created the repository, return to the command line and push your local files to GitHub.
First, add GitHub as a remote repository:
git remote add origin https://github.com/your_username/flask-app
Next, rename the default branch main, to match what GitHub expects:
git branch -M main
Finally, push your main branch to GitHub’s main branch:
git push -u origin main
Your files transfer:
[secondary_label Output]
Enumerating objects: 6, done.
Counting objects: 100% (6/6), done.
Delta compression using up to 8 threads
Compressing objects: 100% (4/4), done.
Writing objects: 100% (6/6), 1.20 KiB | 77.00 KiB/s, done.
Total 6 (delta 0), reused 0 (delta 0)
To github.com:MasonEgger/flask-app.git
 * [new branch]      main -> main
Branch 'main' set up to track remote branch 'main' from 'origin'.
Enter your GitHub credentials when prompted to push your code.
Your code is now on GitHub and accessible through a web browser. Now you will deploy your app to DigitalOcean’s App Platform.
Step 5: Deploying to DigitalOcean with App Platform
Once you push the code, visit The App Platform Homepage and click Launch Your App. A prompt requests that you connect your GitHub account:
Connect your account and allow DigitalOcean to access your repositories. You can choose to let DigitalOcean access all of your repositories or just to the ones you wish to deploy.
Click Install and Authorize. GitHub returns you to your DigitalOcean dashboard.
Once you’ve connected your GitHub account, select the your_account/flask-app repository and click Next.
Next, provide your app’s name, choose a region, and ensure the main branch is selected. Then ensure that Autodeploy code changes is checked. Click Next to continue.
DigitalOcean detects that your project is a Python app and automatically populates a partial Run command.
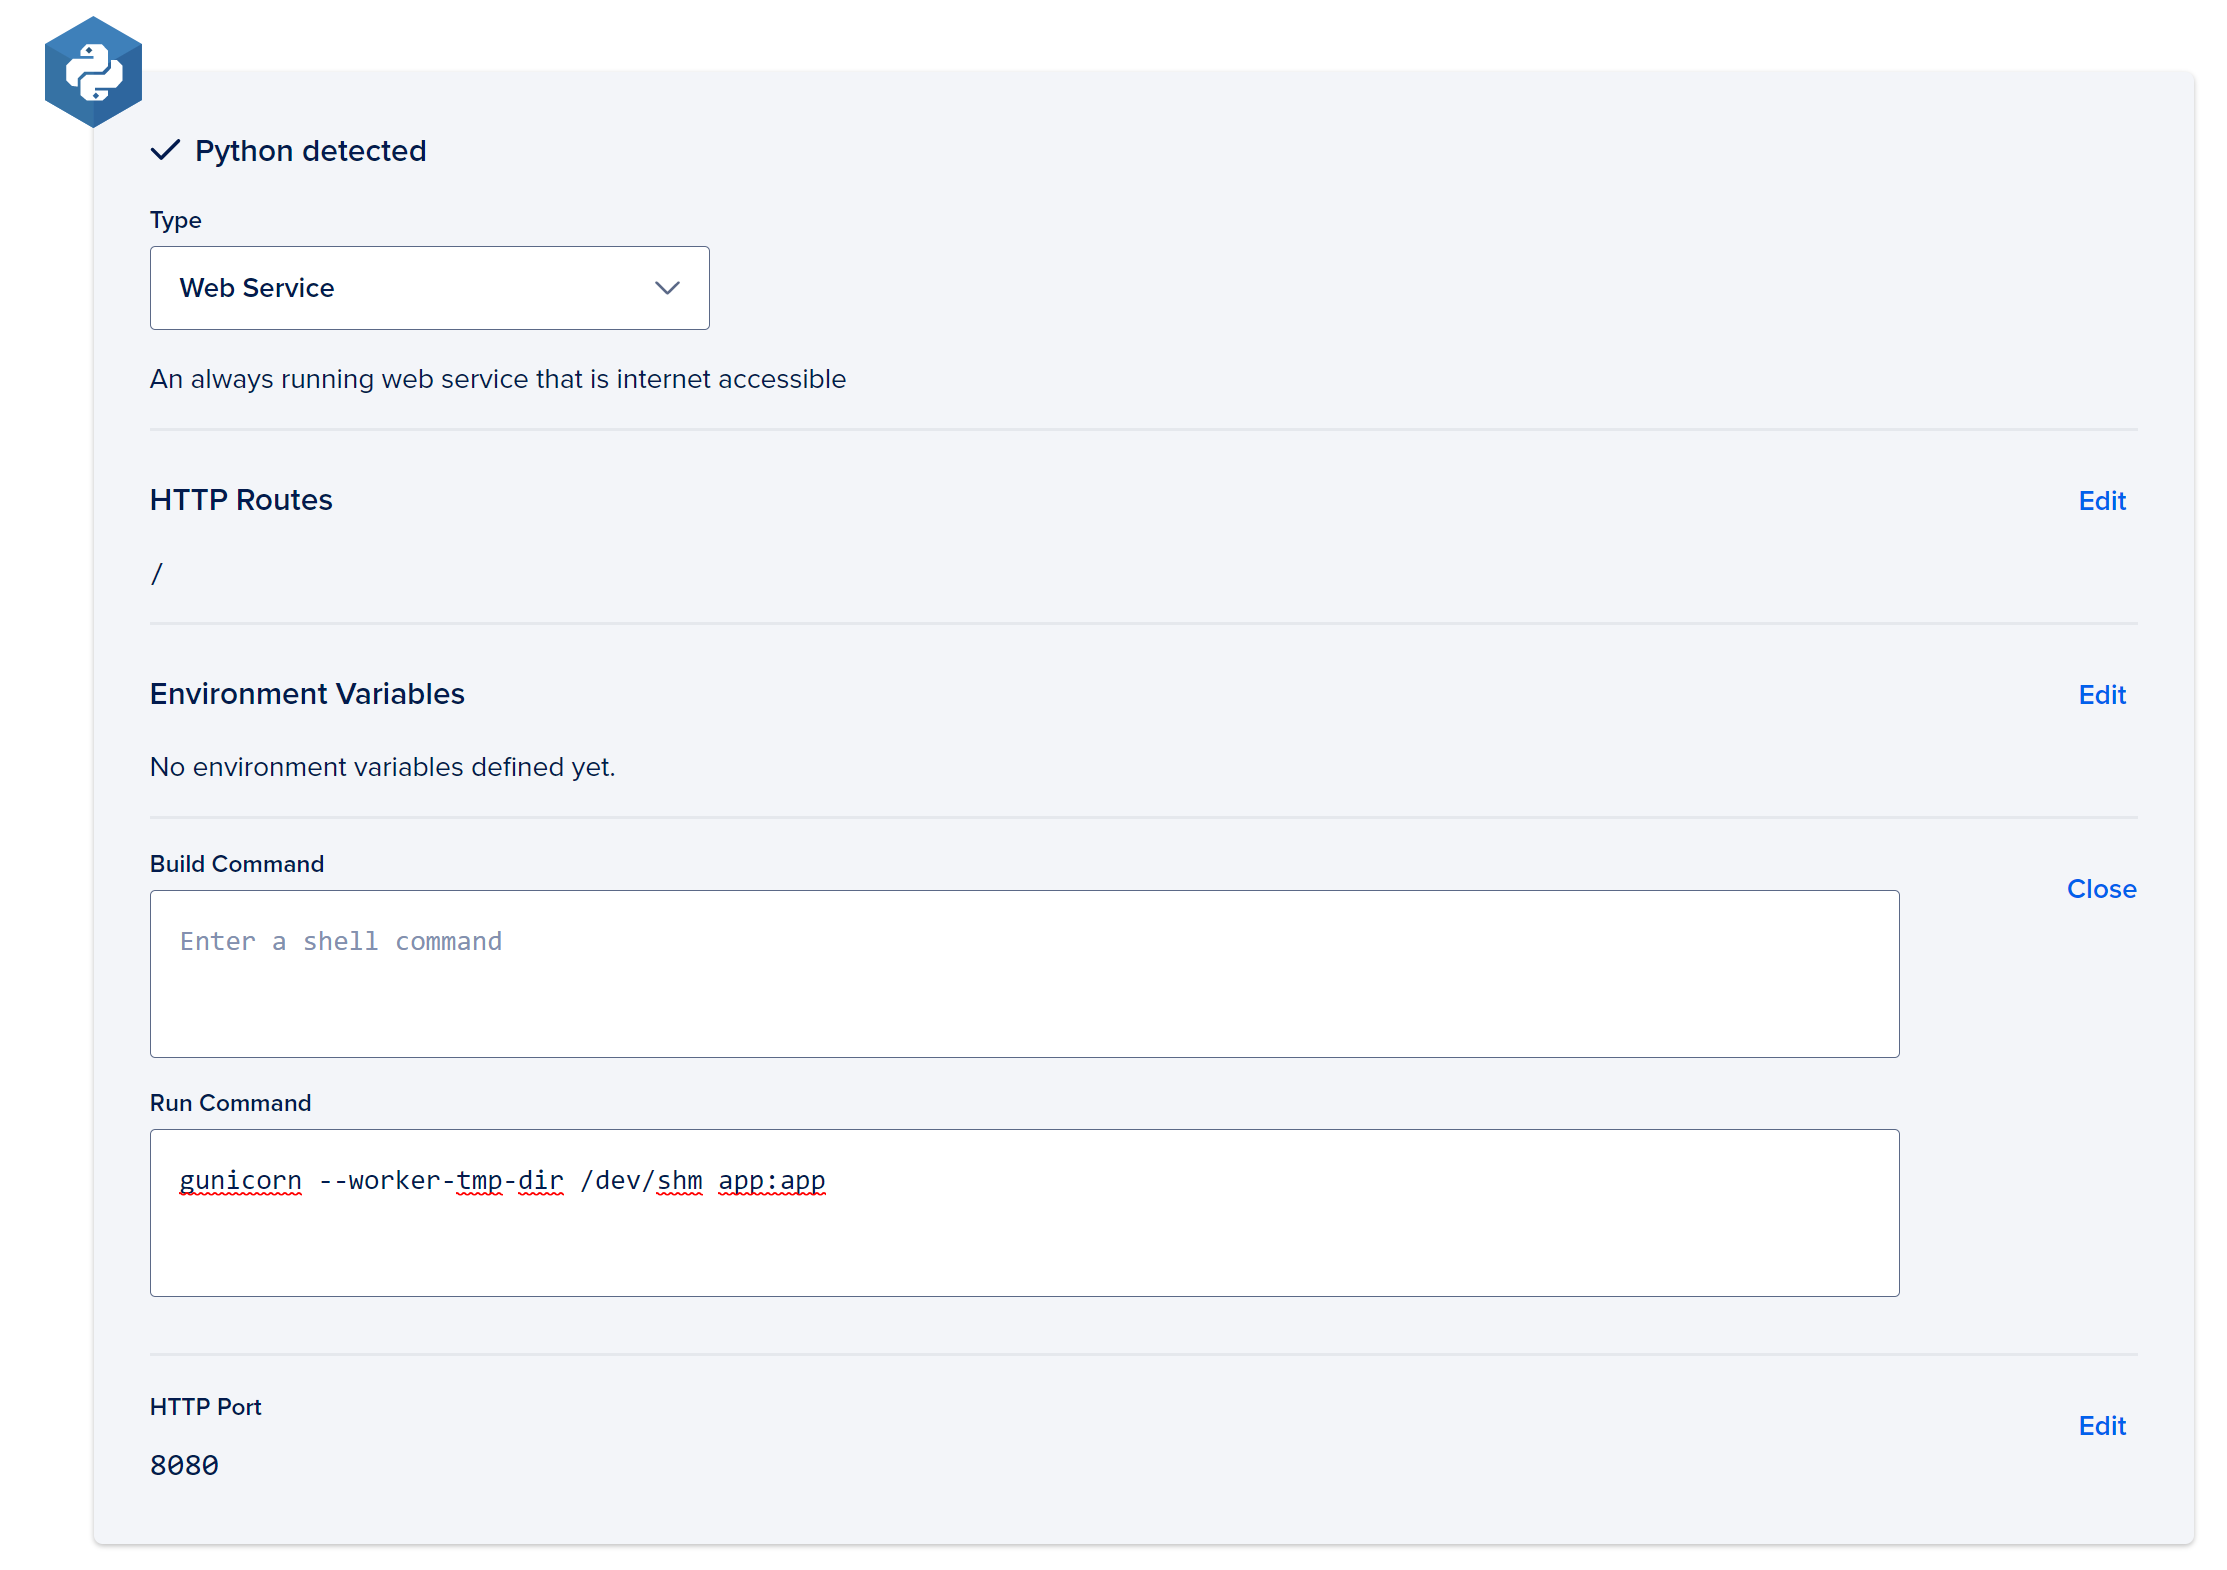
Click the Edit link next to the Build and Run commands to complete the build command. Your completed build command needs to reference your project’s WSGI file. In this example, this is at app:apitp.
Replace the existing command with the following:
gunicorn --worker-tmp-dir /dev/shm app:app
Click Next, and App Platform will direct you to the Finalize and Launch screen. Here you’ll choose your plan. Be sure to select the plan that fits your needs, whether in Basic App or Professional App. Click Launch App at the bottom. Your app builds and deploys.
Once your app finishes deploying, click on the link to your app provided by App Platform. This link takes you to your Hello Sammy page.

You now have a Flask app deployed to App Platform. Make and push any changes to GitHub, and App Platform will automatically deploy them.
Summary
In this tutorial, you:
- Created a simple Flask app.
- Configured a Gunicorn HTTP server.
- Deployed the app to App Platform using the Gunicorn server.
Any changes you commit and push to your repository will trigger a new deployment. This means you can spend more time focusing on your code and expanding your application.
You can find the example code for this tutorial in the DigitalOcean Sample Images Repository.
The example in this tutorial is a minimal Flask app. Your project might have more applications and features, but the deployment process will be the same.
What’s Next?
Once you have deployed the Flask app and used it, you can delete the application or deploy other sample applications.