
Onboarding: How to Use DigitalOcean Managed Databases
Introduction
Welcome to DigitalOcean! We’re excited to have you on board. DigitalOcean offers a variety of products and services. From our simple-to-use Droplets, to our managed Kubernetes services, you can run a blog, a business, and everything between and beyond.
After creating a DigitalOcean account, you’ll access the Control Panel, which is the central hub for all of your projects on the DigitalOcean platform. We’re here to help you get comfortable with different menus and workflows as you begin your next project.
When you set up a Managed Database with DigitalOcean, you get simplified setup, automatic daily backups, automatic updates, end-to-end security, reliable performance, and simplified scalability.
In this tutorial, you’ll familiarize yourself with our Managed Databases, creating, managing, and connecting to your very own Managed Database. DigitalOcean has five different database engines in our Managed Database offerings: MongoDB, PostgreSQL, MySQL, Redis, and coming soon, Kafka.
Creating a Managed Database
You can create a Managed Database by following the process in this section. The tasks are detailed in the embedded video and the text that follows.
To manage and connect to a database, you first need to create one.
To follow step-by-step guides for each of the database engines, you can review our product documentation for each engine:
- How to Create PostgreSQL Database Clusters
- How to Create MySQL Database Clusters
- How to Create Redis Database Clusters
- How to Create MongoDB Database Clusters
First, press the Create button in the upper right of the Control Panel, then select the Databases option from the dropdown menu:
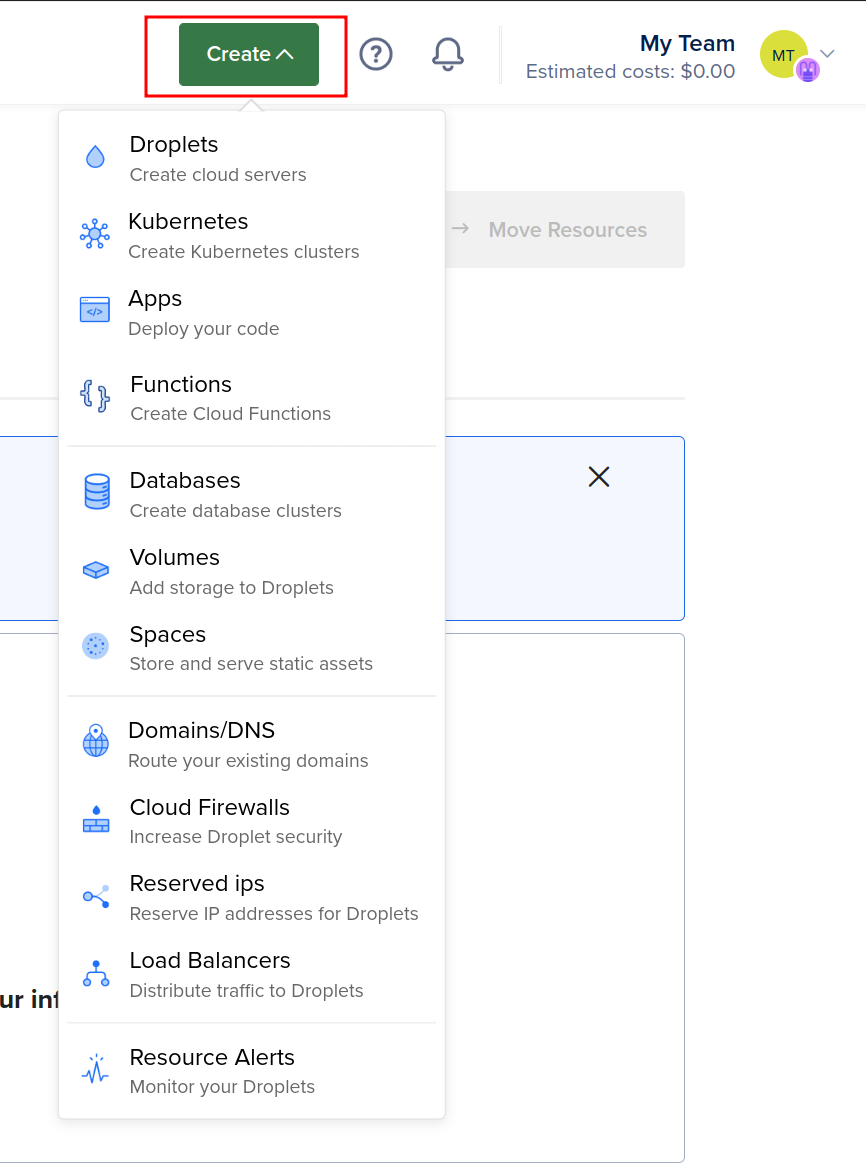
This action opens the user interface for creating a new database cluster. You can also select Databases from the sidebar navigation menu on the left and then press the Create Database Cluster button from the Databases page.
On the creation page, there are multiple options to select from.
First, complete the Choose a datacenter region field. It is recommended to keep your database close to your servers for a faster connection. Regions that store your current resources load by default. In this tutorial, we selected NYC1, which is in New York.
Next to each datacenter option, there is a list of resources associated with that region. When you hover over the resources link, a tooltip loads with the types of active resources you have in that datacenter. Keep in mind that you may not yet have any resources associated with a given datacenter region.
Then, select a VPC Network. The VPC network is a Virtual Private Cloud network interface for your DigitalOcean resources. Resources in the same VPC connect to each other securely via private IP addresses. You can select from available VPC networks. In this tutorial, we’ve selected the default-nyc1 network. Newer users may not have any VPC networks.
Now select which type of database engine you want and the version you’d like to use on the creation page. There are five different database engines that you can select: MongoDB, PostgreSQL, MySQL, Redis, and soon Kafka. Each database engine offers compelling features:
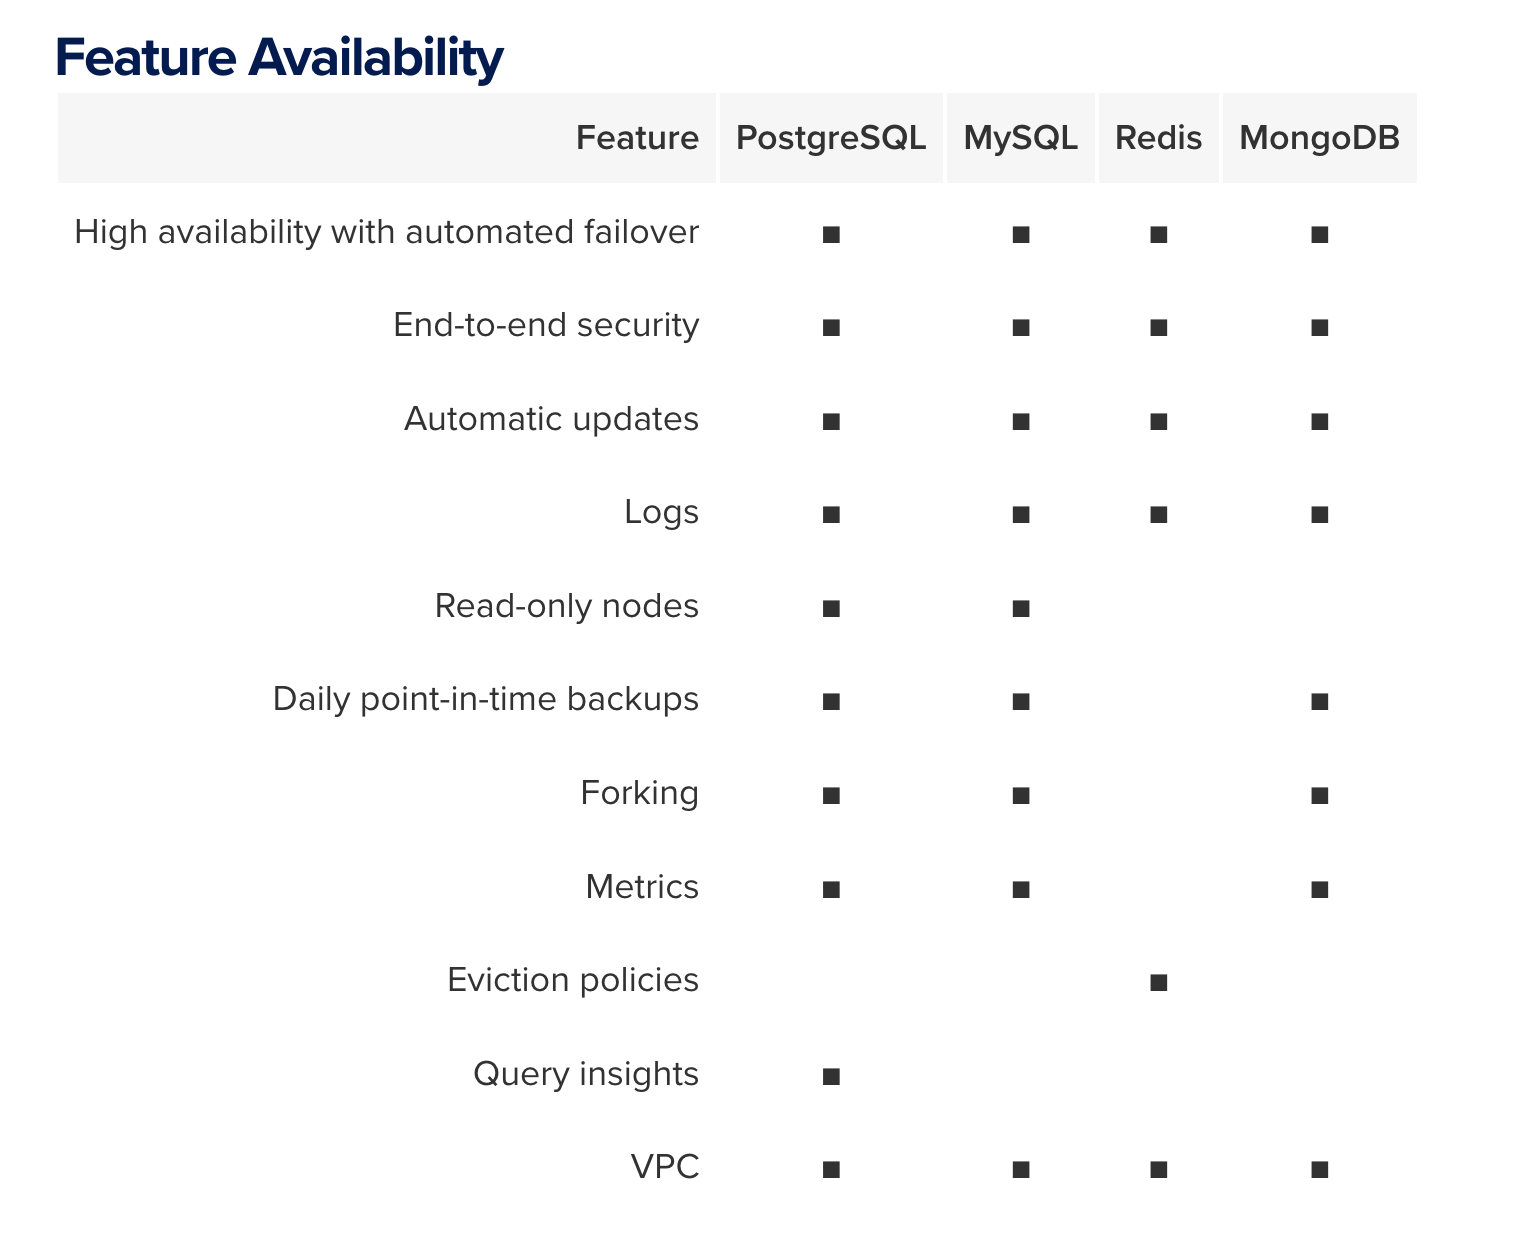
This feature availability list can be accessed in the Managed Databases product documentation.
For this tutorial, we’ve selected PostgreSQL, which includes point in time recovery, automated failover and fallback, a logging and metrics dashboard, zero-downtime scaling and forking, and automated maintenance. Any images displayed in this tutorial represent a PostgreSQL database cluster.
If you select MongoDB, you can add two additional standby nodes for zero-downtime recovery if the primary node fails.
Next, select the plan you would like to use. You can choose from the Starter plan or scale up to the Pro plans, depending on your needs. If your application workloads are CPU-intensive, you might want to choose one of the Pro plans with higher capacity.
Finally, you can customize your database with a unique name and tags.
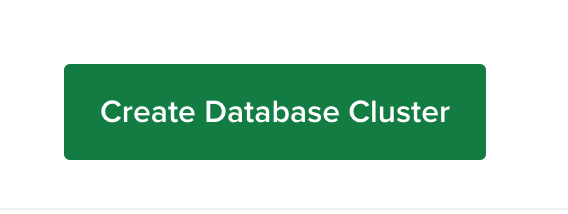
Once you have finalized the settings for your database cluster, click the Create Database Cluster button.
Now that you have created a database, you can access the database dashboard to manage the database.
Managing a Managed Database
To manage your database, you can follow the process explained in this section. The tasks are detailed in the embedded video and the subsequent text.
Once your database has been provisioned, you can access various dashboards to review its use.
The Control Panel for the database opens to an Overview page. Because you have recently created your database, access the Getting Started menu for information on securing your database and accessing it with connection details:

If the database has not yet finished being provisioned, it will load the Your database cluster is provisioning note. Once provisioned, the Getting Started menu will open to the Secure this database cluster option.
By default, the database is open to all incoming connections. Ideally, a database is only usable and connected to by the resources that are actually using it, such as a Droplet or an app. You can tell that this database is open when this warning message appears:

To secure your database cluster and allow access to inbound sources only, specify the trusted sources that can access this database, such as your local machine and specific Droplets.
On the page for securing the database, you can Add trusted sources by searching for existing resources or entering a specific IP address (such as the IP address for your current computer) in the text box. Once you have entered the trusted sources, press the Allow these inbound sources only button, which will restrict access to only those sources:

Once you have secured your database, the Connection Details section will load, providing the information necessary to connect to this database cluster:

You now have access to the credentials needed to connect to the database securely, such as your username, password, host, port access, database, and SSL mode.You can use this information to connect through your app or database tools. For this tutorial, we used port 25060, which was selected by default.
You can also toggle the Connection parameters box to display a Connection string option in the dropdown menu:

Once selected, a unique connection string is displayed, which you can copy and paste wherever you need it.
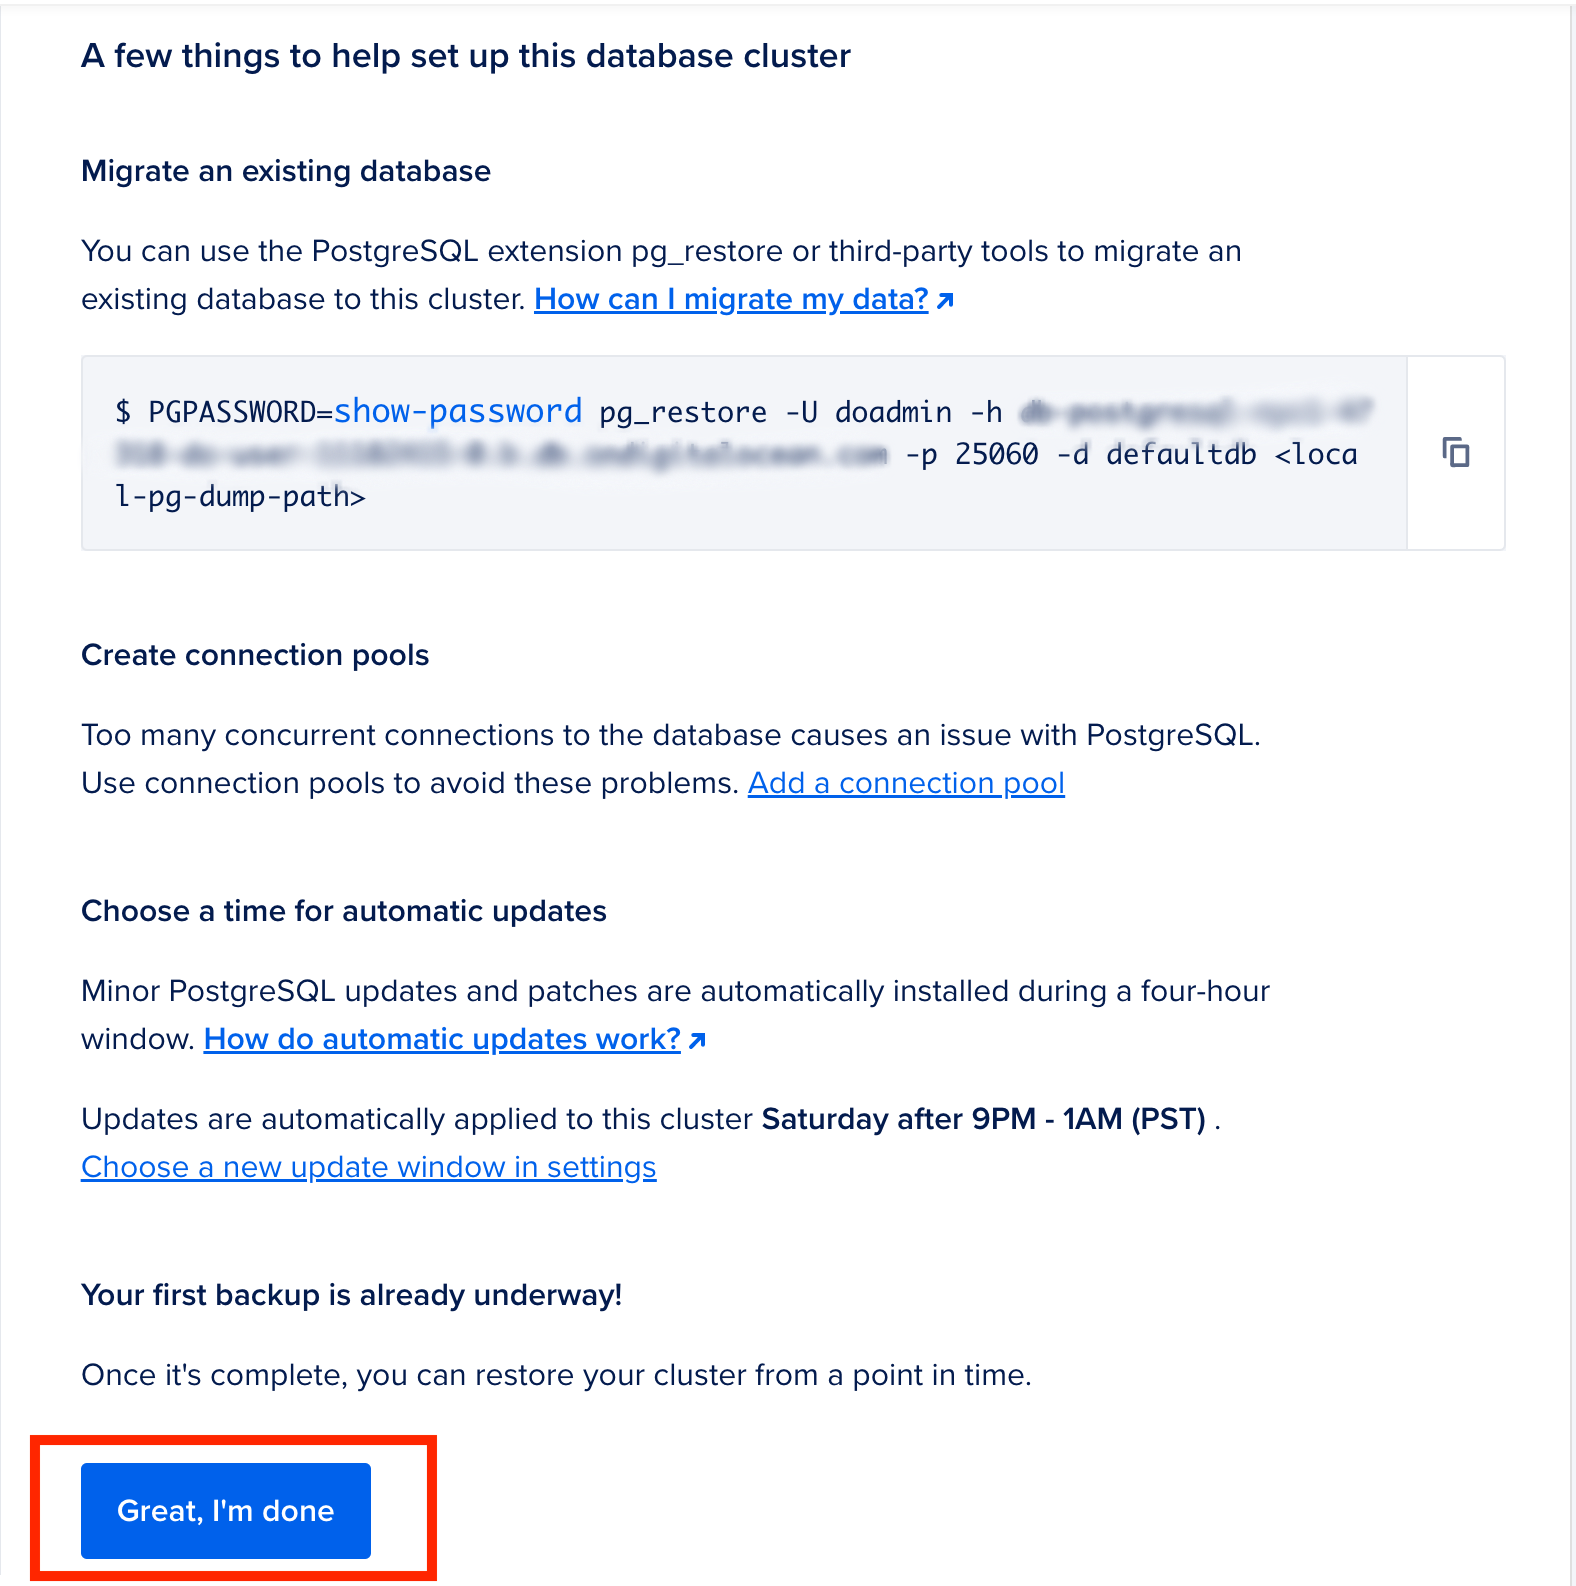
Press Continue, which takes you to the Next steps menu containing additional steps you can do to set up your database cluster, such as migrating an existing database, creating connection pools, restoring from a backup, and more. For now, press the Great, I’m done button, which returns you to the database overview:
The Overview dashboard includes all of the information that you selected during the setup. You can also access other dashboards using the navigation menu:

For examples, the Insights dashboard displays information about your database usage:

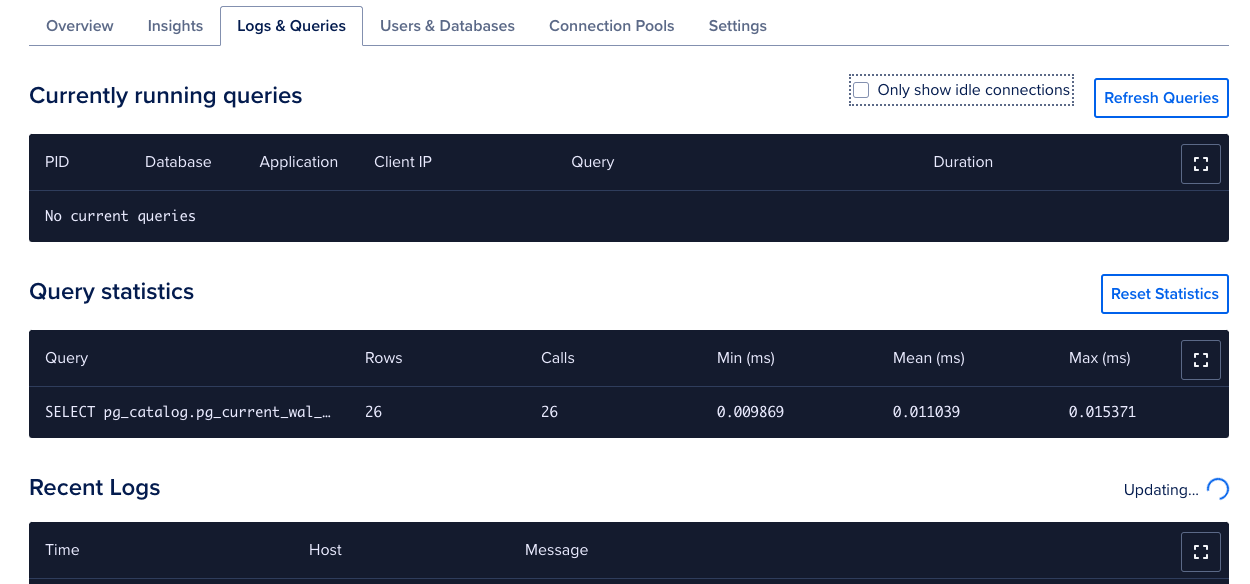
The Logs and Queries dashboard loads your queries, including any Currently running queries and Query Statistics. You can use this dashboard to assess if any queries are running slowly:
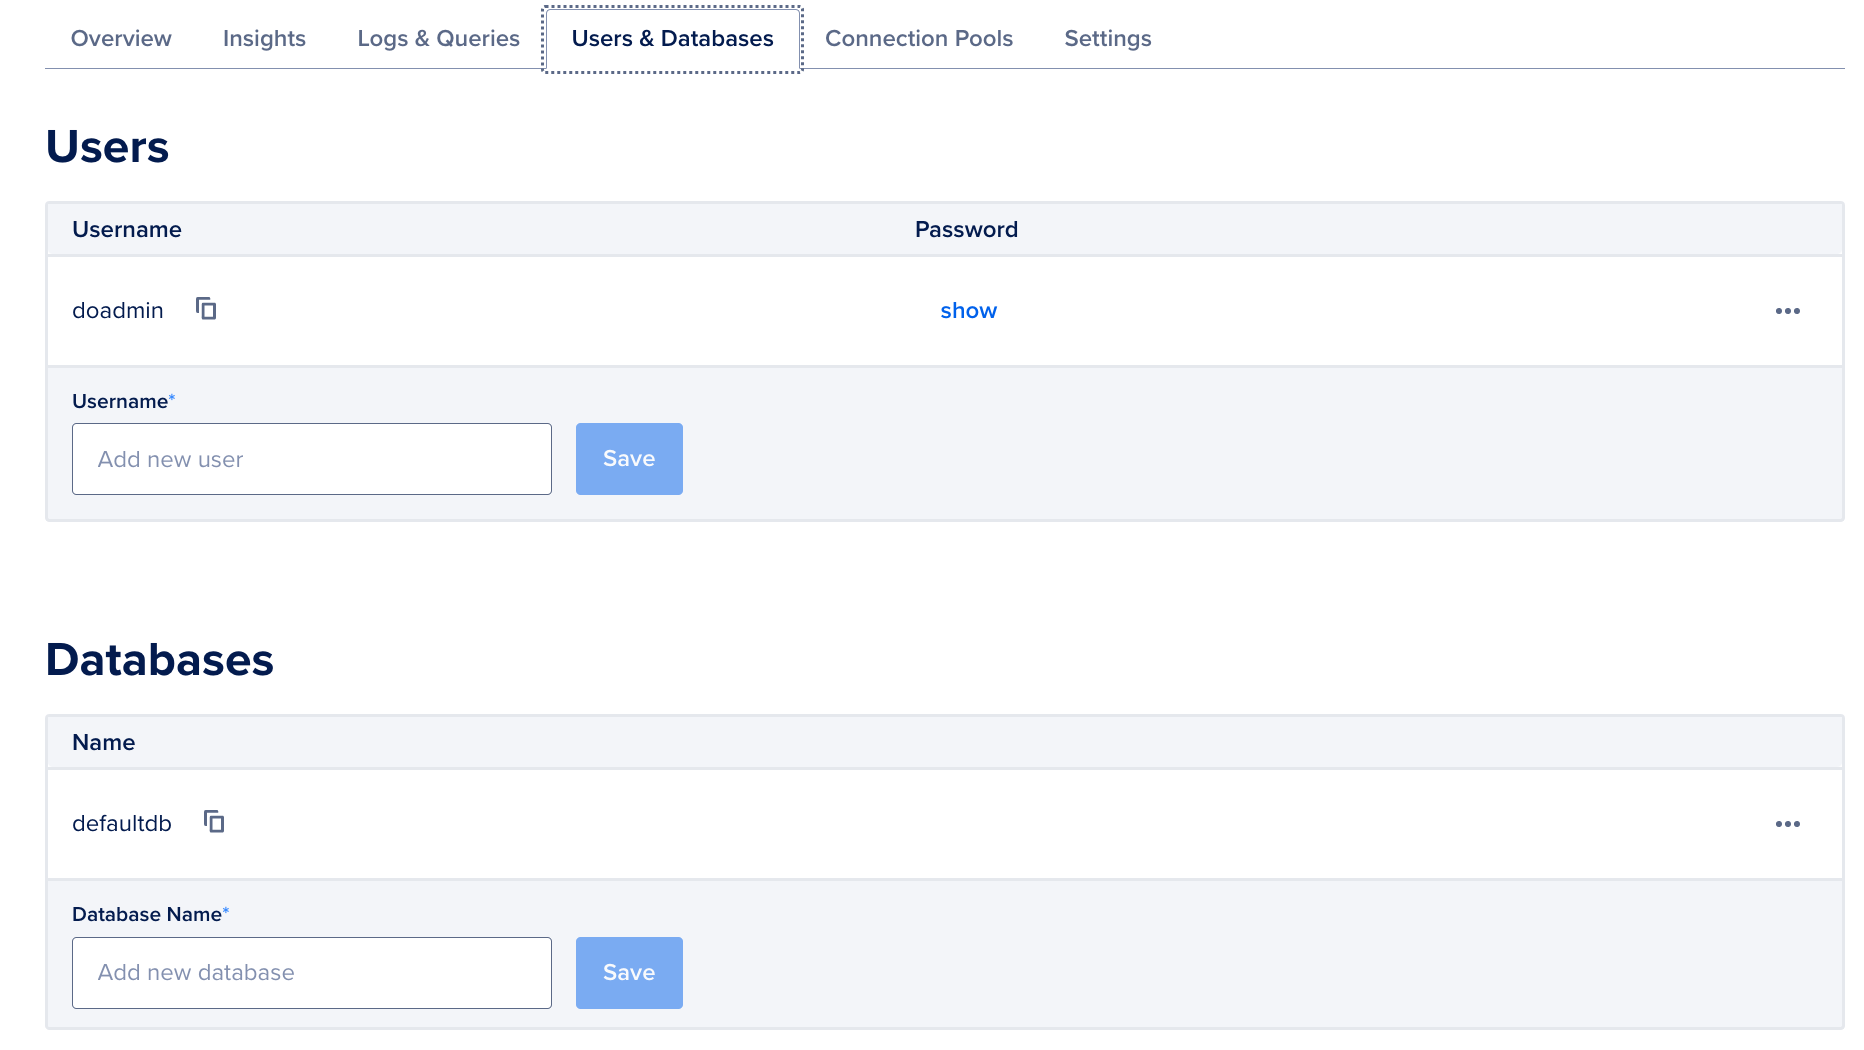
With the Users & Databases dashboard, you can create new databases inside this one. You can also create new users that can connect to the database by adding their information in the text box:
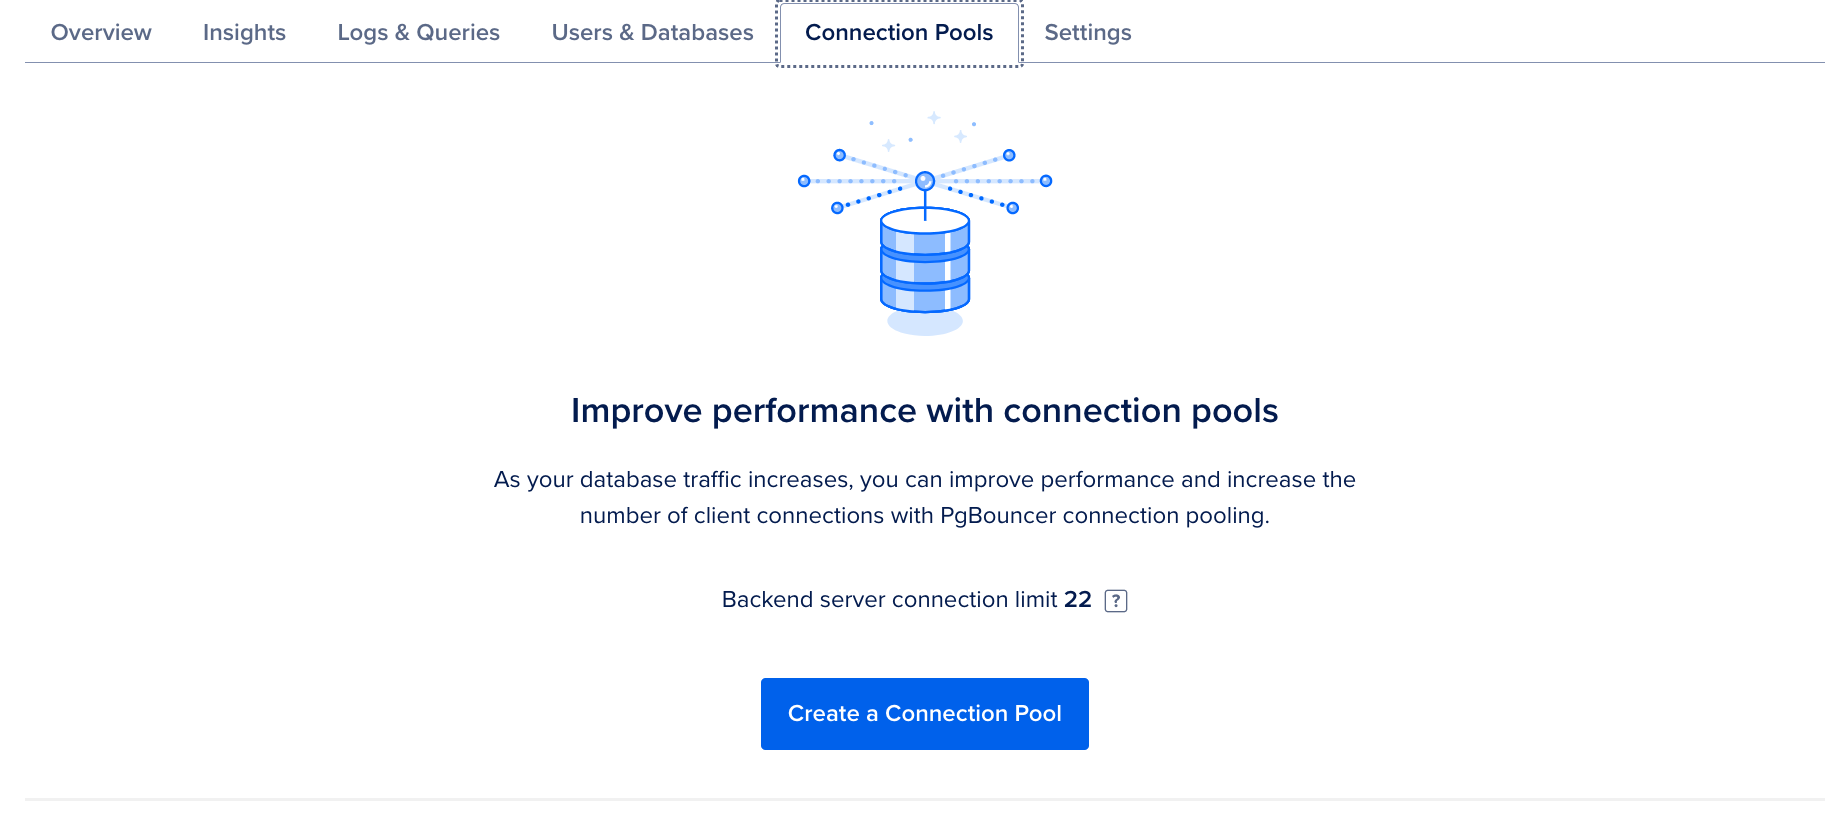
Because the sample database in this tutorial is PostgreSQL, you can also access the Connection Pools menu. You can create new pools on this page to improve performance:
Finally, you can select the Settings dashboard to display the information about your database:
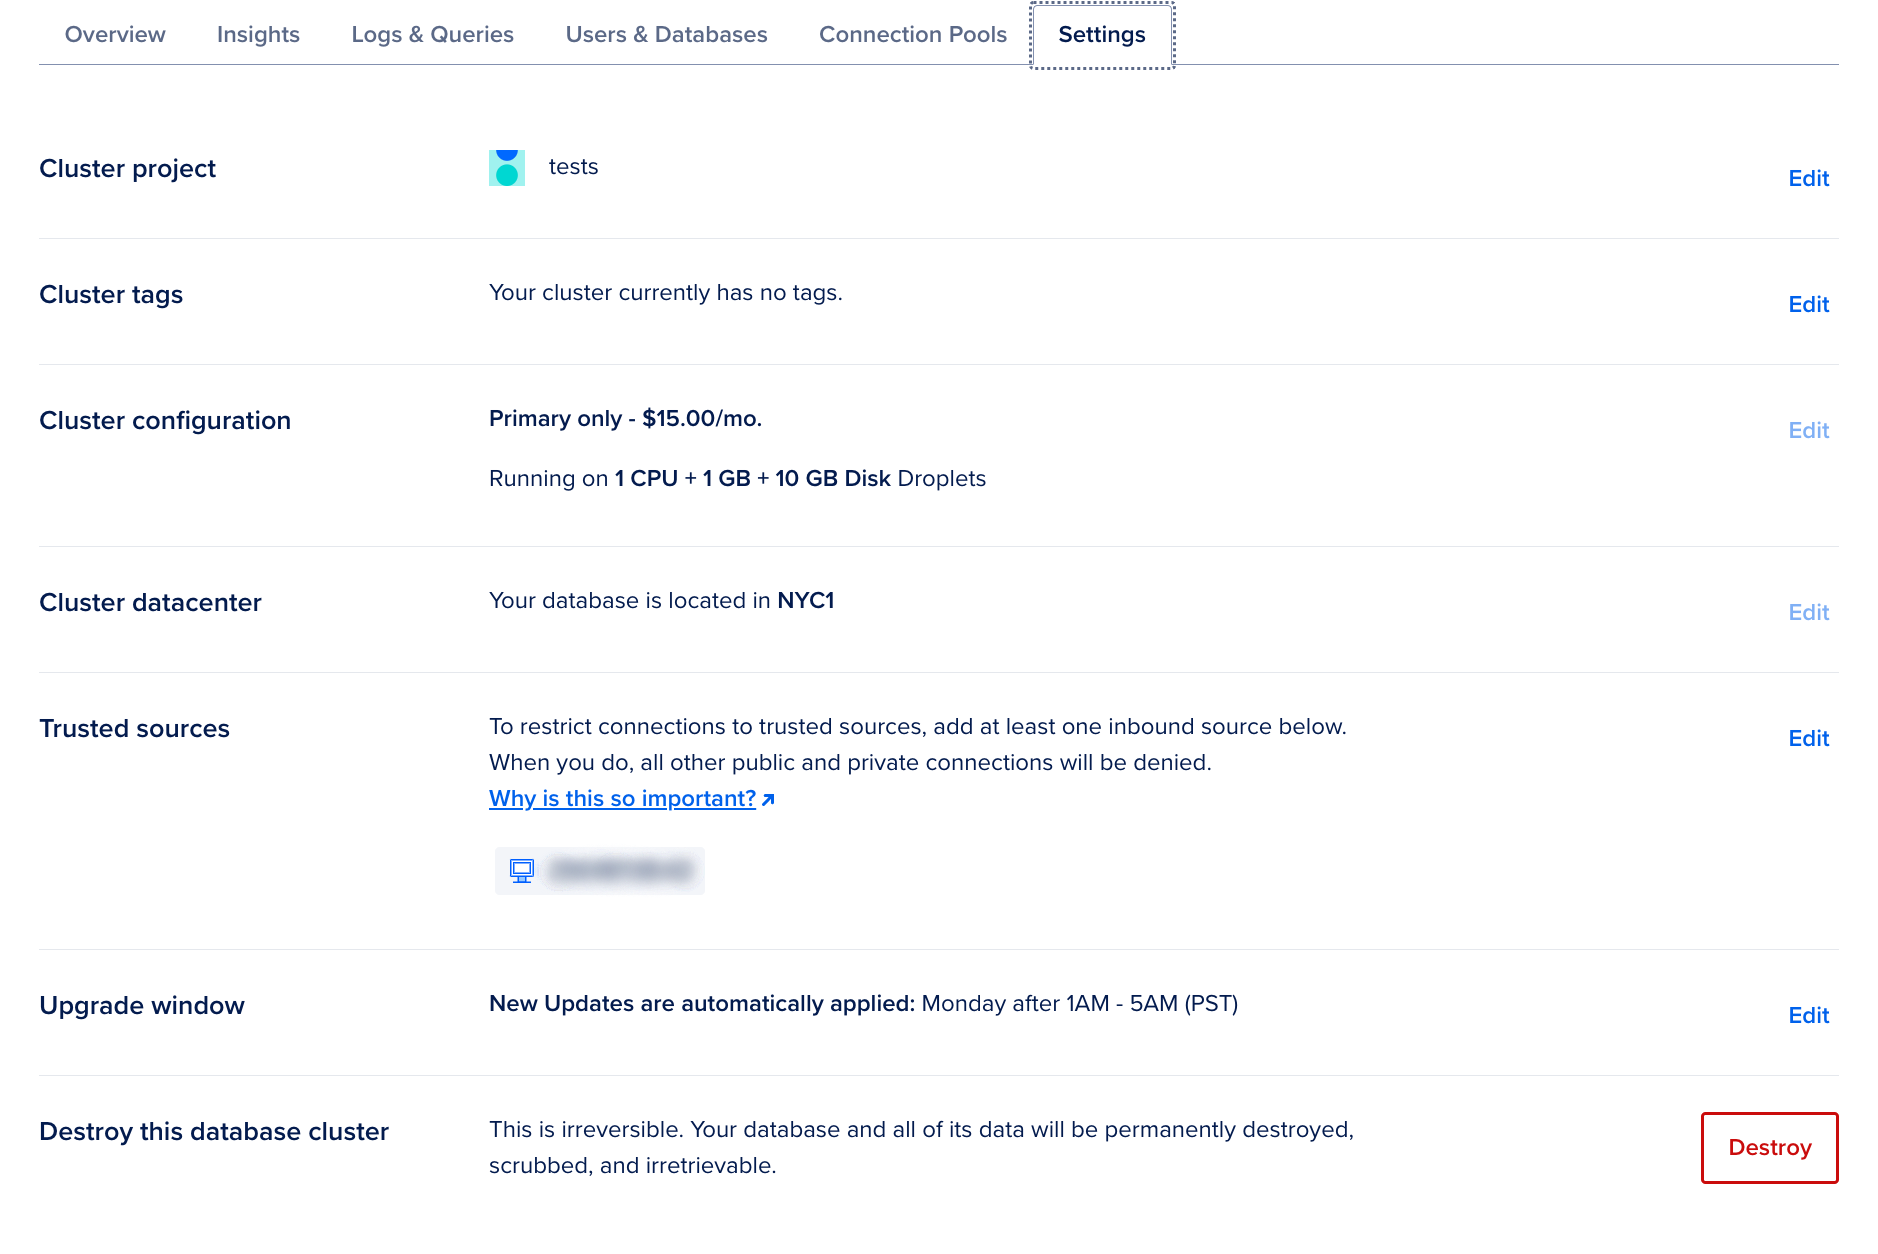
You can also Destroy this database from the settings page. Destroying a database is irreversible and all data associated with the database will be scrubbed:

For more detailed information on working with a PostgreSQL database, you can continue learning with our PostgreSQL product documentation. If you are working with another database engine, you can also access our MySQL docs, MongoDB docs, or Redis docs.
When you have finished setting up your database, you can connect to it.
Connecting To a Managed Database
When you need to connect to your Managed Database, you can use the process explained in this section. The tasks are detailed in the embedded video and the text that follows.
Once your database has been created and you have designated trusted sources, you can try connecting to it so you can work with it.
Depending on the database engine you selected, you can follow our product documentation for connecting:
- How to Connect to PostgreSQL Database Clusters
- How to Connect to MySQL Database Clusters
- How to Connect to Redis Database Clusters
- How to Connect to MongoDB Database Clusters
For this tutorial, we’ll continue using the PostgreSQL database that we created.
There are a variety of tools you can use to connect to your database with a graphical user interface, such as TablePlus or DataGrip. For this tutorial, you will use TablePlus with your connection details.
Note: You can also connect to databases from the command-line. For PostgreSQL databases, you can use the
psqlcommand-line client for Postgres by following the section on Connecting to a Managed PostgreSQL Database in our tutorial on How To Connect to a Managed Database.
Use the Connection Details for your database, which you can access from the Overview menu. First, ensure that you have added the IP address of your current computer to the Trusted Sources, otherwise you won’t be able to connect to your database.
Due to the DigitalOcean DNS firewall protection, you may find that the IP address that loads for Your Current Computer in the Control Panel does not match your current IP address. It is recommended that you double check your IPv4 address to add the accurate IP address to your database’s Trusted Sources manually. If an inaccurate IPv4 address appears, you won’t be able to connect to the database using the connection string, as detailed in the following text.
Press the Connection parameters box to display a dropdown menu with Connection string that you can copy and paste wherever you need it:
Press Show Password in the connection string to display the connection string with its full credentials. Copy the entire string with the visible password credentials.
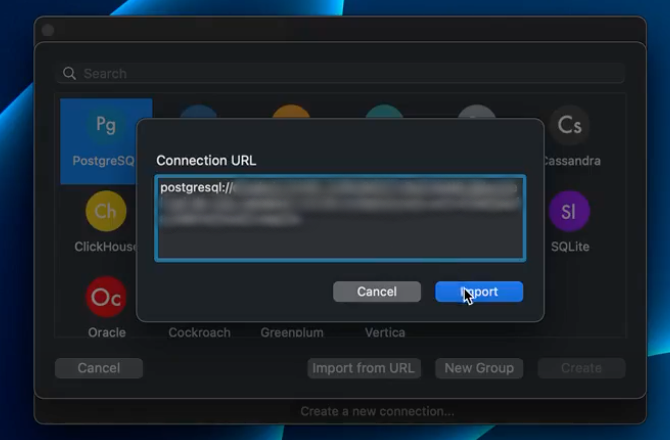
Then, open TablePlus or whichever application you prefer to connect to your database. Select the database type, here, we are using PostgreSQL. Press Import from URL, then paste in the connection string that you copied from your DigitalOcean dashboard:
Select a name for the database. TablePlus loads the credentials associated with the connection string. Then press Test to test the connection. If there are no errors, you can press Connect to connect to the database.
From the TablePlus menu, you can access everything associated with the database, such as users, posts, and more.
The connection string also enables you to connect to your database from your applications.
Conclusion
You have now created, managed, and connected to a PostgreSQL database being managed by DigitalOcean.
If you’d like to learn more about our Managed Database offerings, you can review our product documentation. You can also get started with other DigitalOcean products that fit your needs.
To continue learning about how to use DigitalOcean products, you can continue watching our Onboarding Series on YouTube.