
Hosting Supabase on DigitalOcean
Introduction
Supabase is a backend-as-a-service platform built around the Postgres database, and is an Open Source alternative to Firebase. It can reduce time to market by providing a ready to use backend that includes a database with real time capabilities, authentication, object storage and edge functions. You can use Supabase as a service via their managed offerings or self-host it on your own server or on a cloud provider.
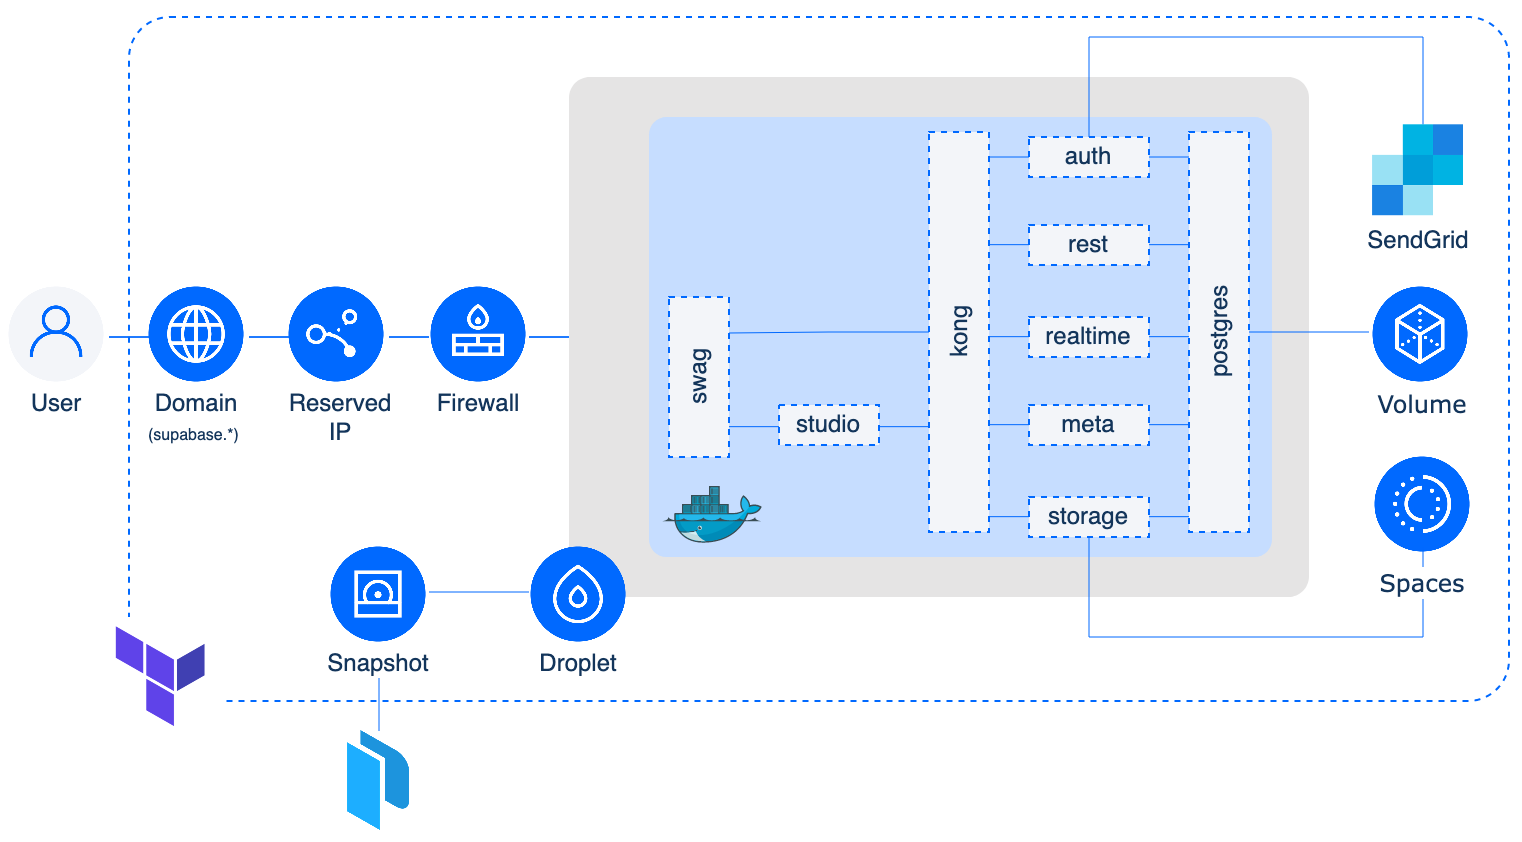
In this tutorial we will self-host Supabase by deploying the following architecture:
Docker Compose
The components that make up Supabase will be running via a docker-compose.yml file. The following is taken directly from the Supabase self-hosting documentation page and provides a description of each of its components:
- Kong is a cloud-native API gateway.
- GoTrue is an SWT based API for managing users and issuing SWT tokens.
- PostgREST is a web server that turns your PostgreSQL database directly into a RESTful API
- Realtime is an Elixir server that allows you to listen to PostgreSQL inserts, updates, and deletes using websockets. Realtime pollsPostgres’ built-in replication functionality for database changes, converts changes to JSON, then broadcasts the JSON over websockets to authorized clients.
- Storage provides a RESTful interface for managing Files stored in S3, using Postgres to manage permissions.
- postgres-meta is a RESTful API for managing your Postgres, allowing you to fetch tables, add roles, and run queries, etc.
- PostgreSQL is an object-relational database system with over 30 years of active development that has earned it a strong reputation for reliability, feature robustness, and performance.
In addition to the above components, the docker-compose file also runs swag. SWAG (Secure Web Application Gateway) provides an Nginx webserver and reverse proxy with a built-in certbot client that automates free SSL certificate generation and renewal. It also contains fail2ban for added intrusion prevention. As swag deploys Nginx we will also use it to setup basic authentication to protect access to studio (the dashboard component of Supabase).
DigitalOcean Components
All of the above will be running on a DigitalOcean Droplet. Persistent storage for the database is provided via a Volume attached to the Droplet and object storage, for artifacts like profile pics and more, will be achieved using Spaces. A Domain, Reserved IP and Firewall are also setup to ensure we can securely access our Supabase instance from the web.
SendGrid
Supabase’s auth component, GoTrue, requires the ability to send emails. As DigitalOcean blocks Port 25 on all Droplets for new accounts (IP reputation being a main reason for this as well as other factors) we will use SendGrid to send emails. SendGrid offers a generous free plan of 100 emails/day which should suffice for most use cases.
Packer and Terraform
At DigitalOcean simplicity in all we DO is one of our core values, and automating as much as possible of our processes enables us to achieve this. In this regard we will use Packer and Terraform to automate the build and provision the resources.
Pre-requisites
- DigitalOcean account (Haven’t got one? Start your free trial now and grab $200 in credits.);
- SendGrid account (You can signup for free);
- packer cli;
- terraform cli;
- curl installed on your machine (if you are running a *nix or Mac OS there is a 99.9% chance of you already having this installed. For Windows users use WSL);
- A Domain you own added to DigitalOceans’ Domain section and the nameservers in your chosen domain registrar pointed towards DigitalOceans’ own NS records(docs).
The Manual Part
- Create a DigitalOcean API token with read/write permissions (docs)
- Create a DigitalOcean Spaces access key and secret (docs)
- Create a Domain in DigitalOcean and change nameservers in your domain registrar (docs)
- Create an admin (full access) SendGrid API token (docs)
- (Optional) If using Terraform Cloud to manage your state file, create a user API token
The (Semi-)Automated Part
We’re going to run some cli commands within our terminal which can be fully automated within a CI/CD process.
Once we’ve setup and created all of the above, clone the repository:
git clone https://github.com/digitalocean/supabase-on-do.git
cd supabase-on-do
- After cloning the repo, our next step is to build a snapshot of the Droplet using Packer.
- Finally we will deploy our resources using terraform.
TLDR
Or the - I didn’t want to read the next sections, just give me the commands to run, I trust you - version
Run Packer to create the Snapshot
## From the root of the repository change directory to the packer directory
cd packer

## Copy the example file to supabase.auto.pkrvars.hcl,
## modify it with your own variables and save
cp supabase.auto.pkrvars.hcl.example supabase.auto.pkrvars.hcl
## Initialise packer to download any plugin binaries needed
packer init .

## Build the snapshot and upload it as a Snapshot on DO
packer build .
Run Terraform to create the resources
## From the root of the repository change directory to the terraform directory
## (from the packer directory  use ../terraform)
cd terraform

## Copy the example file to terraform.tfvars,
## modify it with your own variables and save
cp terraform.tfvars.example terraform.tfvars
## Initialise terraform to download any plugin binaries needed
terraform init

## Create and show a plan of what will be created
## (skip if you want to apply immediately)
terraform plan

## Apply the changes specified by confirming at the prompt
## (--auto-approve if you're feeling adventures)
terraform apply

## Apply again to verify the SendGrid components
## (needed as they are created before the domain records in DO)
terraform apply
Show generated passwords and tokens for later use
## Show the generated auth password
terraform output -raw htpasswd

## Show the generated psql password
terraform output -raw psql_pass

## Show the generated jwt secret and tokens
terraform output -raw jwt -raw jwt_anon -raw jwt_service_role
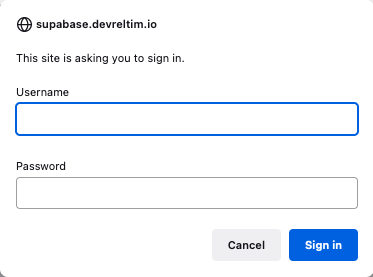
Take a 5-10 min break and after that point your browser to supabase.<your-domain>. When the pop-up asking for your auth details appears enter your provided username and the generated htpasswd.
Build Image using Packer
IMPORTANT: A note on secrets/tokens/apis. Ensure that any files containing secrets/tokens/apis are NOT stored in version control.
The initial step is to create a Snapshot, using Packer, and storing it on DigitalOcean in the Images section. To do this you’ll have to input some variables within a supabase.auto.pkrvars.hcl file. An example file has been provided for you which you can copy and modify.
## From the root of the repository change directory to the packer directory
## Copy the examples file and modify accordingly
cd packer
cp supabase.auto.pkrvars.hcl.example supabase.auto.pkrvars.hcl
After creating the variables, create the snapshot by running the following packer commands. The final snapshot will be uploaded and stored in your DigitalOcean account under the Images section.
## Initialise packer to download any plugin binaries needed
packer init .

## Build the snapshot and upload it to DO
packer build .
What’s happening in the background
When you run the packer build . command a DigitalOcean Droplet is temporarily spun up to create the Snapshot. Within this Droplet, Packer copies the supabase directory that contains the following files:
.
├── docker-compose.yml # Containers to run Supabase on a Droplet
├── supabase.subdomain.conf # Configuration file for the swag container (runs nginx)
└── volumes
   └── db # SQL files when initialising Supabase
       ├── realtime.sql
       └── roles.sql
and also runs the setup script that installs docker and docker-compose onto the image.
N.B. If you changed the image to a non Ubuntu/Debian image the script will fail as it uses the apt package manager. Should you wish to use a different OS, modify the script with the appropriate package manager.
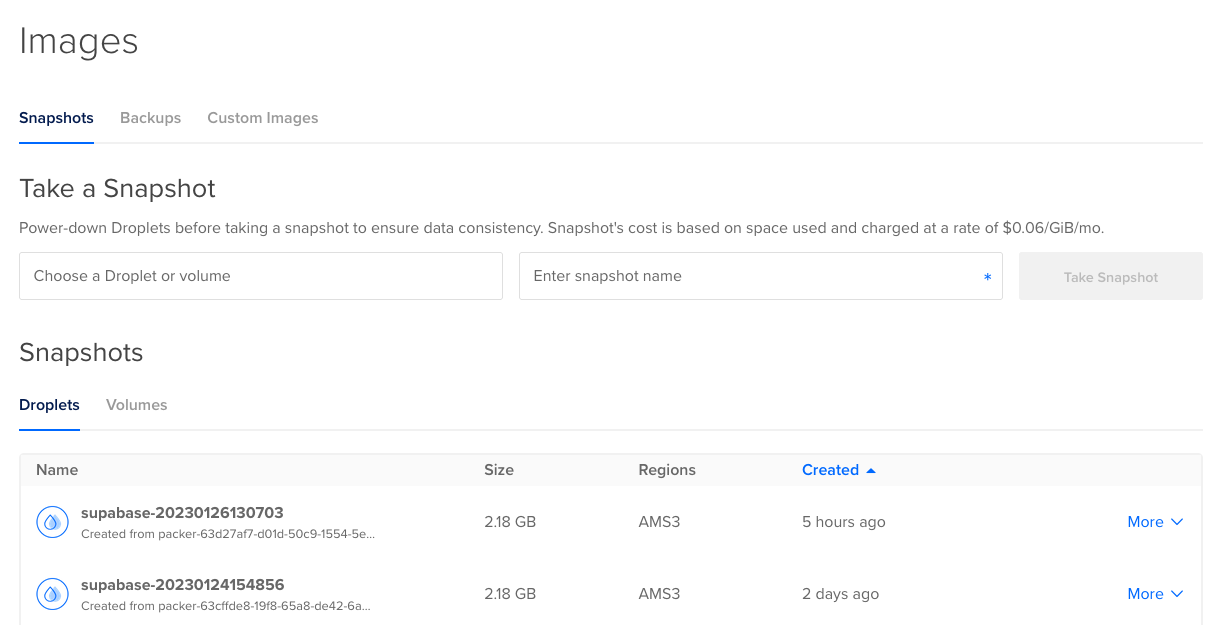
Throughout the build you might see some warnings/errors. If the build ends showing the version of Docker Compose installed and stating that the build was successful, as shown below, you can disregard these messages. Your Snapshot name will be slightly different to the one shown below as the time the build started is appended to the name in the following format supabase-yyyymmddhhmmss.
    digitalocean.supabase: Docker Compose version v2.15.1
==> digitalocean.supabase: Gracefully shutting down droplet...
==> digitalocean.supabase: Creating snapshot: supabase-20230126130703
==> digitalocean.supabase: Waiting for snapshot to complete...
==> digitalocean.supabase: Destroying droplet...
==> digitalocean.supabase: Deleting temporary ssh key...
Build 'digitalocean.supabase' finished after 5 minutes 8 seconds.

==> Wait completed after 5 minutes 8 seconds

==> Builds finished. The artifacts of successful builds are:
--> digitalocean.supabase: A snapshot was created: 'supabase-20230126130703' (ID: 125670916) in regions 'ams3'
You’ll be able to see the snapshot in the images section of the DigitalOcean UI.
Now that we’ve created a snapshot with Docker and Docker Compose installed on it as well as the required docker-compose.yml and conf files, we will use Terraform to deploy all the resources required to have Supabase up and running on DigitalOcean.
Deploy Resources via Terraform
IMPORTANT: A note on secrets/tokens/apis and the
terraform.tfstatefile. Ensure that any files containing secrets/tokens/apis as well as theterraform.tfstatefile are NOT stored in version control.
This is where most of the magic will happen as all you need to do is configure your variables and run 3 (2 if you’re confident in what is happening) commands.
The terraform directory has multiple files to create the wanted architecture:
.
├── droplet.tf                        # Droplet resource that is created from the previously created snapshot
├── files                             # Directory with templated files
│   ├── .env.tftpl                    # environment variable file to be used by docker-compose
│   ├── .htpasswd.tftpl               # auth credentials for nginx basic authentication
│   ├── digitalocean.ini.tftpl        # DigitalOcean credentials for certbot to use when creating ssl certs
│   ├── kong.yml.tftpl                # kong configuration file
│   └── sender-verification.sh.tmpl   # script to create single sender verification on SendGrid (more info below)
├── locals.tf                         # terraform locals that are used within other resources (also creates passwords/tokens)
├── network.tf                        # Domain, Reserved IP and Firewall creation
├── outputs.tf                        # outputs required computed variables (will also output sensitive information in the tfstate file)
├── project.tf                        # currently not in use
├── provider.tf                       # sets up all the providers and requirements to run terraform
├── sendgrid.tf                       # setups SendGrid single sender verification, domain authentication and link branding (more info below)
├── storage.tf                        # creates a Volume to attach to the Droplet and a Spaces bucket for object storage
├── terraform.tfvars.example          # example tfvars file, copy and modify as specified above
└── variables.tf                      # terraform variable definitions and requirements
I won’t be going into the specifics of each and every file, but if you have any questions or comments do not hesitate to reach out.
Before running terraform you’ll have to populate a terraform.tfvars with the appropriate variables, you can copy the example file as a starting point. A list of required variables, as well as optional variables with their default values, is documented in the README file within the terraform section of the GitHub repo.
## From the root of the repository change directory to the terraform directory
## (from the packer directory  use ../terraform)
## Copy the examples file and modify accordingly
cd terraform
cp terraform.tfvars.example terraform.tfvars
After creating the variables file run the following commands to deploy the resources:
## Initialise terraform to download any plugin binaries needed
terraform init

## Create and show a plan of what will be created
## (skip if you want to apply immediately)
terraform plan

## Apply the changes specified by confirming at the prompt
## (--auto-approve if you're feeling adventures)
terraform apply
Once all the resources have been created you’ll see the following message (the bucket name, volume id and reserved ip will obviously be different):
Apply complete! Resources: 26 added, 0 changed, 0 destroyed.

Outputs:

bucket = "supabase-1a2b3c4d5e6f7g8h"
droplet_volume_id = "12345678-abcd-12ab-34cd-123456abcdef"
htpasswd = <sensitive>
jwt = <sensitive>
jwt_iat = 1674738146
jwt_exp = 1832504546
jwt_anon = <sensitive>
jwt_service_role = <sensitive>
psql_pass = <sensitive>
reserved_ip = "123.456.789.000"
sendgrid_generated_api = <sensitive>
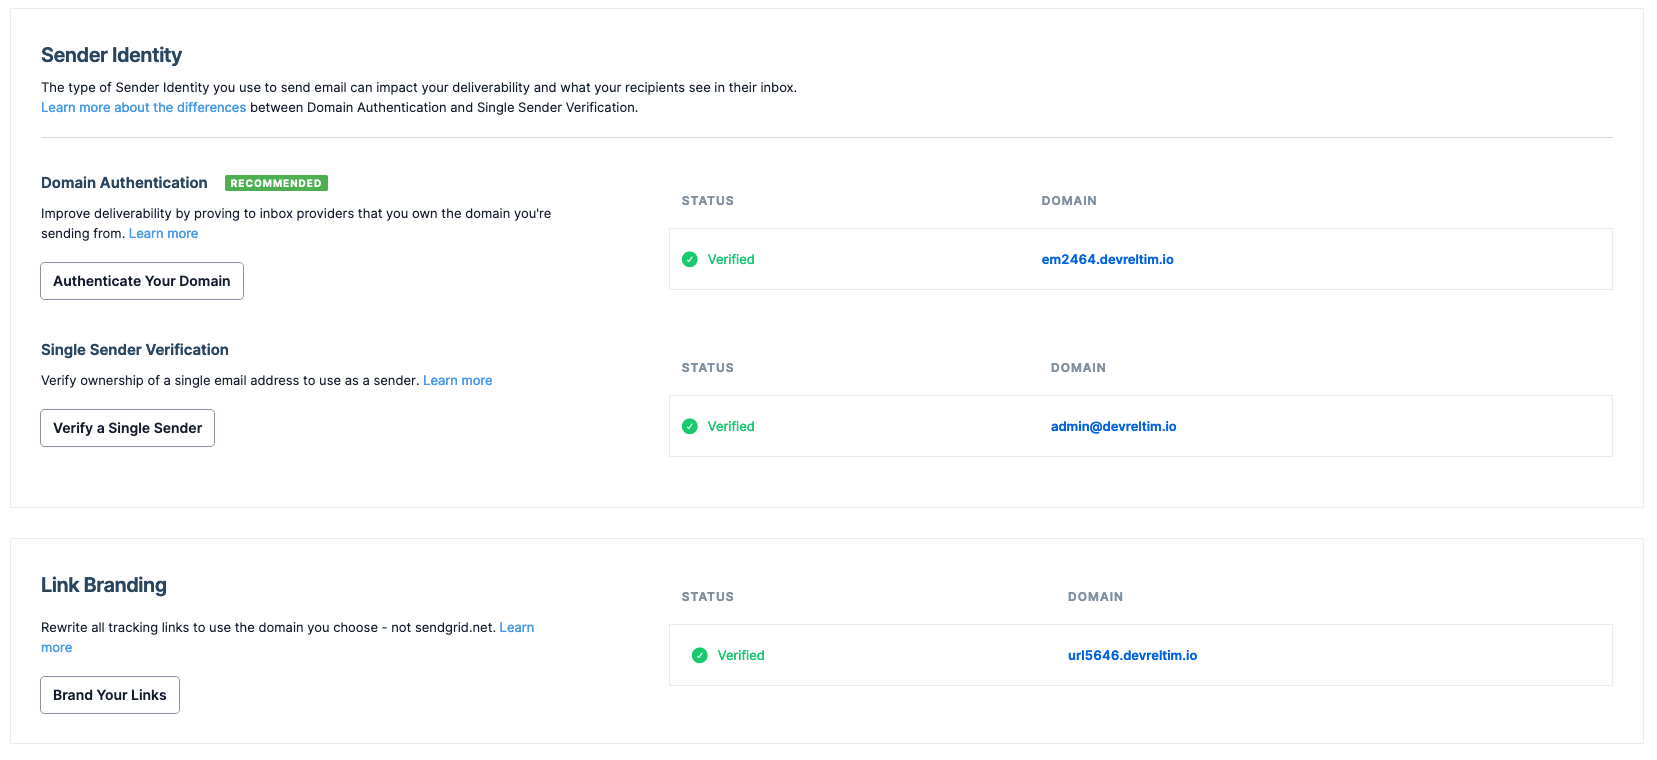
As the SendGrid Single Sender, Domain Authentication and Link Branding resources are created before the domain records are created, we need to verify them before being able to send emails via SendGrid. You can either use SendGrid’s UI, within Settings > Sender Authentication of your account to manually verify them or rerun the apply command.
## Re-apply terraform to verify SendGrid resources
terraform apply
Within SendGrid’s UI you should now have green ticks showing that all the resources have been verified. N.B. Updates to your nameservers with your domain registrar and records within DigitalOcean can take up to 48 hours to propagate (unlikely but possible).
You’ll need to grab the passwords and tokens generated by terraform to access and make use of the system. To do this run the following commands (AGAIN ensure you do not store secrets in version control)
## Show the generated auth password
terraform output htpasswd

## Show the generated psql password
terraform output psql_pass

## Show the generated jwt secret and tokens
terraform output jwt
terraform output jwt_anon
terraform output jwt_service_role
Now take a 5-10 min break and grab a coffee, cup of tea, etc. The Droplet needs time to download all the containers, extract them, configure ssl certs and more (I’m not kidding, the supabase-db container alone is over 1GB to download and when extracted is over 2GB).
What’s happening in the background
When you confirm the output of the terraform apply command (or if you were feeling adventures, after hitting return on the terraform apply --auto-approve command), terraform creates a dependency graph to determine in which order to create resources (if you really want to get into the specifics of it all the Terraform internals documentation is great, especially the Resource Graph section).
A note about securing the Droplet and Spaces
The Firewall opens Ports 80 and 443 for general web interaction and also Port 22 to be able to SSH into the Droplet. We highly suggest that you SSH into the Droplet by using an ssh key and that you restrict the IPs that can SSH into it by setting the ssh_ip_range variable.
A policy for the Spaces bucket is created during the creation process. This policy can be restricted to only allow access to the bucket via the Restricted IP, Droplet IP and IPs specified in ssh_ip_range (if populated) by setting the spaces_restrict_ip variable to true (default false). If you do set the spaces_restrict_ip variable to true be aware that you won’t be able to access artifacts in the bucket via DigitalOcean’s UI (If needed you can set the variable back to false and run terraform apply again).
A note about the SendGrid Provider
The SendGrid Provider is not an official provider (which is fine, here at DigitalOcean we Love Open Source). This does mean that it does not fully support SendGrid’s api currently. Which is why a hack has been implemented to automate the creation of the Single Sender Verification (and why you need curl installed in your system). If one of the providers ever supports this functionality this will be implemented for robustness, until then we have to make way for this hack. Regarding this please note the comment about destroying this resource (or lack of ability to do this currently).
A note on destroying
Should you wish to destroy the resources created all you need to do is run the destroy command (makes sense).
## Destroy the resources specified by confirming at the prompt
## (as with apply you can --auto-approve if you're feeling adventures)
terraform destroy
If you have any artifacts stored in your Spaces bucket the terraform destroy command will partly fail warning that the bucket cannot be destroyed. To destroy it you’ll have to first remove all artifacts within the bucket and re-run terraform destroy.
Also Terraform won’t destroy the Single Sender created in SendGrid (told you it was a hack), so you’ll have to manually delete this yourself via SendGrid’s UI.
Access your Supabase instance
After taking a well deserved break go to your browser and input the supabase domain in the format supabase.<your-domain>. A pop-up appears asking you to enter your authentication details (your provided username and the generated htpasswd).
You’re done!!! You’ve now got a secure self-hosted Supabase system running on DigitalOcean with persistent storage. You’ll be welcomed to your default project, all you need to do now is:
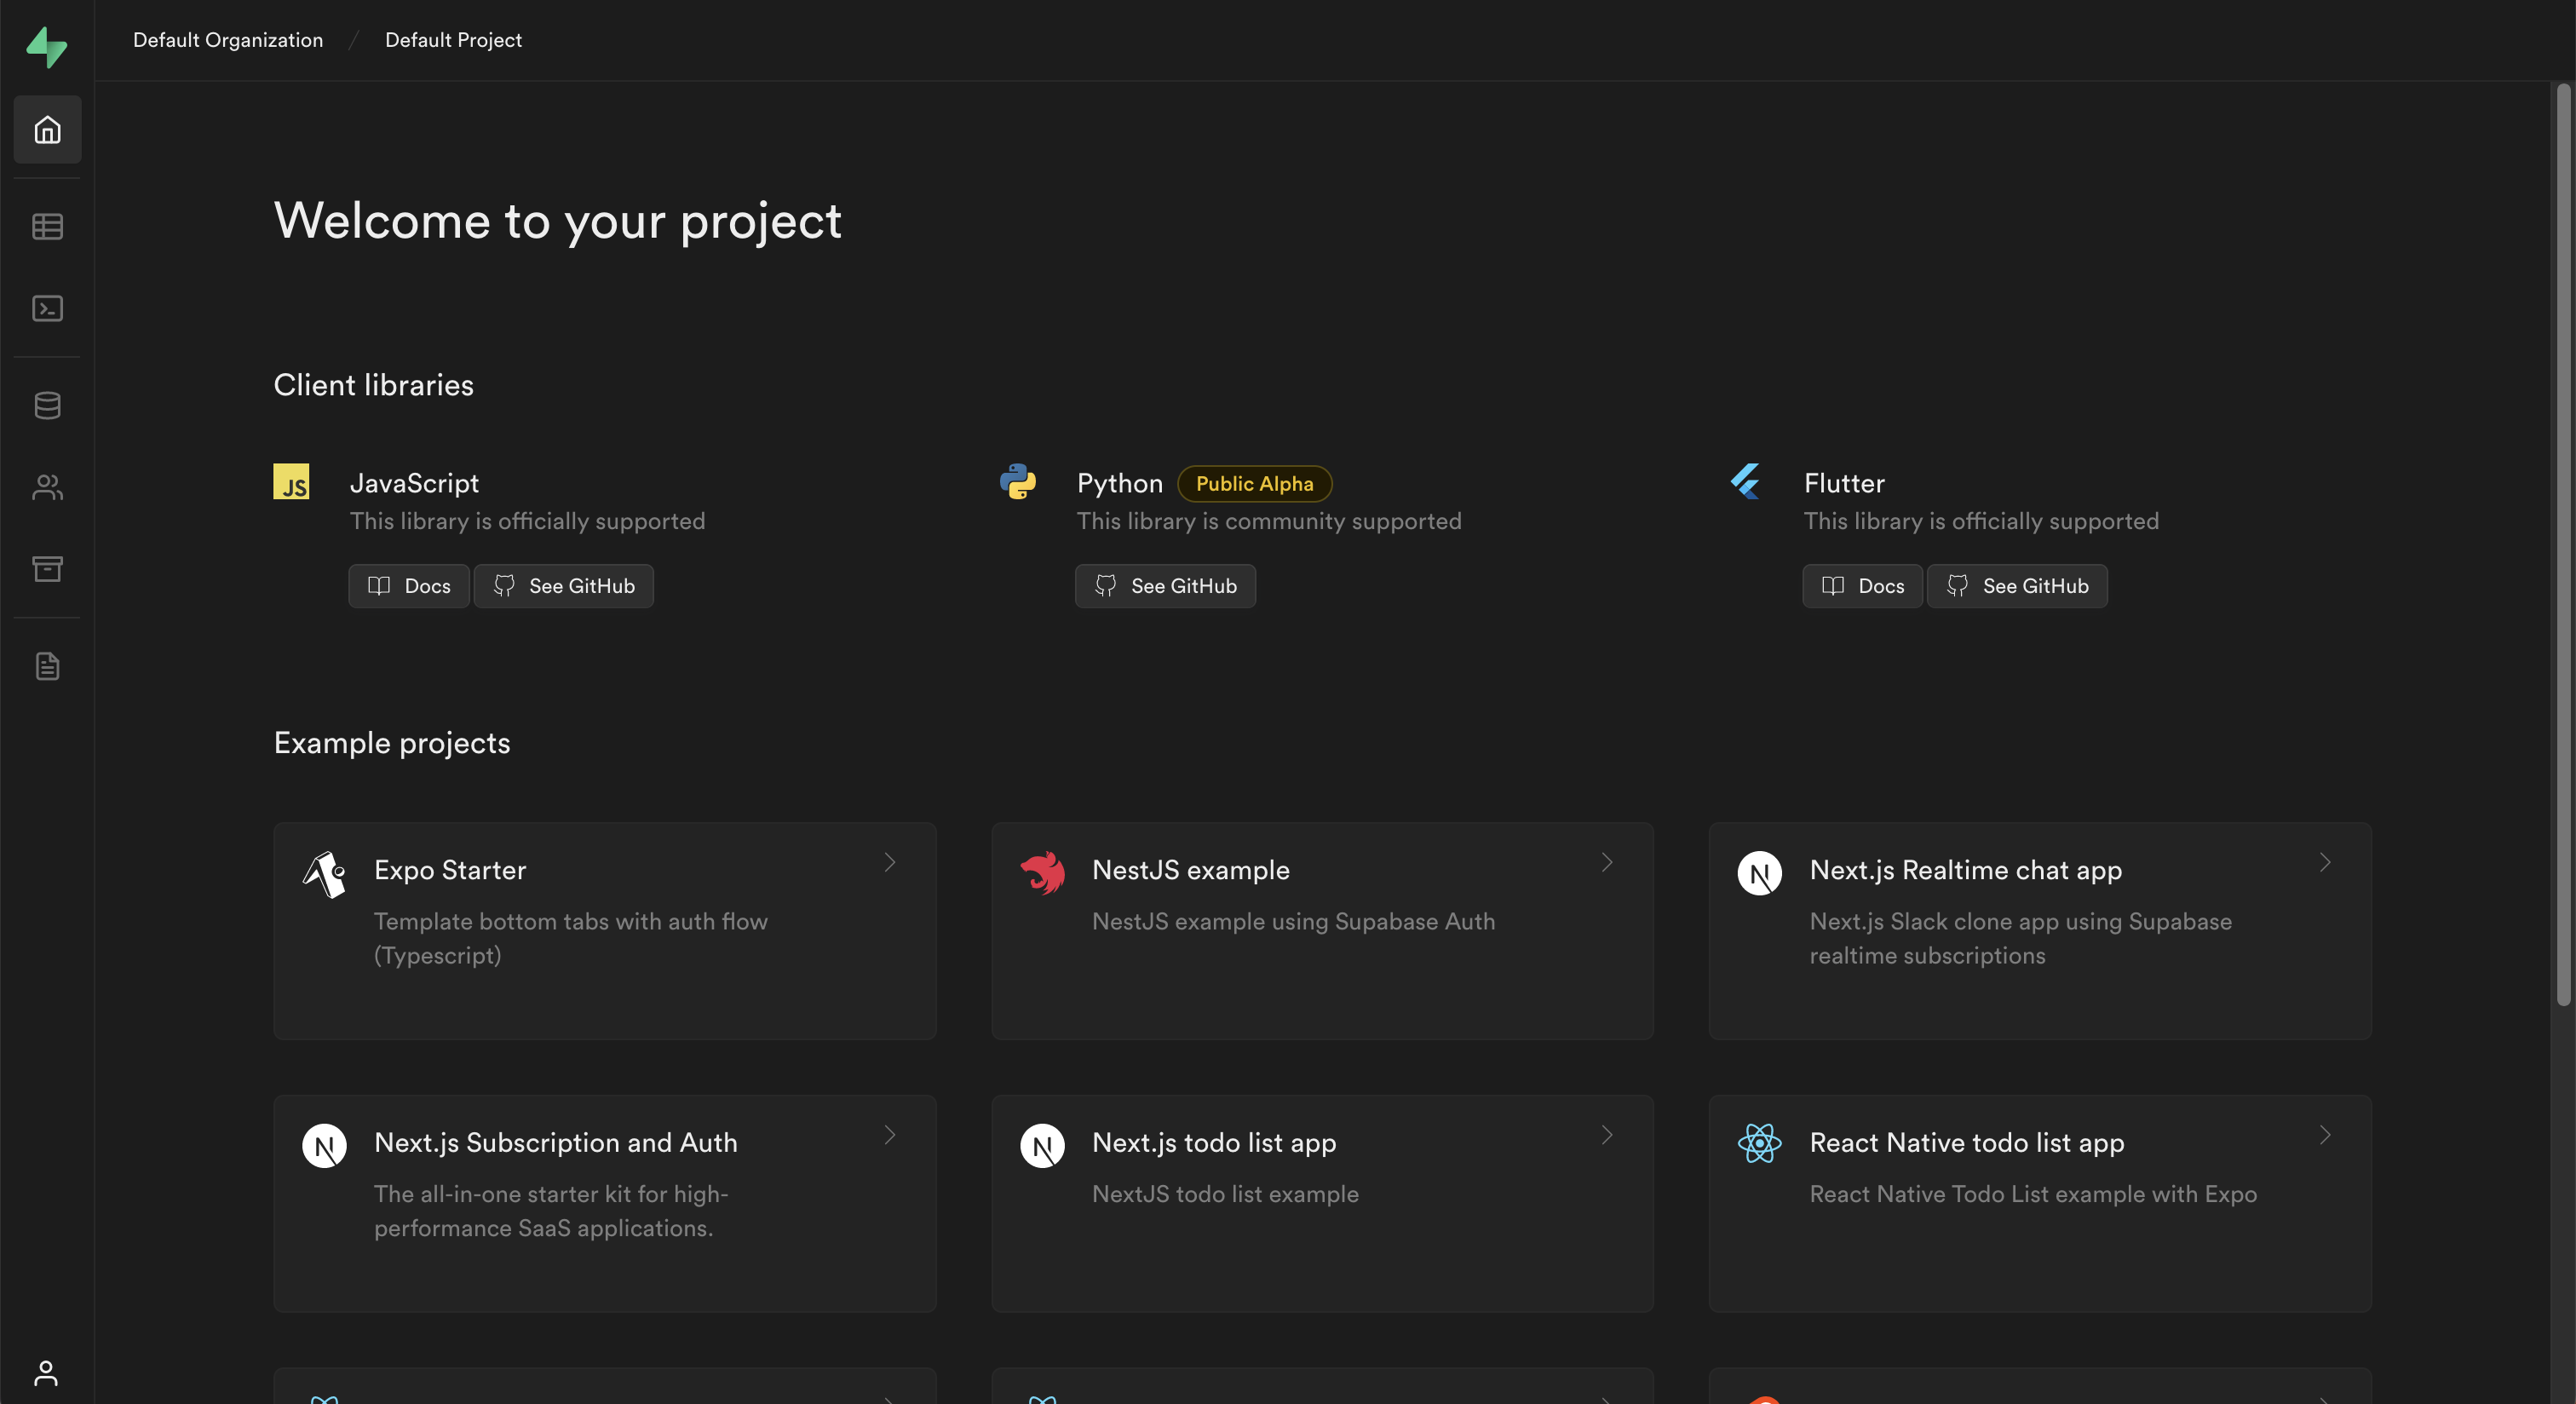
Enjoy and Happy creating :)
P.S. Keep an eye out on our upcoming blog post which will go through the deployment of an application utilizing this Supabase self-hosted setup.