
Automatic Node Repair on DigitalOcean Kubernetes
Introduction
When a node in a DigitalOcean Kubernetes cluster is unhealthy or not ready, replacing the node is manual and cumbersome. The cluster will operate at lower capacity without replacing the nodes because the unhealthy nodes will not run any Pods.
Cluster nodes can become unhealthy when the kubelet service dies or is unresponsive. This can happen for several reasons,
- Worker node is overloaded
- Networking issues: This can happen if the node loses connectivity to the Kubernetes API server or if there are issues with the network overlay used by the cluster.
- Resource constraints: If the node does not have enough resources (such as CPU, memory, or disk) to execute the pods scheduled on it, it can become “NotReady.” This can happen if a pod’s resource requests are more significant than the node’s available resources.
- Hardware failures: If a hardware failure on the node (such as a disk or network interface failure), the node can become “NotReady.”
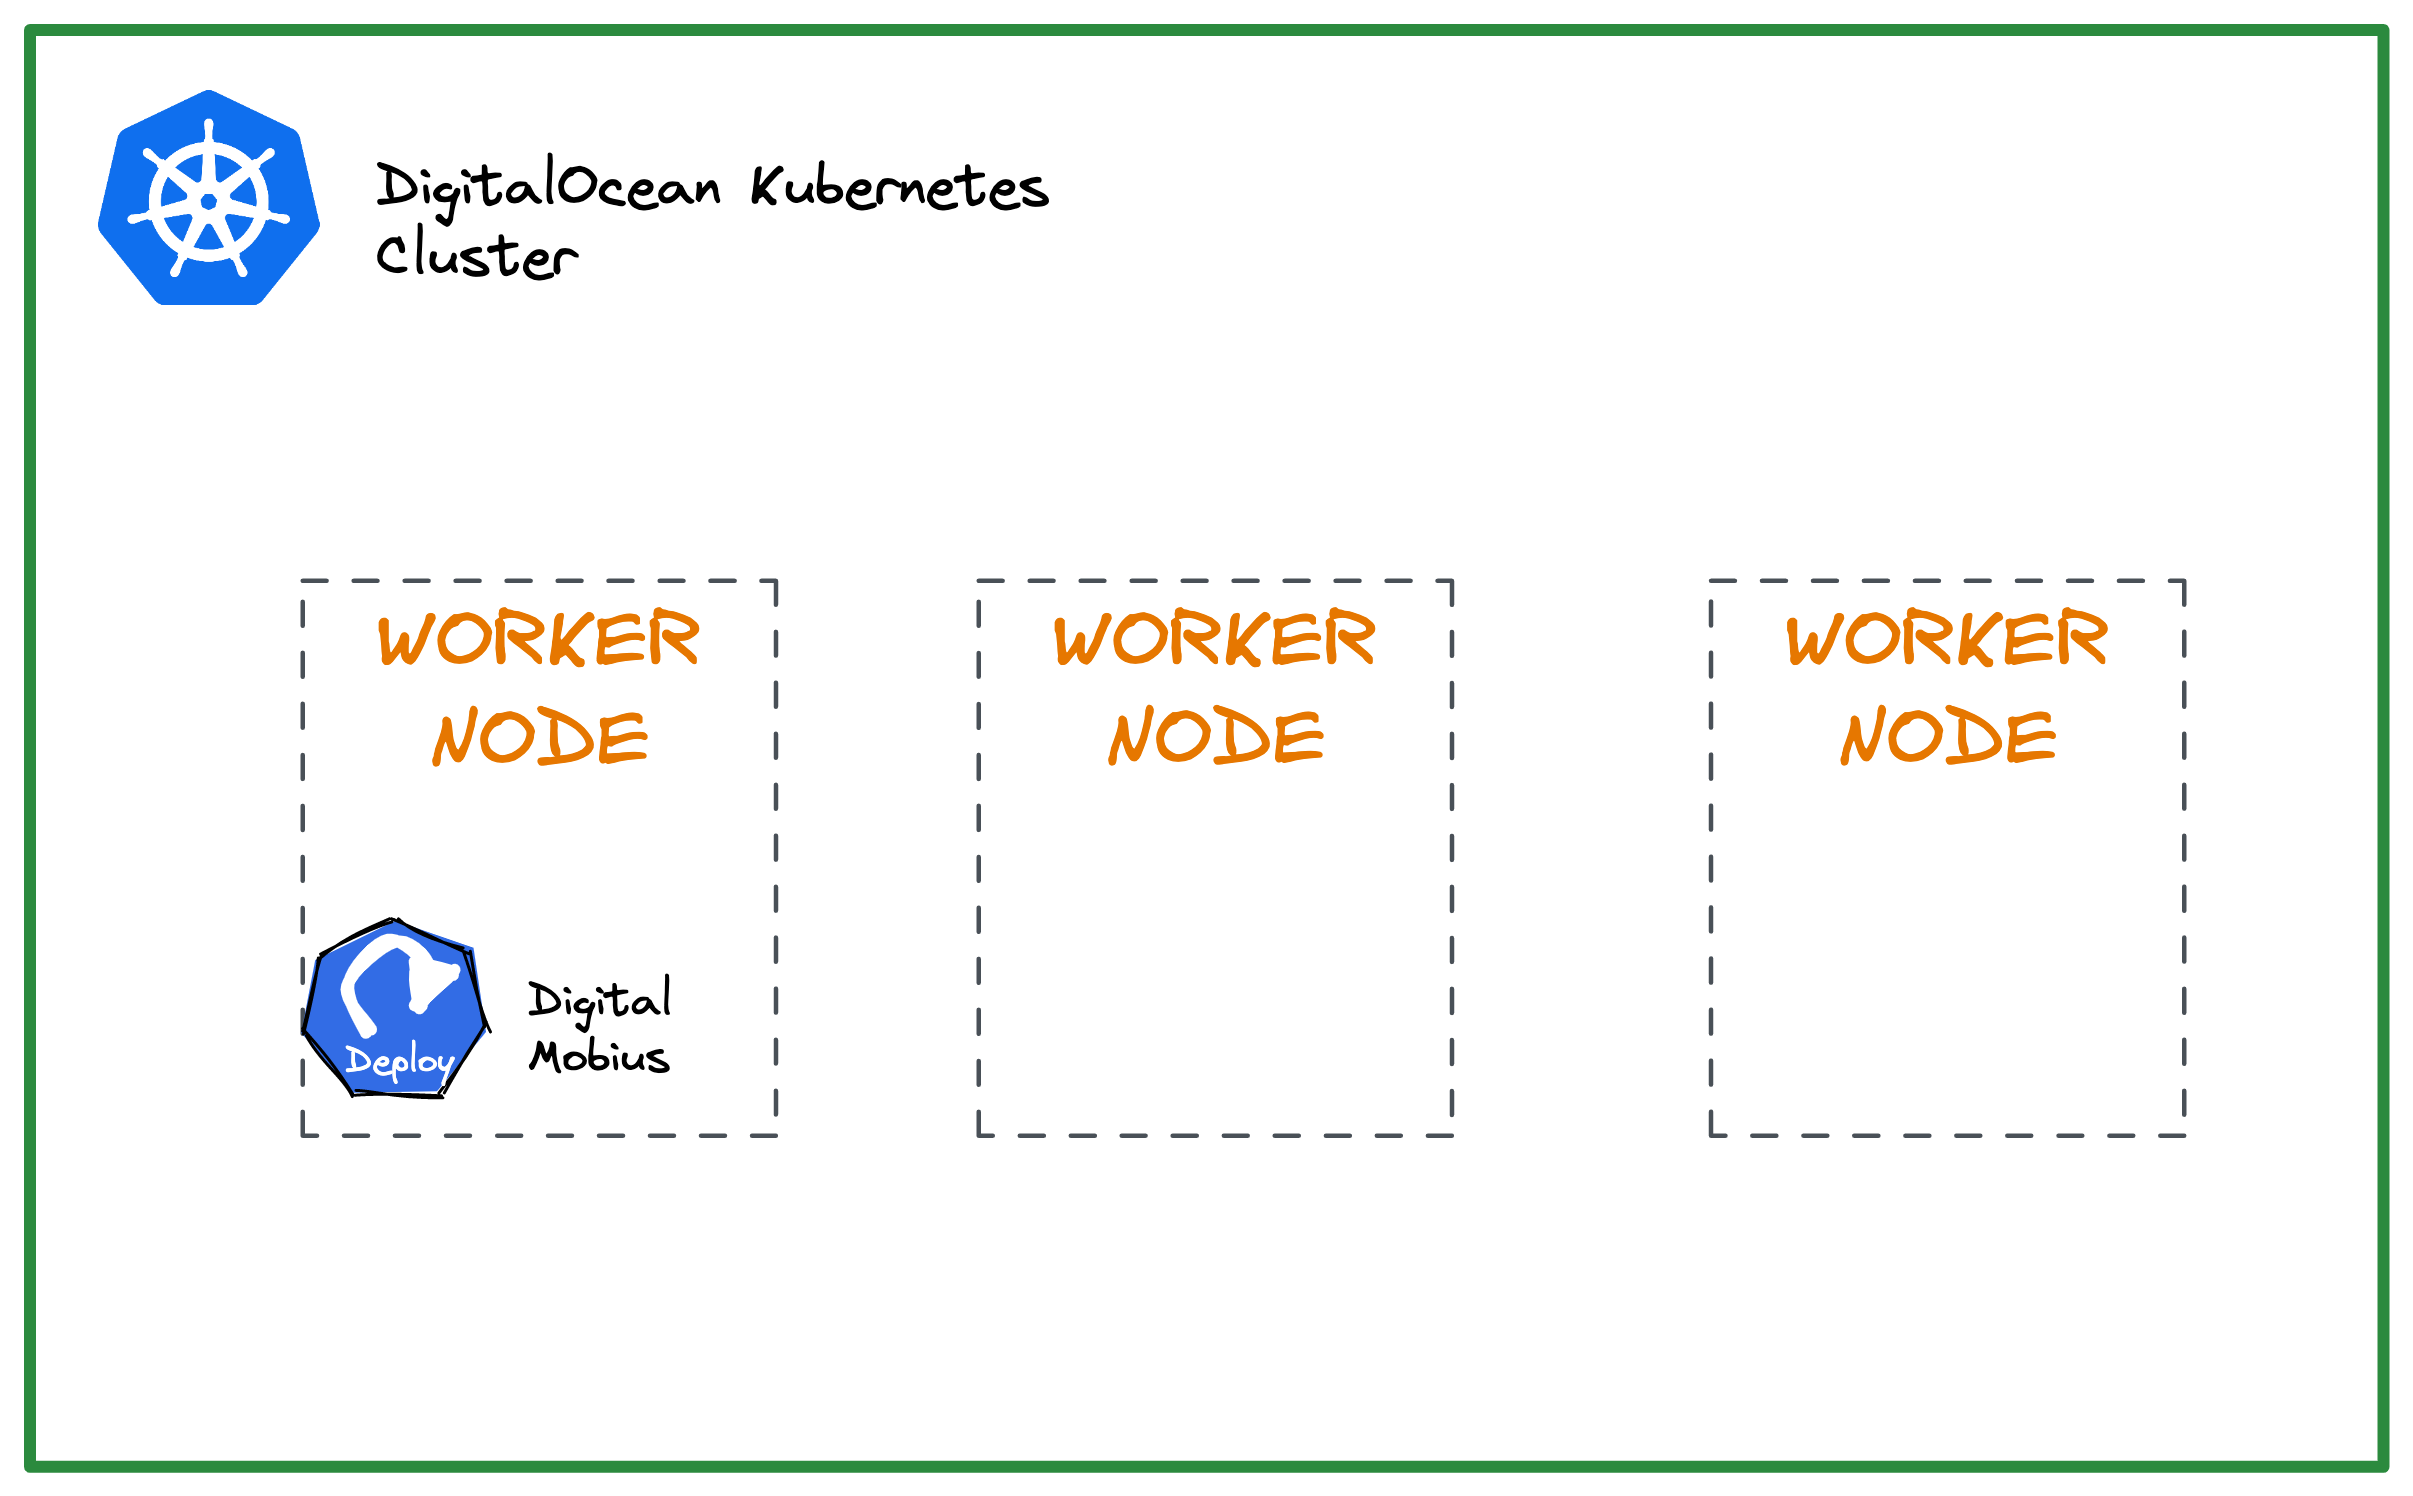
This tutorial provides an automated way to recycle unhealthy nodes in a DigitalOcean Kubernetes (DOKS) cluster using Digital Mobius.
Prerequisites
-
DigitalOcean access token for managing the DOKS cluster. Ensure that the access token has a read-write scope.
export DIGITAL_OCEAN_TOKEN="<your_do_personal_access_token>" # Copy the token value and save it in a local environment variable to use later -
# Initialize doctl
doctl auth init --access-token "$DIGITAL_OCEAN_TOKEN"
Digital Mobius setup
Digital Mobius is an open-source application written in Go specifically for DOKS cluster node recycling. The application monitors DOKS cluster nodes that are in an unhealthy state at specified regular intervals.
Digital Mobius needs a set of environment variables to be configured and available. You can see these variables in the values.yaml:
LOG_LEVEL: "info"
DELAY_NODE_CREATION: "10m"                                  # Node recycle period
DIGITAL_OCEAN_TOKEN: "<your_digitalocean_api_token>"       # Personal DO API token value
DIGITAL_OCEAN_CLUSTER_ID: "<your_digitalocean_cluster_id>" # DOKS cluster ID that needs to be monitored
Note:
Choose an appropriate value for DELAY_NODE_CREATION. A value that is too low will interfere with the time interval needed for a node to become ready and available after it gets recycled. In real-world situations, this can take several minutes or more to complete. A good starting point is 10m, the value used in this tutorial.
Configure and Deploy
Digital Mobius can be easily deployed using the Helm chart (or artifacthub.io).
-
Add the required Helm repository:
helm repo add digital-mobius https://qovery.github.io/digital-mobius -
Fetch the cluster-ID that you want to monitor for node failures:
doctl k8s cluster list export DIGITAL_OCEAN_CLUSTER_ID="<your_cluster_id_here>" -
Set the DigitalOcean access token:
export DIGITAL_OCEAN_TOKEN="<your_do_personal_access_token>" echo "$DIGITAL_OCEAN_TOKEN" -
Start the deployment in a dedicated namespace. This example uses
maintenanceas the namespace:helm install digital-mobius digital-mobius/digital-mobius --version 0.1.4 \ --set environmentVariables.DIGITALOCEAN_TOKEN="$DIGITAL_OCEAN_TOKEN" \ --set environmentVariables.DIGITALOCEAN_CLUSTER_ID="$DIGITAL_OCEAN_CLUSTER_ID" \ --set enabledFeatures.disableDryRun=true \ --namespace maintenance --create-namespaceNote:
The
enabledFeatures.disableDryRunoption enables or disables the tool’sDRY RUNmode. Setting it totruemeans the dry run mode is disabled, and the cluster nodes will be recycled. Enabling the dry run mode is helpful if you want to test it first without performing any changes to the actual cluster nodes. -
Check the deployment once it completes.
# List the deployments
helm ls -n maintenance
The output looks similar to the following:
NAME            NAMESPACE       REVISION        UPDATED                                 STATUS          CHART                   APP VERSION
digital-mobius  maintenance     1               2023-03-04 11:24:10.131055 +0300 EEST   deployed        digital-mobius-0.1.4    0.1.4
Verify the running Pod(s):
kubectl get pods -n maintenanceThe output looks similar to the following:
NAME                             READY   STATUS    RESTARTS   AGE
digital-mobius-55fbc9fdd-dzxbh   1/1     Running   0          8s
Inspect the logs:
kubectl logs -l app.kubernetes.io/name=digital-mobius -n maintenanceThe output looks similar to the following:
    _ _       _ _        _                      _     _
 __| (_) __ _(_) |_ __ _| |     _ __ ___   ___ | |__ (_)_   _ ___
/ _` | |/ _` | | __/ _` | |    | '_ ` _ \ / _ \| '_ \| | | | / __|
| (_|| | (_| | | || (_| | |    | | | | | | (_) | |_) | | |_| \__ \
\__,_|_|\__, |_|\__\__,_|_|    |_| |_| |_|\___/|_.__/|_|\__,_|___/
        |___/
time="2023-03-04T08:29:52Z" level=info msg="Starting Digital Mobius 0.1.4
Now that we have successfully deployed Digital Mobius,. Let us check out the underlying logic in which it operates.
Automatic Node Repair Logic
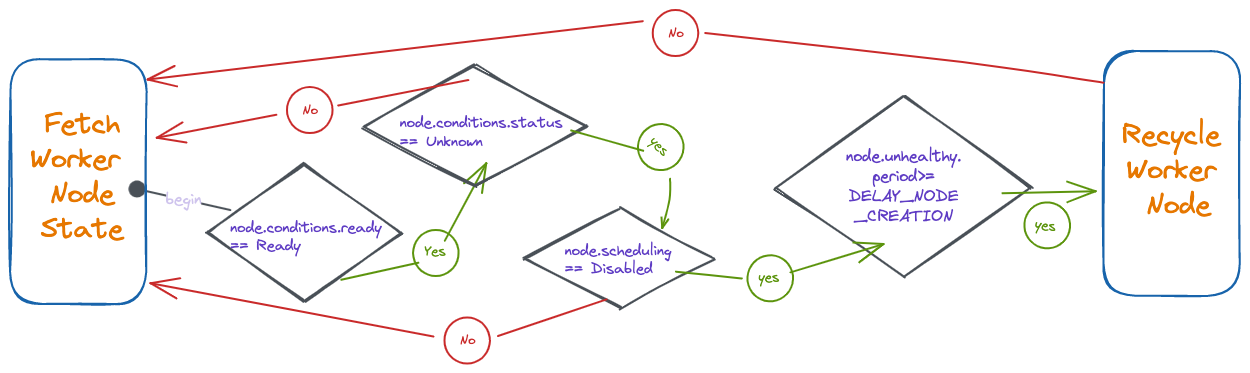
A node is considered unhealthy if the node condition is Ready and the status is False or Unknown. Then, the application recreates the affected node(s) using the DigitalOcean Delete Kubernetes Node API
The following diagram shows how Digital Mobius checks the worker node(s) state:
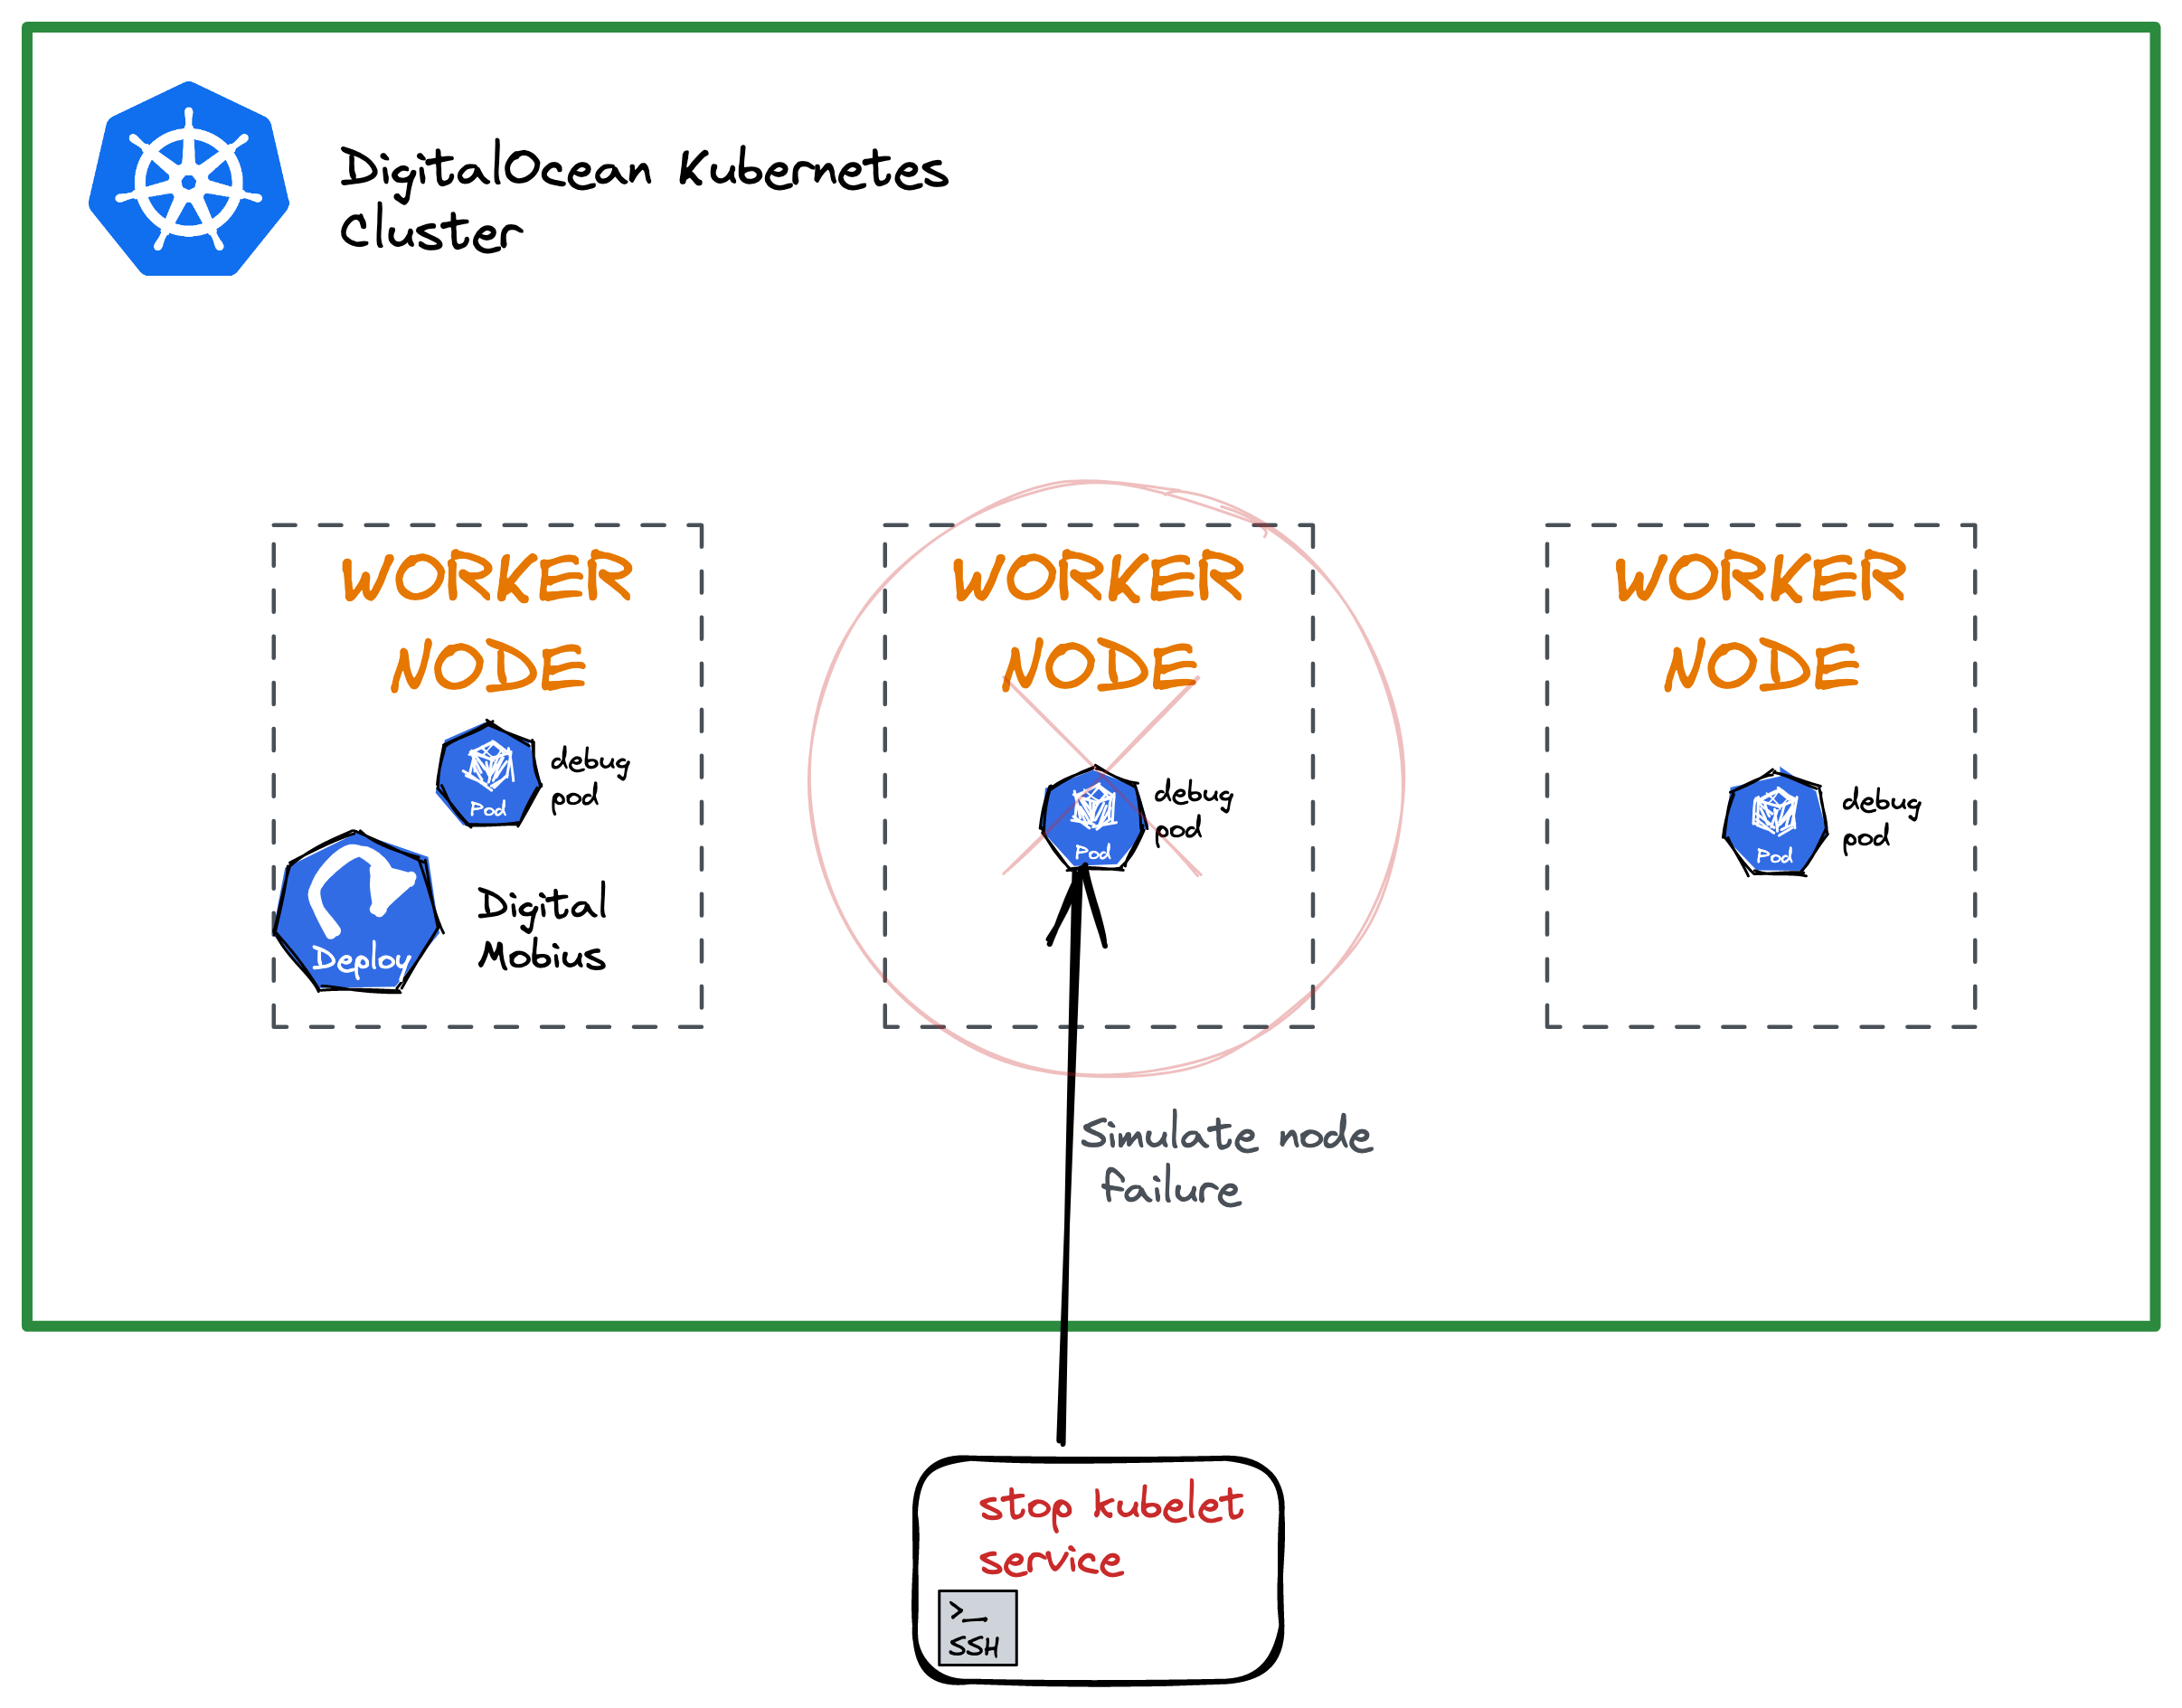
Simulate a Worker Node Problem
We must disconnect one or more nodes from the DOKS cluster to test the Digital Mobius setup. To do this, we will use the doks-debug tool to create some debug pods that run containers with elevated privileges. To access the running containers in the debug pods, we will use kubectl exec. This command will allow us to execute commands inside the containers and gain access to the worker node(s) system services.
-
Create DOKS debug pods:
# This will spin up the debug pods in the `kube-system` namespace:
kubectl apply -f https://raw.githubusercontent.com/digitalocean/doks-debug/master/k8s/daemonset.yaml
Verify the DaemonSet:
kubectl get ds -n kube-systemThe output looks similar to the following (notice the
doks-debugentry):NAME DESIRED CURRENT READY UP-TO-DATE AVAILABLE NODE SELECTOR AGE cilium 3 3 3 3 3 kubernetes.io/os=linux 4d1h cpc-bridge-proxy 3 3 3 3 3 <none> 4d1h csi-do-node 3 3 3 3 3 <none> 4d1h do-node-agent 3 3 3 3 3 kubernetes.io/os=linux 4d1h doks-debug 3 3 3 3 3 <none> 3d22h konnectivity-agent 3 3 3 3 3 <none> 4d1h kube-proxy 3 3 3 3 3 <none> 4d1hVerify the debug pods:
kubectl get pods -l name=doks-debug -n kube-systemThe output looks similar to the following:
NAME READY STATUS RESTARTS AGE doks-debug-dckbv 1/1 Running 0 3d22h doks-debug-rwzgm 1/1 Running 0 3d22h doks-debug-s9cbp 1/1 Running 0 3d22h -
Kill the
kubeletserviceUse
kubectl execin one of the debug pods and get access to worker node system services. Then, stop the kubelet service, which results in the node going away from thekubectl get nodescommand output.Open a new terminal window and watch the worker nodes:
watch "kubectl get nodes"Pick the first debug pod and access the shell:
kubectl exec -it <debug-pod-name> -n kube-system -- bashA prompt that looks similar to the following appears:
root@doks-debug-dckbv:~#Inspect the system service:
chroot /host /bin/bash
systemctl status kubelet
The output looks similar to the following:
● kubelet.service - Kubernetes Kubelet Server
Loaded: loaded (/etc/systemd/system/kubelet.service; enabled; vendor preset: enabled)
Active: active (running) since Fri 2023-03-04 08:48:42 UTC; 2h 18min ago
Docs: https://kubernetes.io/docs/concepts/overview/components/#kubelet
Main PID: 1053 (kubelet)
    Tasks: 17 (limit: 4701)
Memory: 69.3M
CGroup: /system.slice/kubelet.service
        └─1053 /usr/bin/kubelet --config=/etc/kubernetes/kubelet.conf --logtostderr=true --image-pull-progress-deadline=5m
...
Stop the kubelet:
systemctl stop kubelet
Observe the Worker Nodes
After you stop the kubelet service, you will be kicked out of the shell session. This means the node controller lost connection with the affected node where the kubelet service was killed.
You can see the NotReady state of the affected node in the other terminal window where you set the watch:
NAME         STATUS    ROLES   AGE     VERSION
game-q44rc   Ready    <none>   3d22h   v1.26.3
game-q4507   Ready    <none>   4d1h    v1.26.3
game-q450c   NotReady <none>   4d1h    v1.26.3
After the time interval you specified in DELAY_NODE_CREATION expires, the node vanishes as expected:
NAME            STATUS   ROLES    AGE   VERSION
game-q44rc   Ready    <none>   3d22h   v1.26.3
game-q4507   Ready    <none>   4d1h    v1.26.3
Next, check how Digital Mobius monitors the DOKS cluster. Open a terminal window and inspect the logs first:
kubectl logs -l app.kubernetes.io/name=digital-mobius -n maintenance
The output looks like below (watch for the Recycling node {...} lines):
     _ _       _ _        _                      _     _
  __| (_) __ _(_) |_ __ _| |     _ __ ___   ___ | |__ (_)_   _ ___
 / _` | |/ _` | | __/ _` | |    | '_ ` _ \ / _ \| '_ \| | | | / __|
| (_| | | (_| | | || (_| | |    | | | | | | (_) | |_) | | |_| \__ \
 \__,_|_|\__, |_|\__\__,_|_|    |_| |_| |_|\___/|_.__/|_|\__,_|___/
         |___/
time="2023-03-04T08:29:52Z" level=info msg="Starting Digital Mobius 0.1.4 \n"
time="2023-03-04T11:13:09Z" level=info msg="Recyling node {11bdd0f1-8bd0-42dc-a3af-7a83bc319295 f8d76723-2b0e-474d-9465-d9da7817a639 379826e4-8d1b-4ba4-97dd-739bbfa69023}"
...
In the terminal window where you set the watch for kubectl get nodes, a new node appears after a minute, replacing the old one. The new node has a different ID and a new AGE value:
NAME         STATUS   ROLES    AGE     VERSION
game-q44rc   Ready    <none>   3d22h   v1.26.3
game-q4507   Ready    <none>   4d1h    v1.26.3
game-q450d   Ready    <none>   22s     v1.26.3
As you can see, the node was automatically recycled.
Summary
In conclusion, while automatic recovery of cluster nodes is a valuable feature, it is crucial to prioritize node health monitoring and load management to prevent frequent node failures. In addition, properly setting Pod resource limits, such as setting and using fair values, can also help avoid overloading nodes. By adopting these best practices, you can ensure the stability and reliability of your Kubernetes cluster, avoiding costly downtime and service disruptions.